Was this article helpful?
Thanks for your feedback
This comprehensive guide will help you convert your existing Contentstack extension to a marketplace app.
Note: Refer to the Difference Between Apps and Extensions document to know more about the difference between them.
Let’s look at the steps in detail.
The first step to convert an extension into a marketplace app is to remove your existing extension.
Log in to your Contentstack account and perform the following steps to remove your extension:
When developing a Marketplace app, there are two parts that you need to work on: frontend and backend.
You can skip the backend part if your app doesn’t require server-side processing or logic. While the backend could be built in any programming language or framework of your choice, make sure to develop the frontend of your app in a JavaScript environment.
This is to ensure that your app can communicate with the NPM module app-sdk .
Let’s get started with the setup of your UI app.
npm install @contentstack/app-sdk
ContentstackAppSdk.init().then(function (appSdk) {
                // Add your UI logic here
});Note: In an extension, you can only add one Contentstack UI location.
Please make sure that your UI app has the respective URL routing for the selected locations:
| Sl. No. | Contentstack Location | Your app’s URL |
1. | Custom Field | https://{yourwebsite.com} |
2. | Sidebar Widget | https://{yourwebsite.com} |
3. | Dashboard Widget | https://{yourwebsite.com} |
4. | Config Screen | https://{yourwebsite.com} |
4. | RTE - Rich Text Editor | https://{yourwebsite.com} |
After successfully developing your app, deploy both the frontend and backend code of your app on any cloud platform of your choice and make a note of the URL where your app is hosted.
Based on the location, your app’s Base URL will change accordingly.
For example, if you're building a marketplace app for a custom field, your Base URL will look like this:
https://{yourwebsite.com}
Contentstack will then render this URL on its webpage.
It’s time to put your newly built app into action.
Connect your deployed app to Contentstack. For that, you need to create a Marketplace app.
To create an app in Marketplace, perform the steps given in the Create an App in Marketplace document.
Once done, your Marketplace app is now ready.
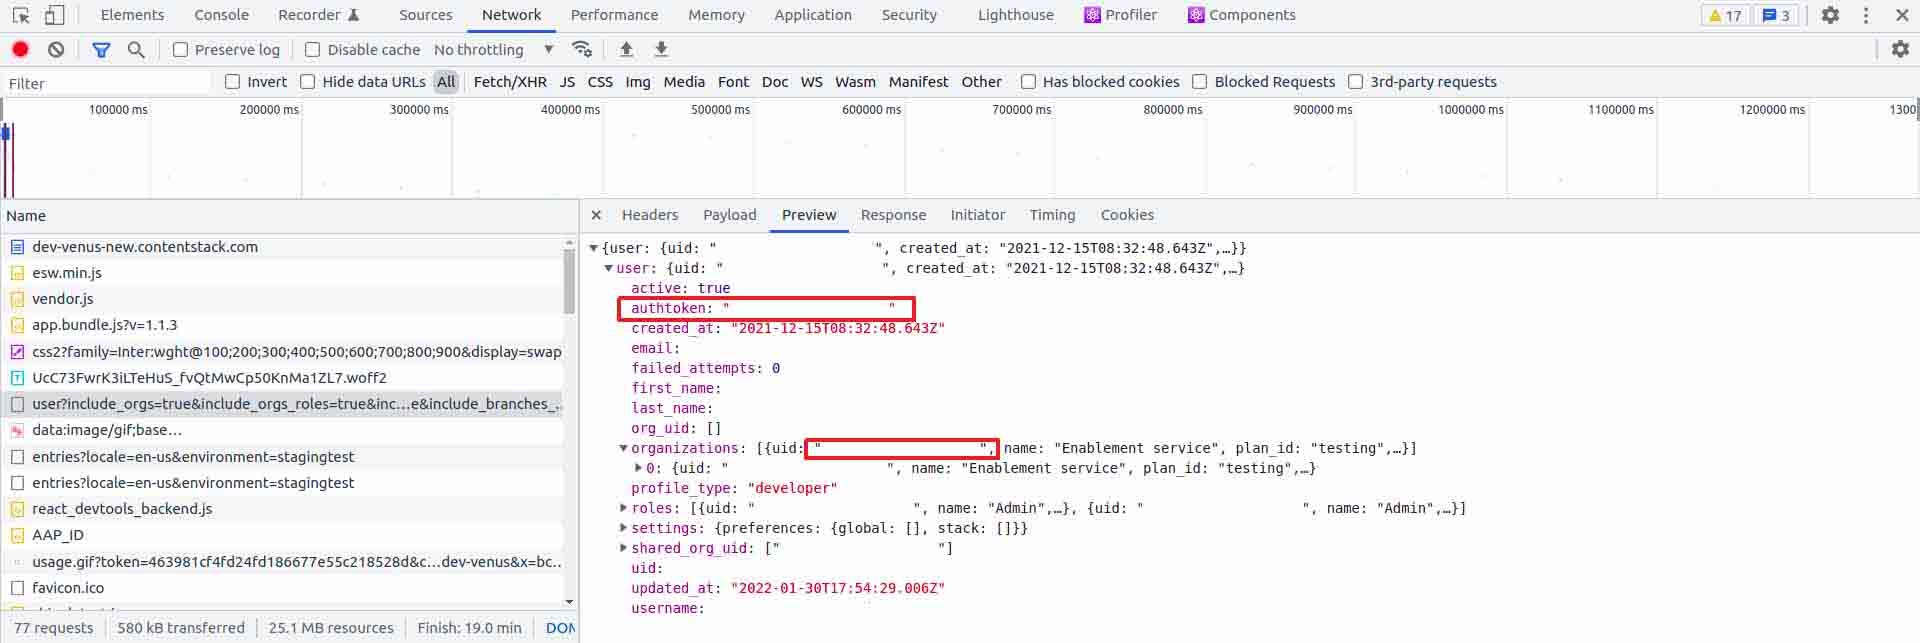
In this step, you need to pass important details such as Organization UID and your Authtoken to Contentstack.
These details will allow your app to work in a custom way and make it installable.
Note: If your app needs a webhook, then this step will work in conjunction with the next step, so please make sure that your API call contains the configuration of your webhook.
Now, let’s see how to update the app with the necessary details:


If some of the UI locations are not required, then you can remove them from the request’s body.locations array.
URL: https://developerhub-api.contentstack.com/apps/{{APP_UID}}

HTTP Method: PUT

Headers: {
        authtoken: <auth_token_of_contentstack_account>,
        organization_uid: <uid_of_organization>
    }


Body(JSON): {
        "name": "<NEW_APP>",
        "target_type": "stack",
        "ui_location": {
            "locations": [
                {
                    "type": "cs.cm.stack.config",
                    "meta": [
                        {
                            "signed": true,
                            "path": "/config"
                        }
                    ]
                },
                {
                    "type": "cs.cm.stack.sidebar",
                    "meta": [
                        {
                            "signed": true,
                            "path": "/sidebar-widget"
                            "data_type": "json"
                        }
                    ]
                },
                {
                    "type": "cs.cm.stack.dashboard",
                    "meta": [
                        {
                            "signed": true,
                            "path": "/dashboard-widget"
                            "data_type": "json"
                        }
                    ]
                },
                {
                    "type": "cs.cm.stack.custom_field",
                    "meta": [
                        {
                            "signed": true,
                            "path": "/custom-field",
                            "data_type": "json"
                        }
                    ]
                },
                {
                    "type": "cs.cm.stack.rte",
                    "meta": [
                        {
                            "signed": true,
                            "path": "/rte"
                            "data_type": "json"
                        }
                    ]
                }
            ],
            "signed": true,
            "base_url": "https://YourWebsite.com"
        }
    }
This step would probably be an optional one for most of the instances. So, if your app needs a webhook, this step will be in conjunction with step 4 above. Thus, it’s advised to update your app via an API call carefully.
Note: To know more about webhooks and their relation with Contentstack, please refer to the Set up Webhooks section.
Now let’s add a webhook to your app:
"webhook": {
    "signed": true,
    "name": "<Your App Name>",
    "enabled": true,
    "target_url": "https://webhook.site/5ec29kc0-9ppa-495a-9e4f-701b63892bhe",
    "channels": [
        "content_types.entries.environments.publish.success",
        "assets.environments.publish.success",
        "content_types.entries.environments.unpublish.success",
        "assets.environments.unpublish.success",
        "content_types.entries.delete",
        "content_types.delete",
        "assets.delete"
    ],
    "app_lifecycle_enabled": true,
    "retry_policy": "manual"
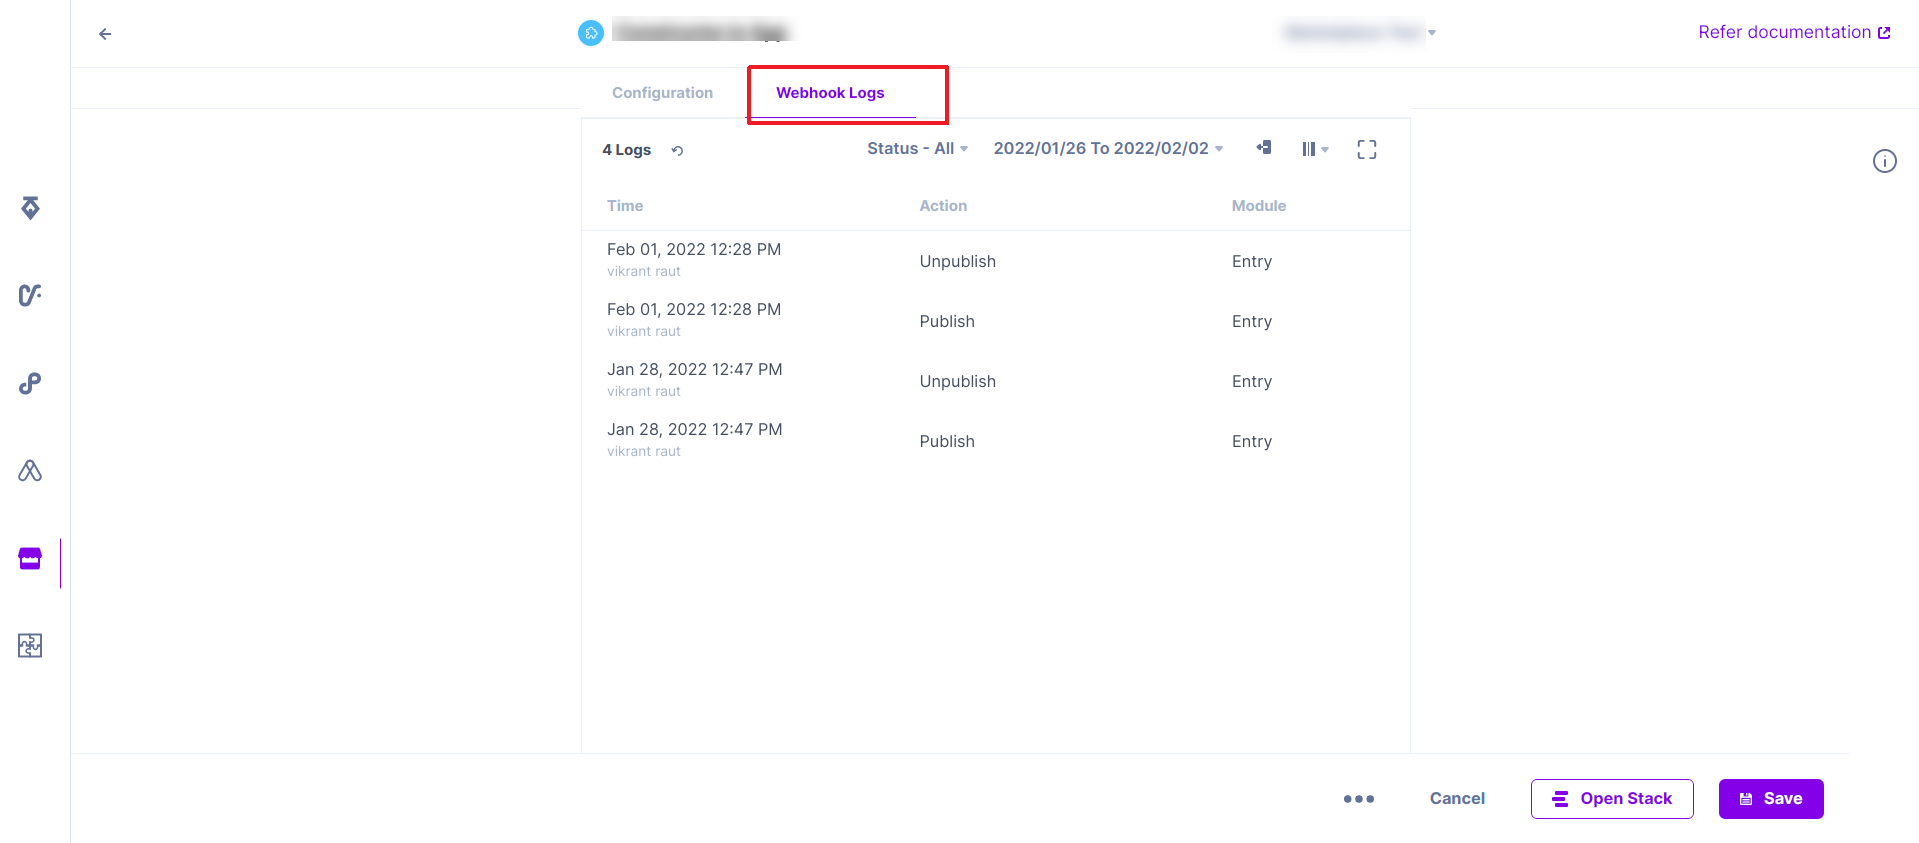
}After modifying all the above values, hit the API call. You should get the status “200 OK”. After your app is installed, your configuration screen should be displaying a new Webhook Logs section as shown below

Now let’s install the Marketplace app in one of your stack.
To install your app, perform the steps covered in the Installing an App in Developer Hub guide.
Once done, your app is now installed and ready to use.
Once your app is installed, navigate to the respective UI locations and check the rendering of your app in its defined locations.
For example, if your app has a “Custom Field” location, let’s see how you can use it in your content type:
Similarly, test the app in other locations where you have installed it.
This concludes the setup guide of converting Contentstack extensions to marketplace apps.
Let’s say you have an extension with a custom field as its UI location, and it stores some data in Contentstack and retrieves it back. You need to convert it into its corresponding Marketplace app.
Here’s a simple extension that stores and retrieves some data from/ to Contentstack:
<html>
<head>
<meta name="viewport" content="width=device-width, initial-scale=1.0"/>
<script src="https://www.contentstack.com/sdks/contentstack-ui-extensions/dist/latest/ui-extension-sdk.js"></script>
<link href="https://www.contentstack.com/sdks/contentstack-ui-extensions/dist/latest/ui-extension-sdk.css" rel="stylesheet" type="text/css" media="all">
</head>
<body>
    <input type="text" id="input1" onchange="onChange()" onclick="setFocus()">
    <script>
        // initialize Field Extension
        window.extensionField = {};

        // find color input element
        var HtmlElement = document.getElementById("input1");

        ContentstackUIExtension.init().then(function(extension) {
            // make extension object globally available
            extensionField = extension;

            // update the field height
            extensionField.window.updateHeight();

            // Get current color field value from Contentstack and update the color picker input element
            HtmlElement.value = extensionField.field.getData();
        })

        // on click of element we will set setFocus on field
        function setFocus(){
            extensionField.field.setFocus();
        }

        // On color change event, pass new value to Contentstack
        function onChange(){
            extensionField.field.setData(HtmlElement.value);
        }

    </script>
</body>
</html>
Here’s the code for the Marketplace app built using React.js with TypeScript, for the above extension:
import React, { useEffect, useState } from 'react';

import ContentstackAppSdk from '@contentstack/app-sdk';
import { isEmpty } from 'lodash';

import { TypeDataSDK } from '../../common/types';

import InputElement from '../../components/inputelement/index';

const CustomField: React.FC = function () {
   const [state, setState] = useState<TypeDataSDK>({
       config: {},
       location: {},
       appSdkInitialized: false,
   });

   const [inputData, setInputData] = useState<String>('');

   useEffect(() => {
       ContentstackAppSdk.init().then(async appSdk => {
           const config = await appSdk?.getConfig();

           setState({
               config,
               location: appSdk.location,
               appSdkInitialized: true,
           });

           appSdk.location.CustomField?.frame.updateHeight(300);

           const initialData = appSdk.location.CustomField?.field.getData();

           if (initialData && !isEmpty(initialData)) {
               setInputData(initialData);
           }
       });
   }, []);

   const onChangeSave = (saveData: any) => {
       state.location?.CustomField?.field?.setData(saveData.toString());
   };

   return (
       <div>
           {state.appSdkInitialized && (
               <InputElement onChange={onChangeSave} value={inputData} />
           )}
       </div>
   );
};

export default CustomField;
Was this article helpful?
Thanks for your feedback