A preset is a customized version of an image pre-configured with specific formatting and sizing constraints. You can build customized presets for any image file to tailor your assets as per your business requirements.
Contentstack Marketplace provides a prebuilt Asset Sidebar Extension template, i.e Image Preset Builder, to help you build image presets instantly and use them in your entries. All you need to do is install the Image Preset Builder app through Marketplace, add it to your stack, configure it, and you are ready to go.
Prerequisites
This step-by-step guide explains how to install and configure Image Preset Builder in your stack.
Steps for Execution
- Install Image Preset Builder in Contentstack Marketplace
- Use Image Preset Builder within your Stack
- Use Image Presets within Entries
Install Image Preset Builder in Contentstack Marketplace
To install the Image Preset Builder application in Contentstack Marketplace, log in to your Contentstack account and follow the steps below:
- On the left-hand-side primary navigation, you will find a new icon for Marketplace (as shown below). Click the icon to go to the Marketplace section of the app.

- Open the Apps section from the left-hand side panel. Now, you can scroll through the list to find the app you are looking for.
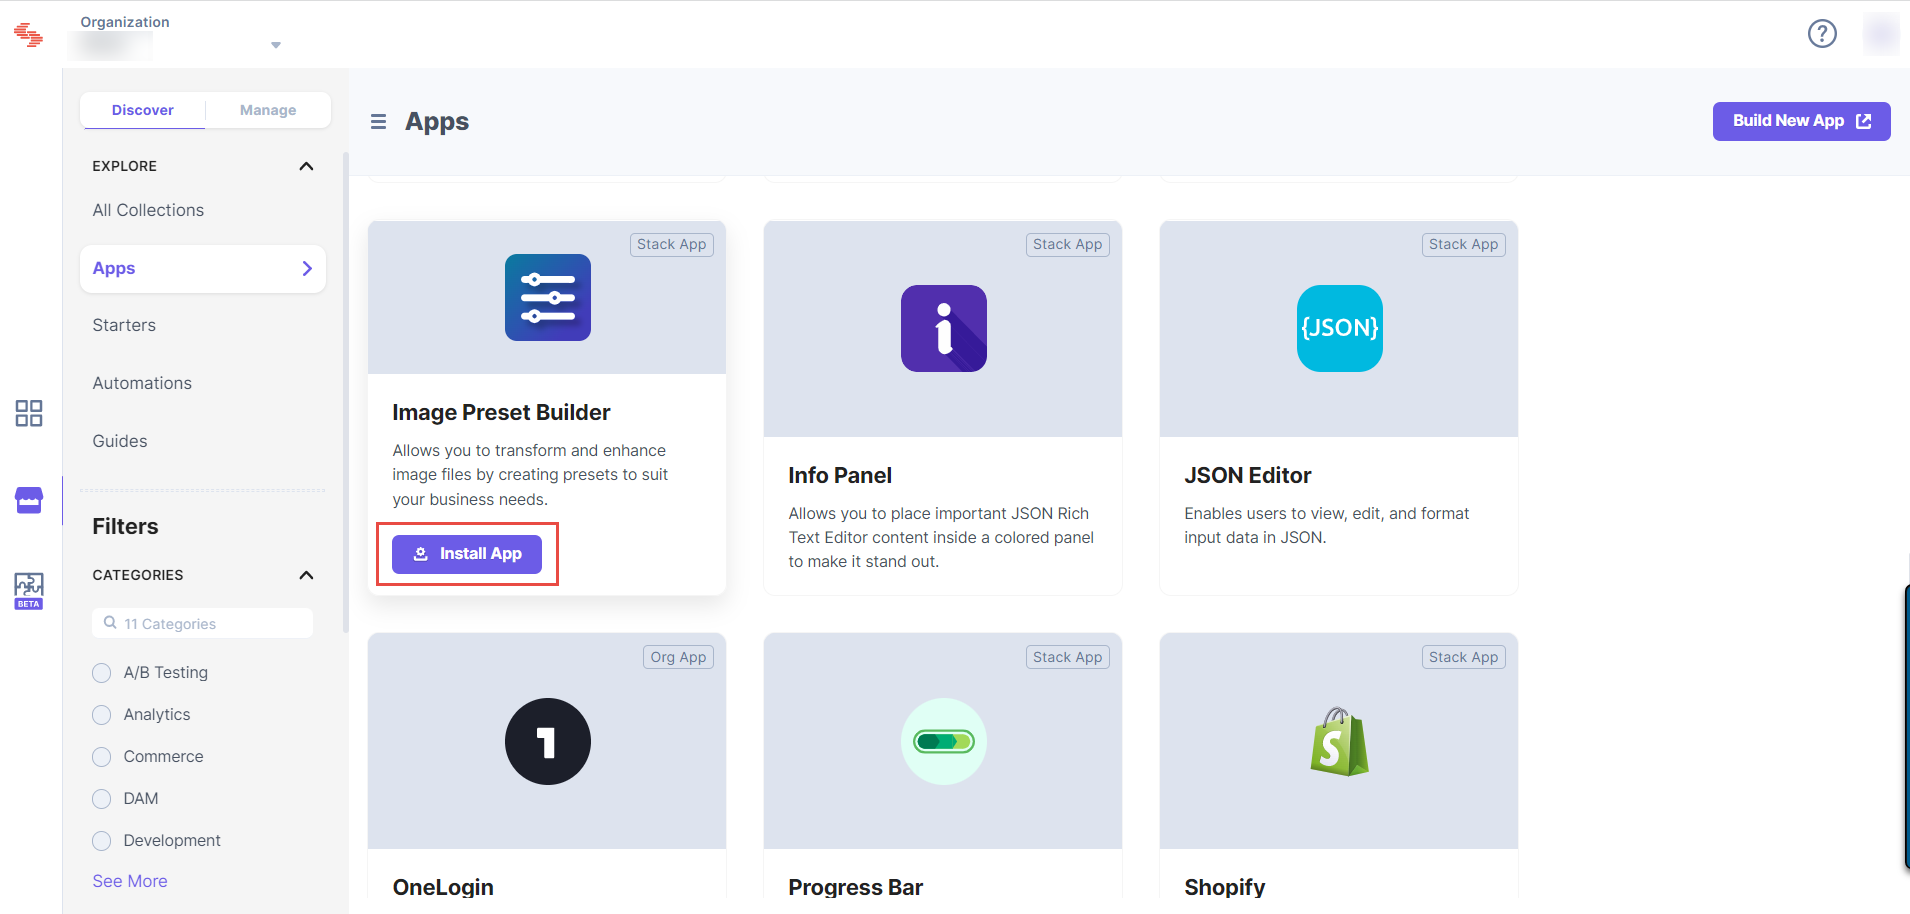
- Once you find the Image Preset Builder app, hover over the card and click the Install App button.
- On the resulting screen, select the stack for which you want to install the Image Preset Builder app.
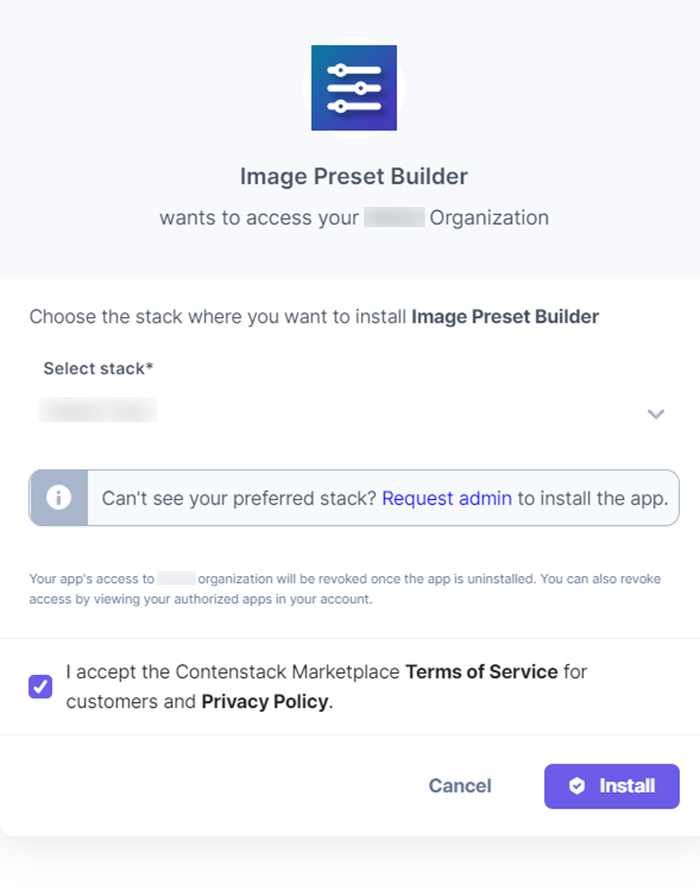
- Accept the terms and conditions and click Install.
- The Image Preset Builder app is auto configured. Click Save to save your app.
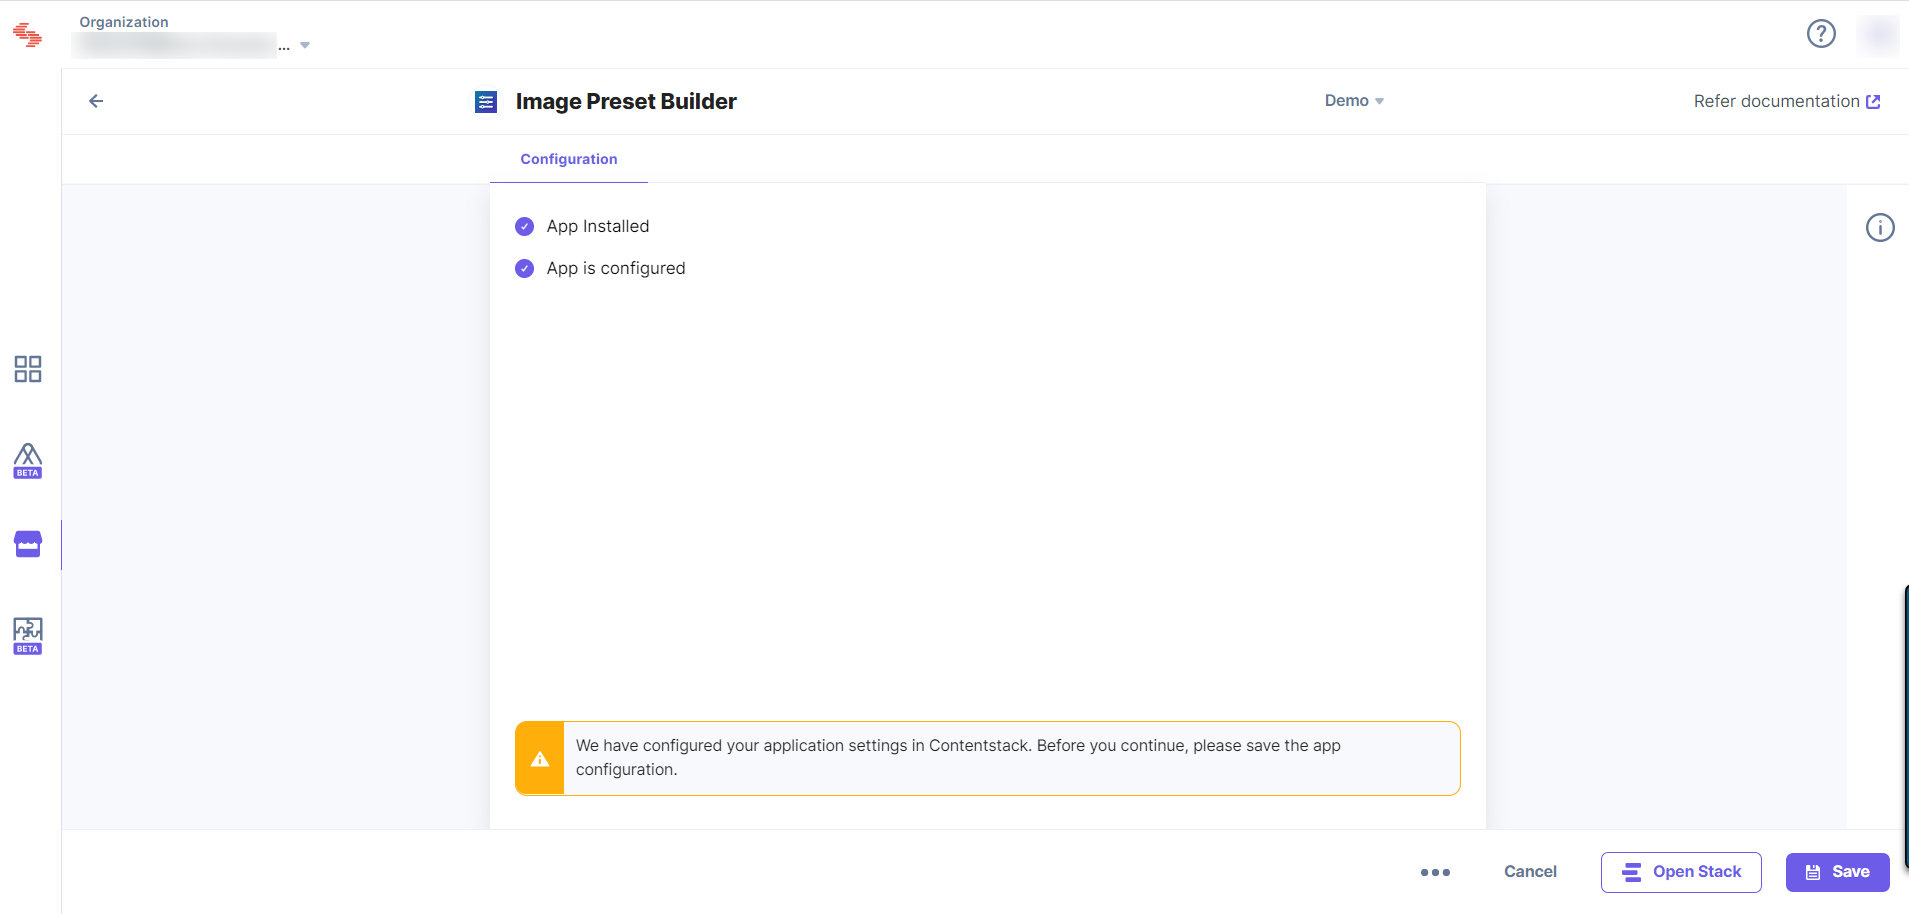
This is a mandatory step. If you miss out on saving your app configurations due to some system or connectivity issues, you can go to Marketplace | Installed Apps | Configured Apps, find your app and save the configuration settings. - Click the Open Stack button to start using the Image Preset Builder application within your stack.
Use Image Preset Builder within your Stack
To use the Image Preset Builder asset sidebar extension within your stack, follow the steps given below:
- Go to your stack and click the “Assets” icon on the left navigation panel. You can add a new image file or open any existing image file.
- Click the “Widgets” icon in the right panel.
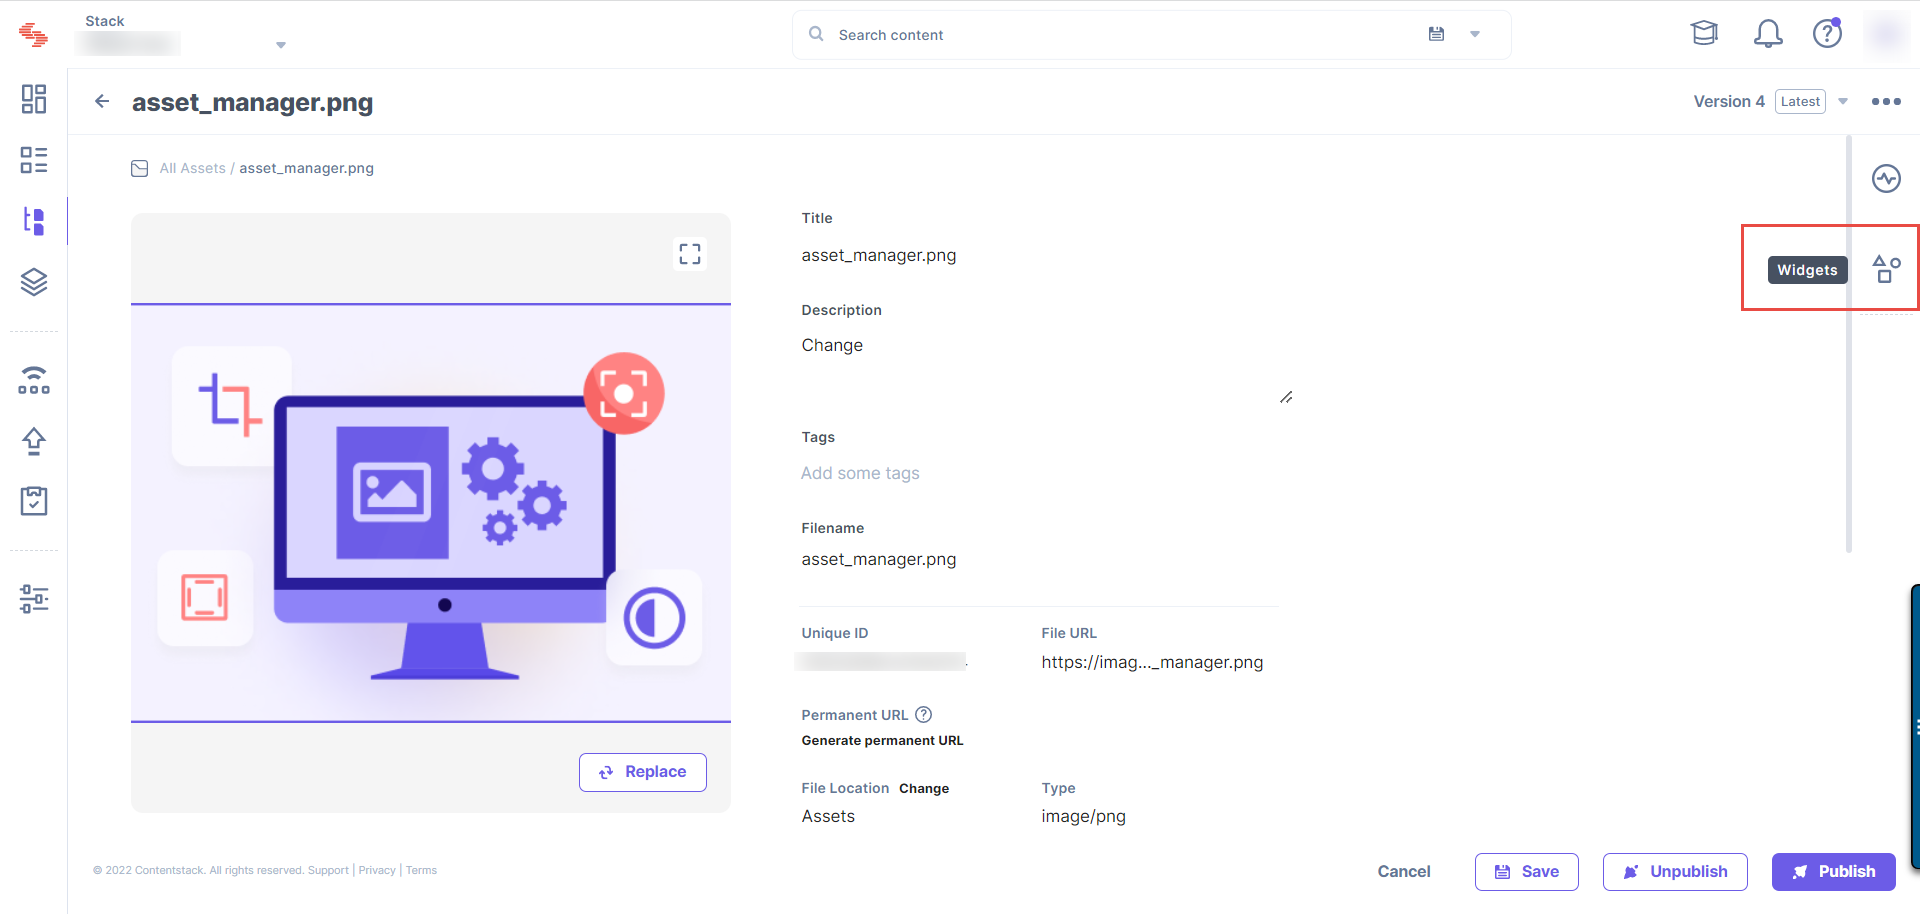
- On the resulting panel that opens, select Image Preset Builder.
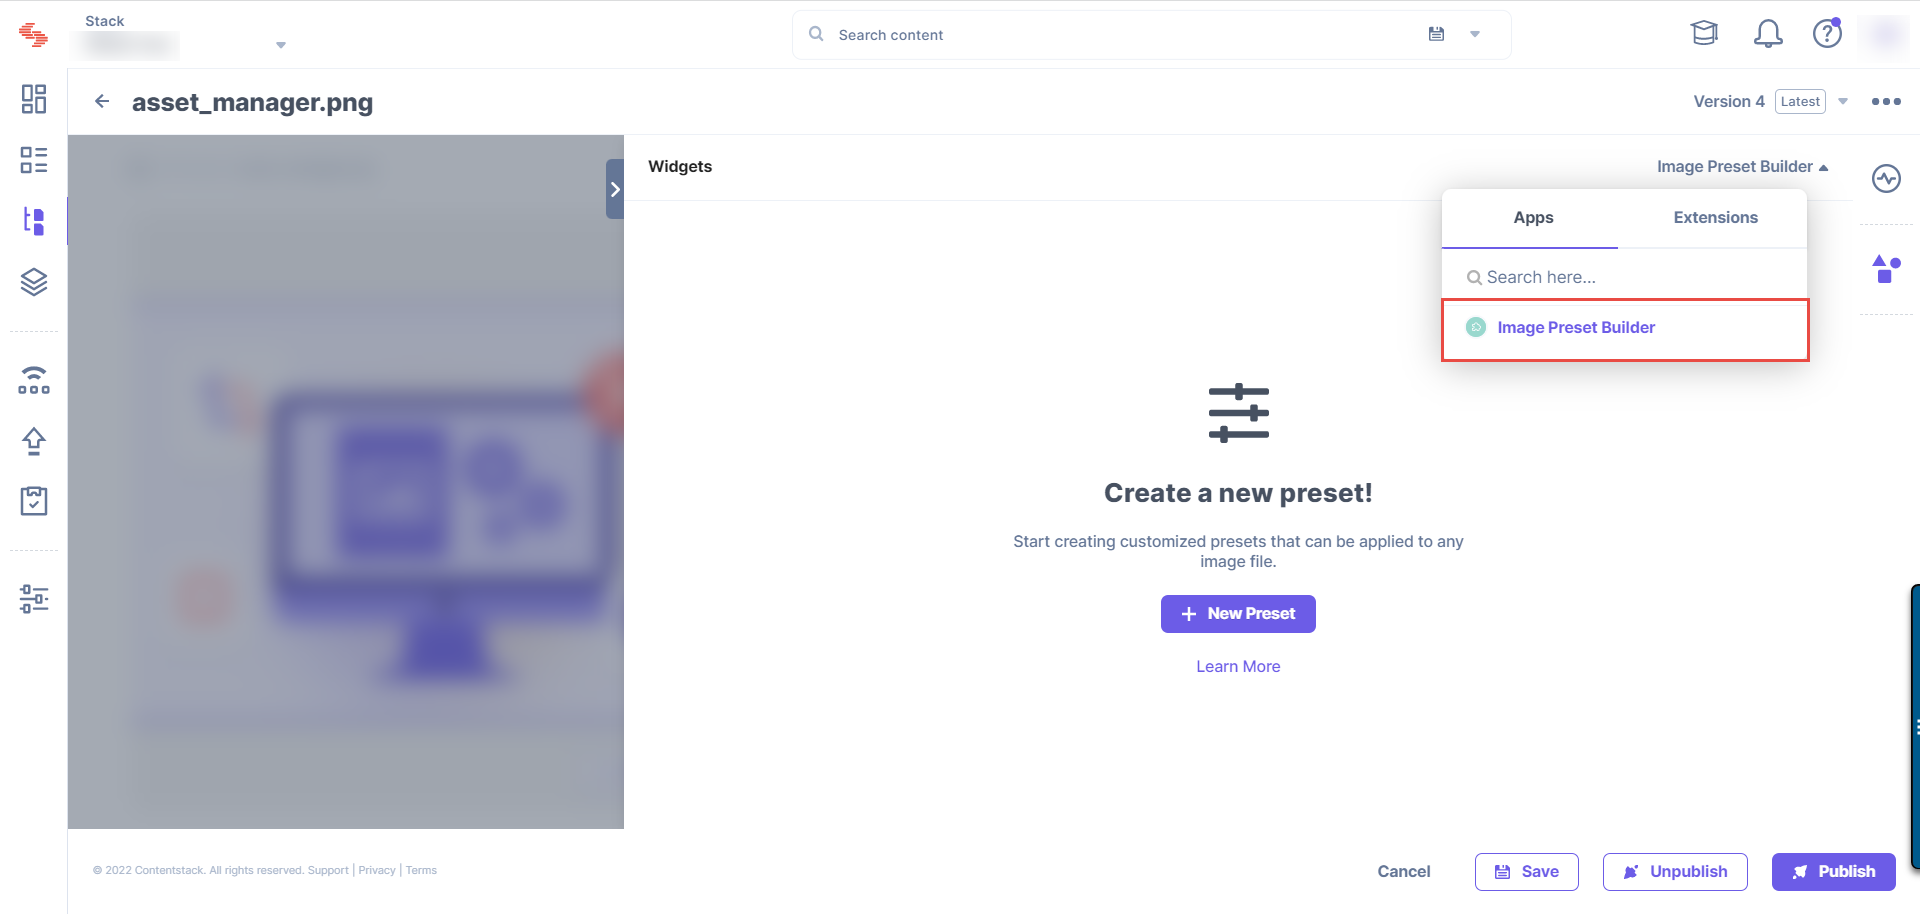
- Now you can start creating presets for your image files. Improve your image files by optimizing and transforming them.
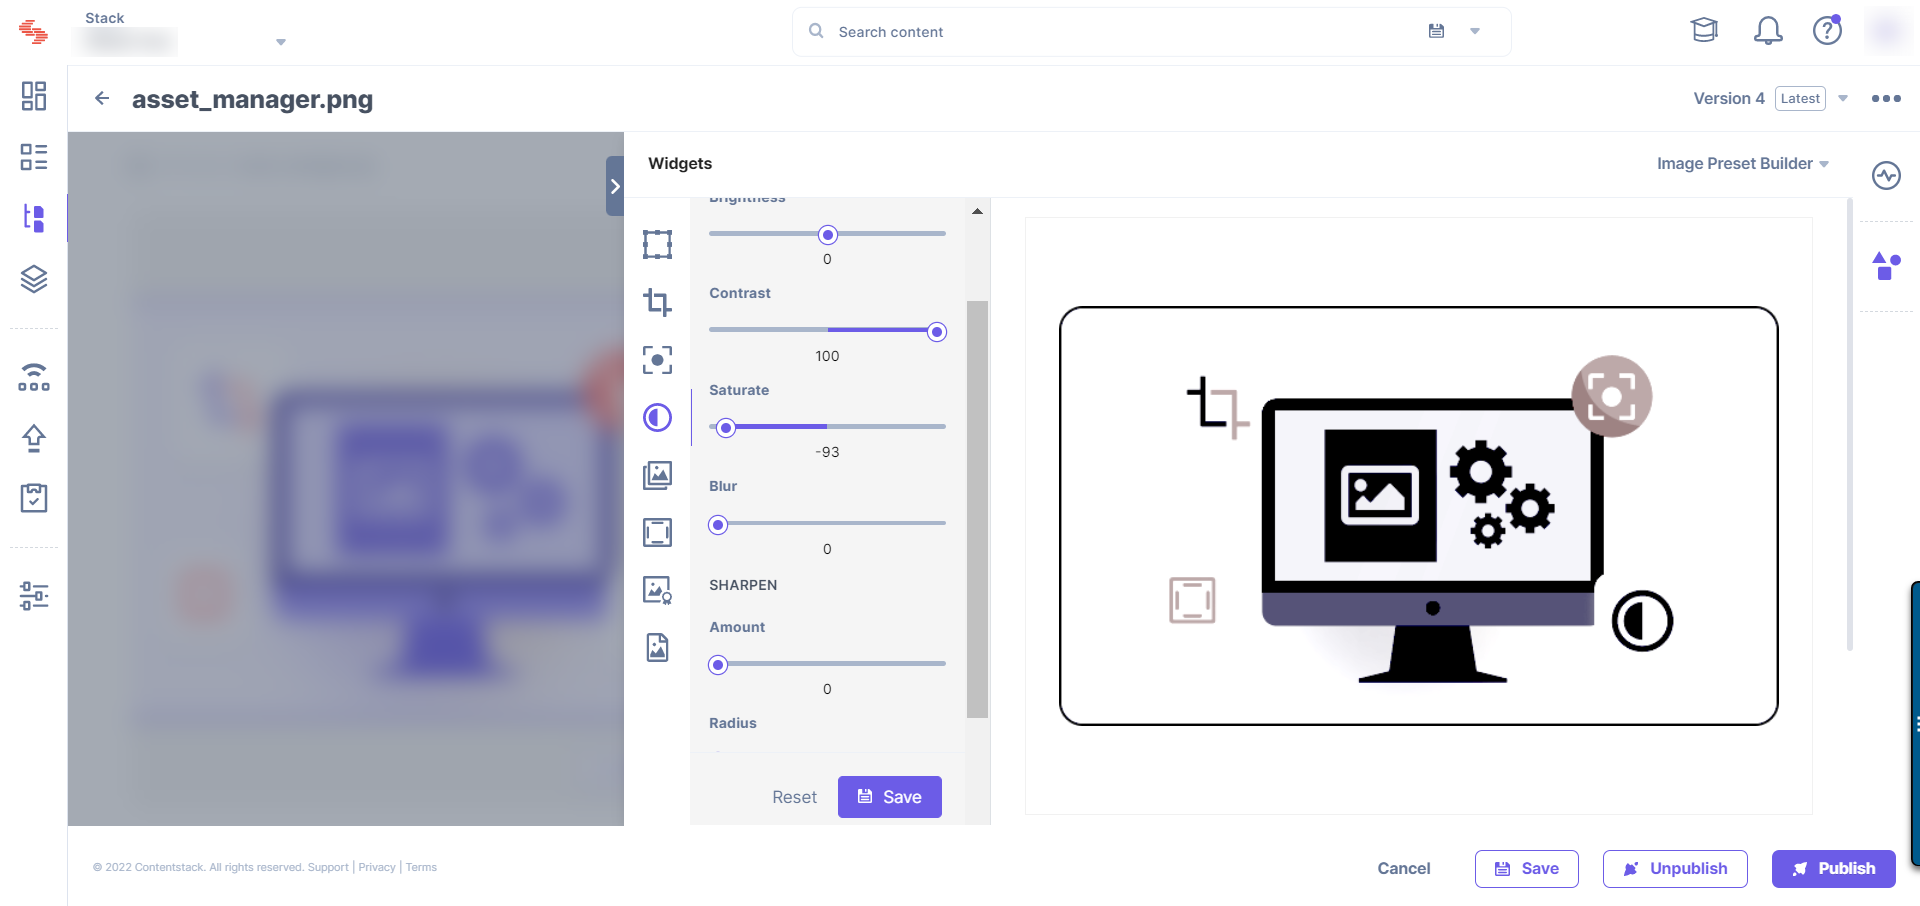
Use Image Presets within Entries
Image Preset Builder allows you to use varied preset versions of assets across your entries. With the help of this app, you can add image presets to fields such as Custom Field extensions and JSON Rich Text Editor.
Let us see how you can configure your content types to use presets for these aforementioned fields of the entries.
Image Presets within Custom Fields
You can add optimized image presets to Custom Field extensions that accept assets as input. Custom fields of such type store data in JSON format and work similar to File fields.
To use presets within Custom Fields, log in to your Contentstack account and perform the following steps:
- Go to your stack, click the “Content Models” icon on the left navigation panel, and open the content model for the content type in which you want to use presets.
- In the Content Type Builder page, add the Custom field in your content type.
- Open the Custom Field's properties window and click the Select Extension/App dropdown menu to open it.
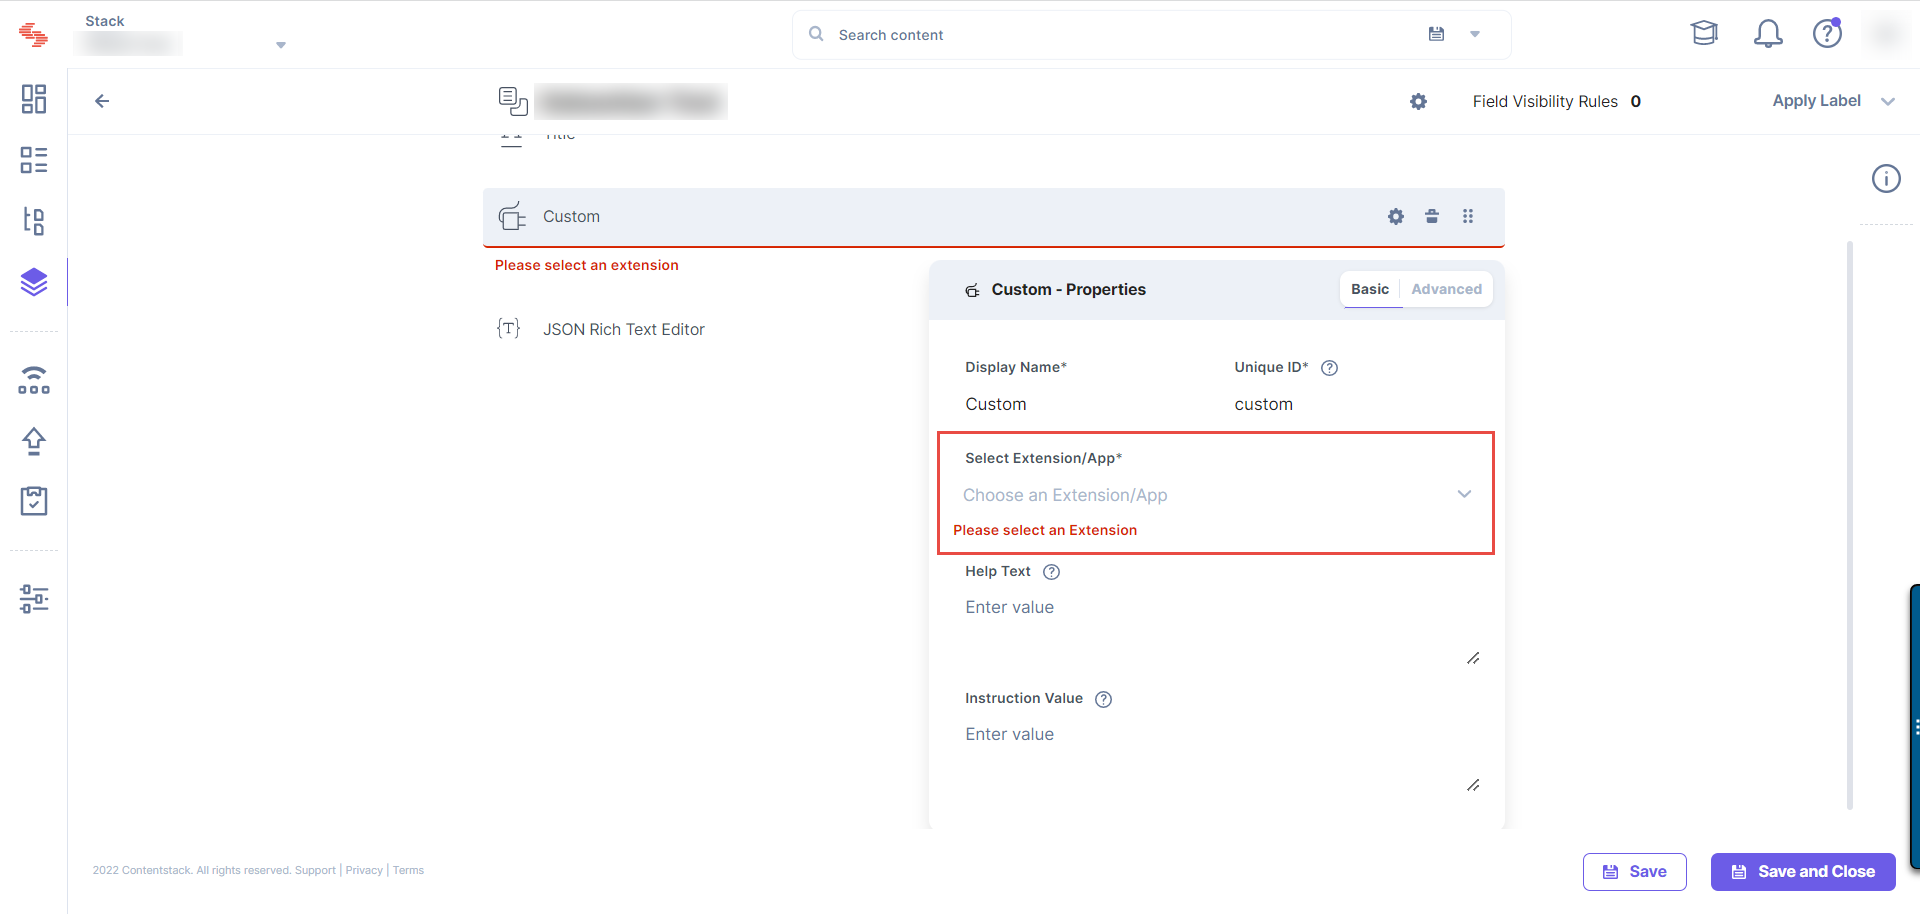
- Select the "Image Preset Builder" application from the list and click Proceed.
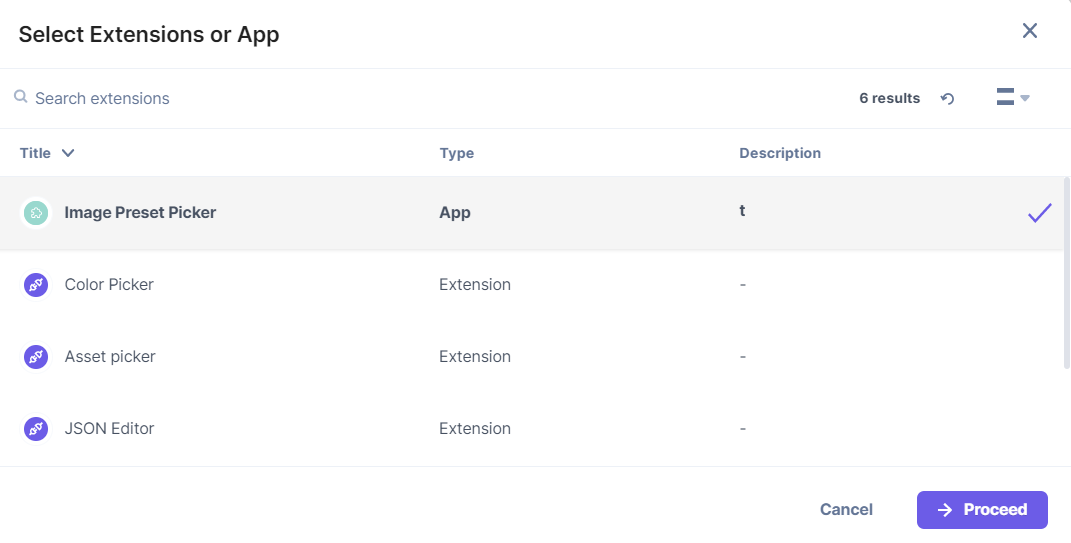
- After adding the field, click Save or Save and Close to save your changes to the content type.
- Now, when you create an entry for that content type, you will be able to add assets to your custom field.
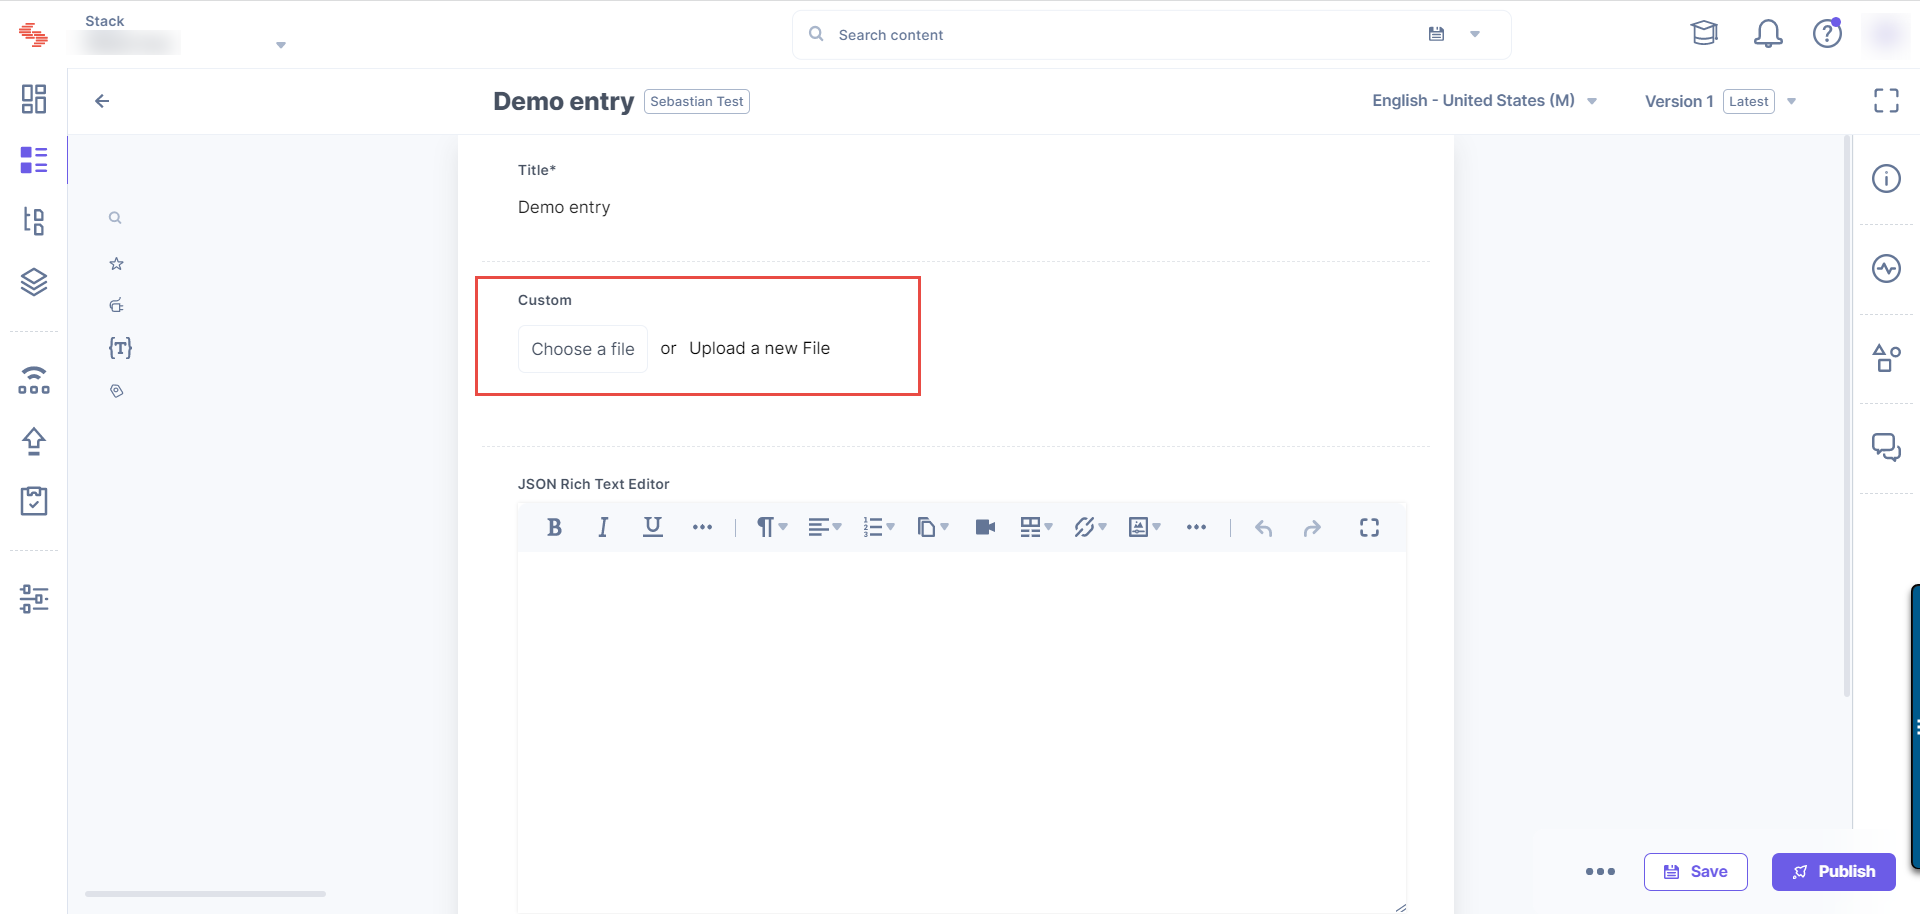
- You can either add the original version of the selected asset to the Custom field or choose a specific preset version of the asset from the Select Preset section. Additionally, you can create a new preset version of the selected image to add to the Custom field.
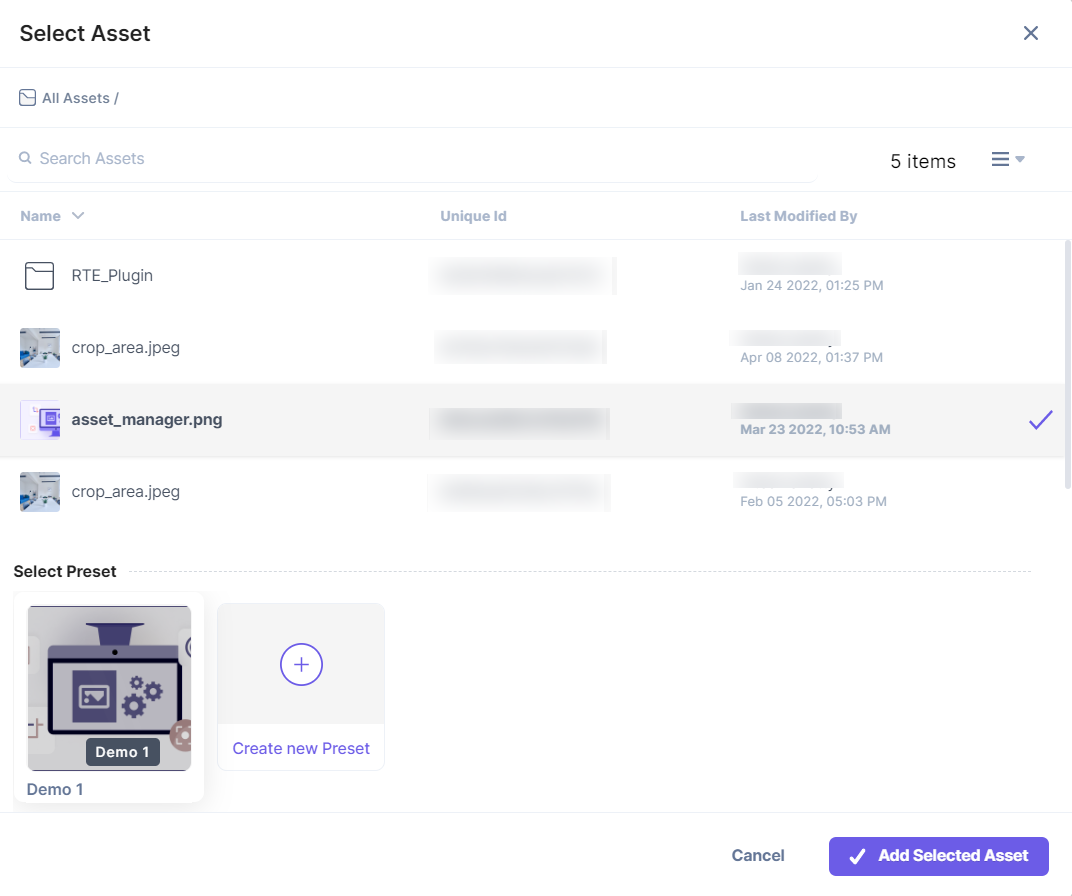
- Once done, click the Add Selected Asset button and Save your entry.
Image Presets within JSON Rich Text Editor Fields
You can add customized image presets to your JSON Rich Text Editor fields using the Preset Builder JSON RTE Plugin.
To use presets within the JSON Rich Text Editor field, login to your Contentstack account and perform the following steps:
- Go to your stack, click the “Content Models” icon on the left navigation panel, and open the content model for the content type in which you want to use presets.
- In the Content Type Builder page, add the JSON Rich Text Editor field in your content type.
- Open the JSON Rich Text Editor (JSON RTE) field's properties window and click the Select JSON RTE Plugin(s) dropdown menu to open it.
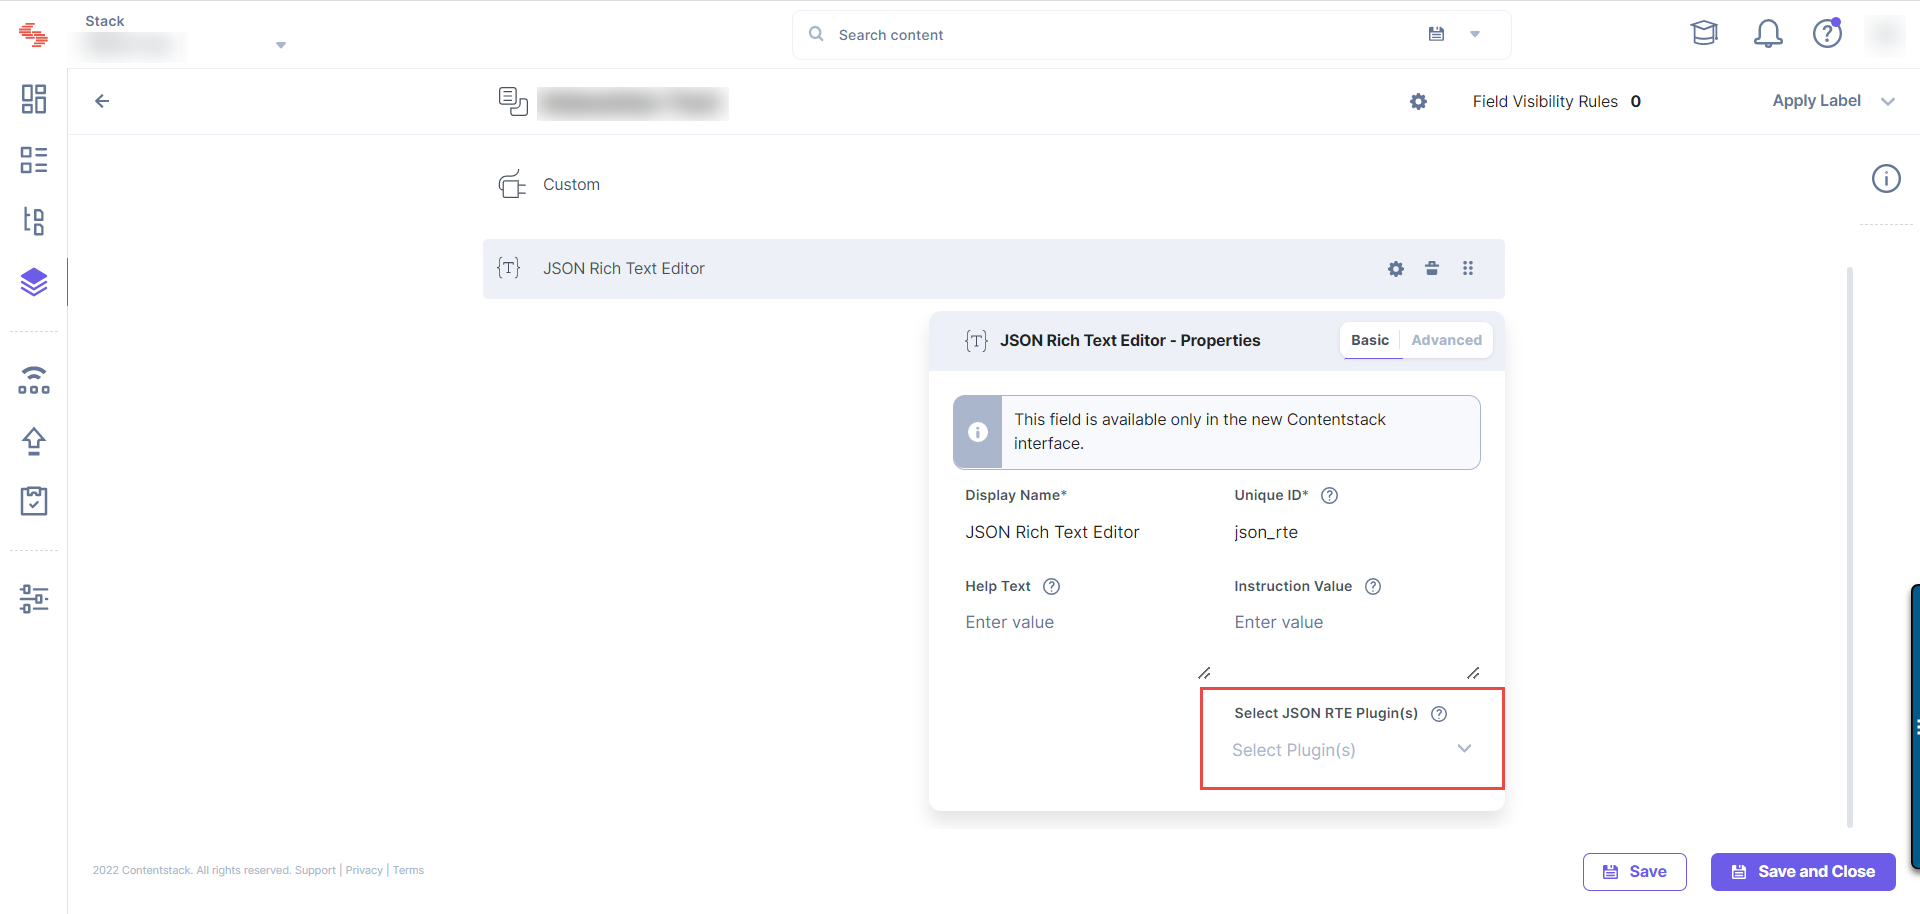
- Select the "Image Preset Builder" application from the list and click Add Plugin(s).
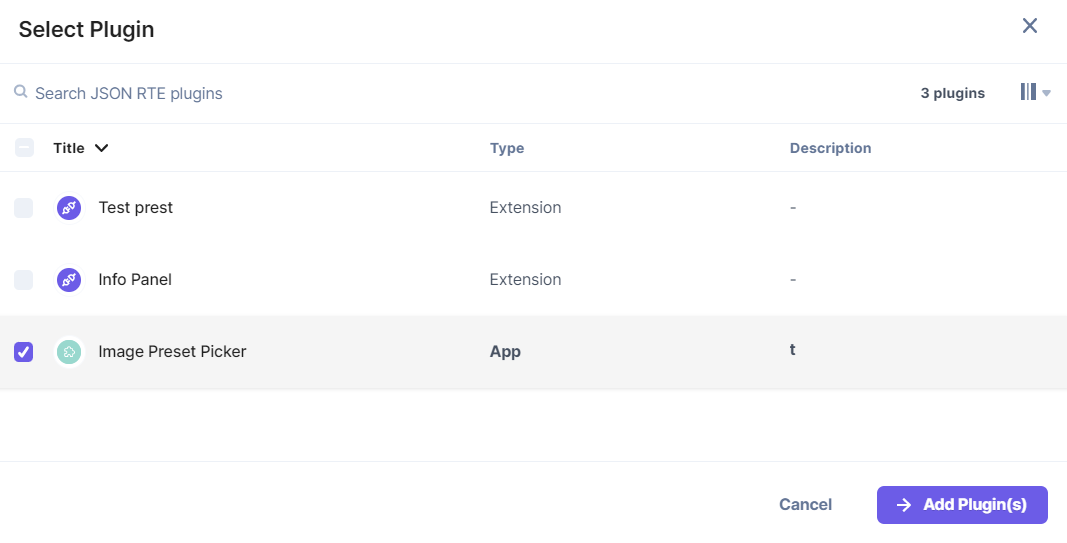
- After adding the field, click Save or Save and Close to save your changes to the content type.
- Now, when you create an entry for that content type, click the Assets icon in the JSON RTE and select Choose from Assets.
- You can either add the original version of the selected asset to the JSON RTE or choose a specific preset version of the asset from the Select Preset section. Additionally, you can create a new preset version of the selected image to add to the JSON RTE field.

- Once done, click Add Selected Asset and Save your entry.


