Contentstack provides certain prebuilt custom widget templates to help you get started instantly without the need to code. All you need to do is add them to your content type, configure them, and you are ready to go.
Below is the list of prebuilt templates that Contentstack provides:
To use a prebuilt custom widget, log in to your Contentstack account, and perform the following steps:
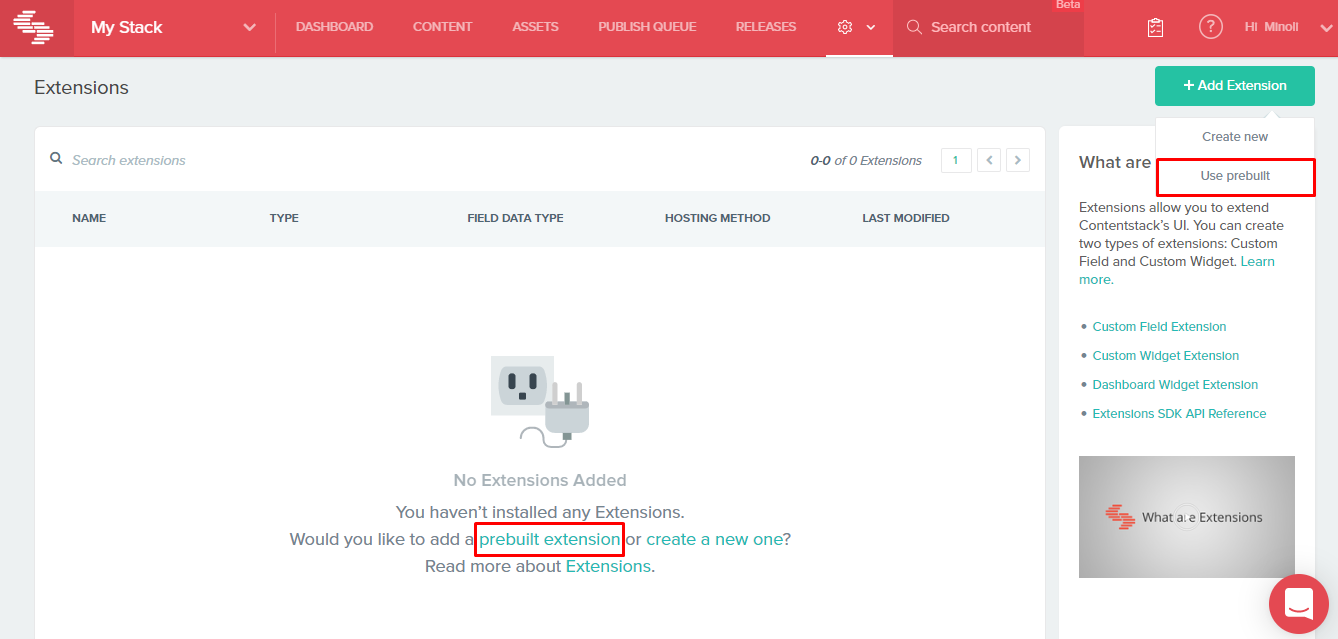
- Go to your stack, navigate to the “Settings” gear icon, and select Extensions.
- Click on + Add Extensions button at the top-right corner of the page, and select Use prebuilt option. If you have not added any extensions in the stack yet, you can click on the prebuilt extension link displayed on the page.

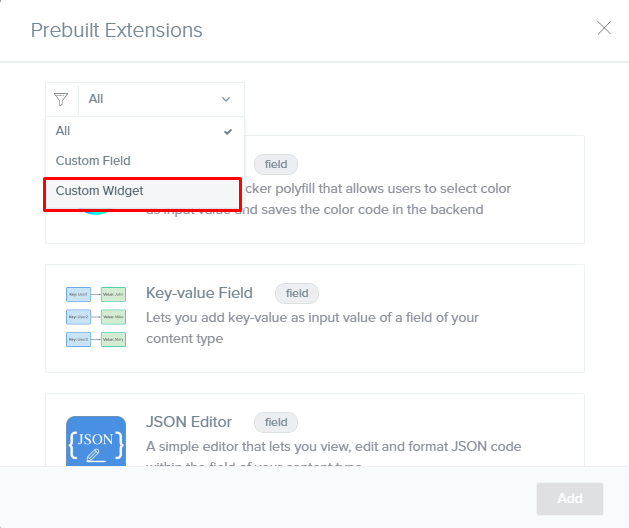
- In the Prebuilt Extensions window, select Custom Widget from the dropdown.

- Select any prebuilt template (for example, Text Intelligence), and click on Add.
- In the Create New Extension page, you will see the following options:
- Title (required): You will see a predefined title that is displayed as the widget name on the entry page. You can edit it as per requirements.
- Hosting method (required): The hosting method is set to Hosted By Contentstack since it is a custom widget hosted on Contentstack.
- Extension Source Code (required): Here you will find the source code for the custom widget. You can make changes to this code as per your requirements.
- Config Parameters (optional): If you have used any config parameters in the source code, provide the value for the parameters in this field.
- Scope (required): Select for which content types this widget will be available. You can choose either All Content Types or Specific Content Types.
- Finally, Save this widget.

