Brightcove is a cloud-based video platform that helps businesses to simplify the process of video distribution across digital platforms.
You can integrate Brightcove with Contentstack using our Experience Extension. You can add a Custom Field in your content type to fetch and display Brightcove videos into a field of your content type.
Thus, when you create an entry for this content type, you can select one or more videos as an input value for the field.
Prerequisites
- Contentstack account
- Brightcove account
- AWS account
- Working knowledge of AWS lambda and AWS API Gateways
-
Basic knowledge of Contentstack Experience Extensions
This step-by-step guide explains how to create a Brightcove custom field extension for your content types in Contentstack. The steps performed are as follows:
- Create and set up your Brightcove account
- Create the AWS Lambda Function and set up the API Gateway
- Add the “Brightcove” custom field extension to your stack
- Use your custom field
Create and Set up Your Brightcove Account
To use this extension, you need to create an account in Brightcove. To do that, perform the following steps:
-
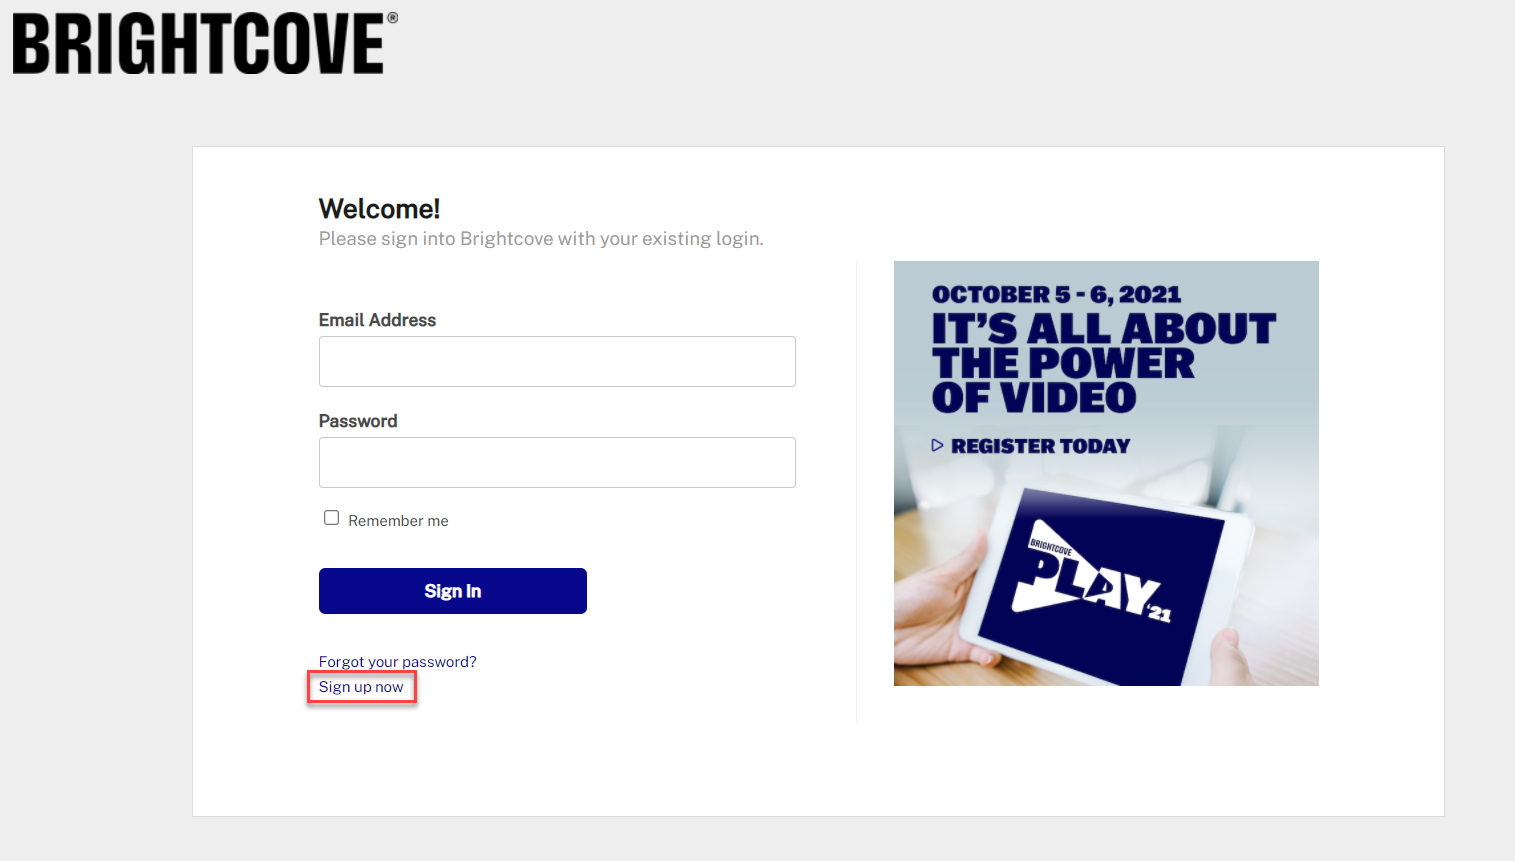
Go to Brightcove website and create your account by clicking on the Sign up now link.
- On the next page, you can choose from the available options such as Video Cloud, Enterprise Video Suite, and so on.
Select the one that suits your requirement, enter your work email address, and click on GET STARTED.

Note: You get a free trial to try the platform. However, if you want to use the APIs for integration, the free plan will not work. Therefore, it is suggested to buy one of their plans to have full-fledged access to the API usage.
-
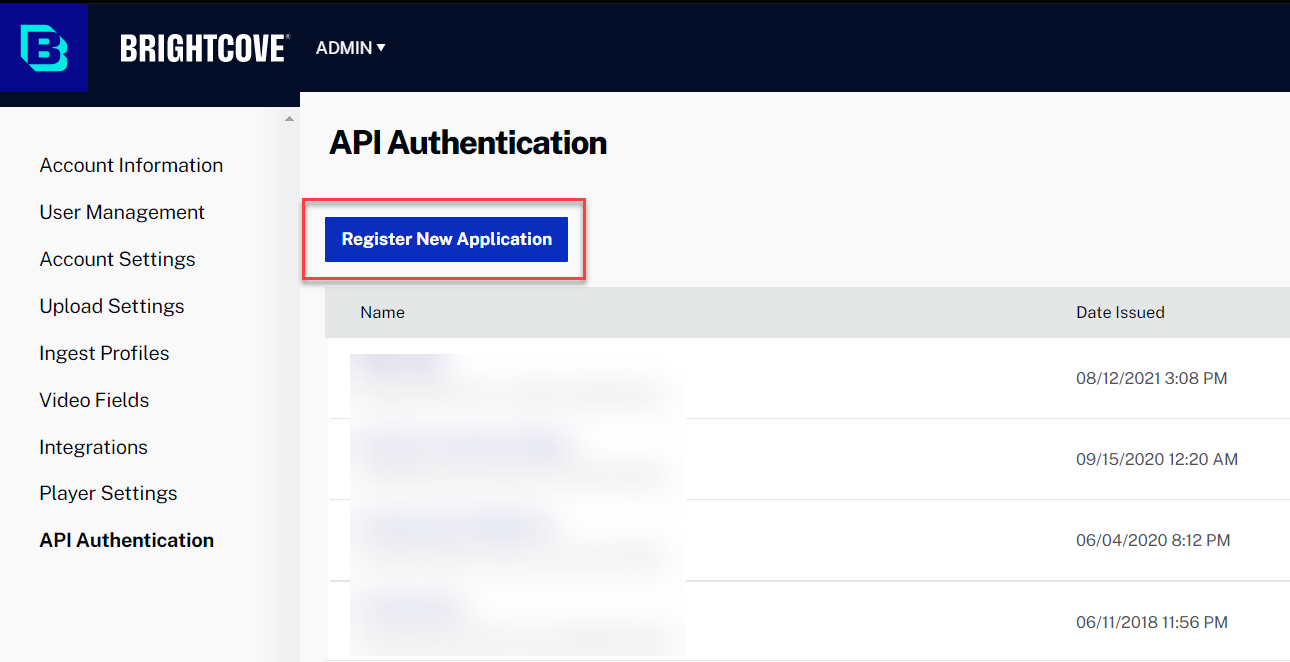
Follow the on-screen instructions and set up your account and then log in. You should see your dashboard. Click on the ADMIN option at the top-right corner, as shown below, and select API Authentication.

- On the API Authentication screen, you need to register your application for using the APIs. To do this, click on Register New Application.
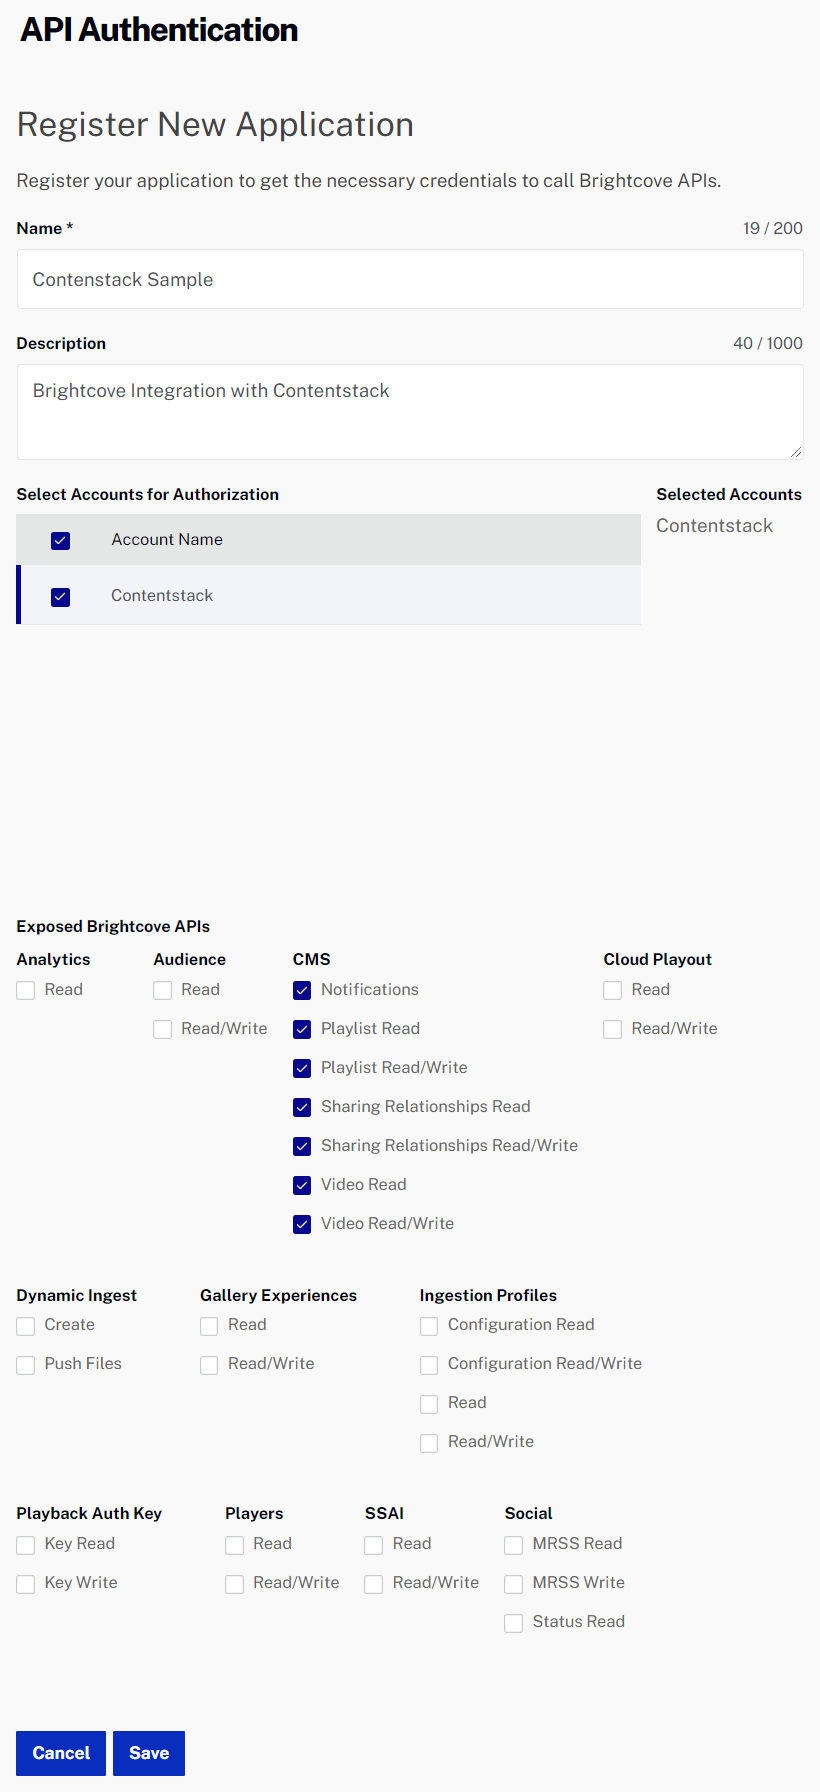
- On the Register New Application screen, provide a Name and an optional Description. Select the appropriate account from the Select Accounts for Authorization option.
Select all options in CMS (under the Exposed Brightcove APIs section) as shown below. You can leave all other options unchecked for now and click on the Save button.
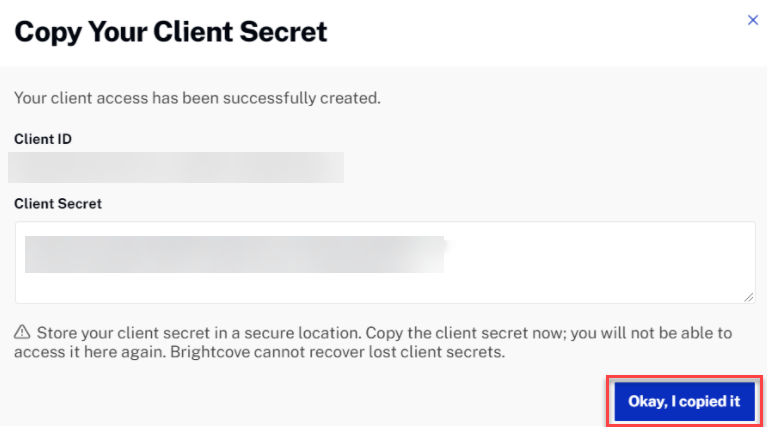
- A Copy Your Client Secret window will pop-up, as shown below. Make a note of the Client ID and Client Secret as we will need these keys while setting up the lambda function in AWS. Once you have copied the IDs, click on the Okay, I copied it button.
- Your app is now registered and you can start uploading videos in Brightcove. To do this, click on the BRIGHTCOVE icon at top left. You'll get to your dashboard. Click on HOME, at the top-left corner, and select Upload as shown below:
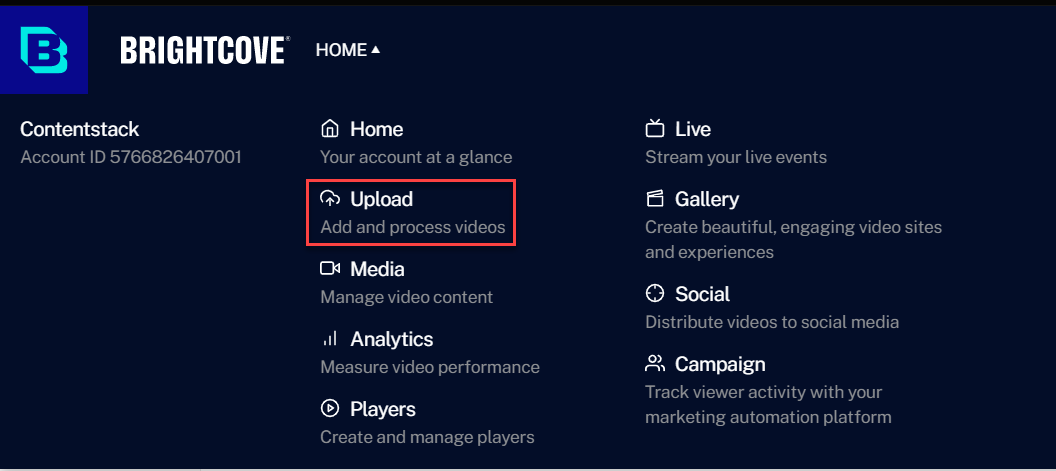
- On the Upload screen, you can drag and drop videos, browse videos from your machine, or upload videos using the URL.
-
Once the uploading finishes, click on the dropdown next to the UPLOAD option and select Media to view the list of your uploaded videos.
With these steps, we have successfully created and configured our Brightcove account. Let's move ahead and set up the AWS Lambda function.
Set up a Lambda Function and an API Gateway
We will create an AWS Lambda Function and set up an API Gateway to trigger the Brightcove extension. To do this, perform the following steps:
-
Log in to your AWS Management Console and select Lambda from the Services list.
-
Click on the Create function button and select the Author from Scratch option (if not already selected).
-
Provide a name to your lambda function inside the Function name field, select Node.js 14.x or higher as your Runtime language, and click on the Create function button.
-
For this exercise, we have created a sample code that will help you set up the system. If Extensions are part of your plan, contact our Support team to get the code for the extension.
-
Once you download the code, you will see the following folders:
- brightcove: It contains the build folder that has the index.html file. You need to copy the code from this file and paste it inside the Extension source code field.
-
brightcove-popup: This folder also contains the build folder that has another index.html file. Upload this file as an asset in Contentstack by following the steps mentioned in the Create/Upload asset article. After uploading the file, you'll get a URL in the asset details section, make note of this URL.
-
lambda: We need to install the node modules inside this and then upload the zip file onto AWS lambda function.
To do this, open the command prompt, move inside the lambda directory, and run the following command:
npm install
Then, build the zip file using the following command:
npm run build
Once you run the above command, a brighcove.zip file will be created.
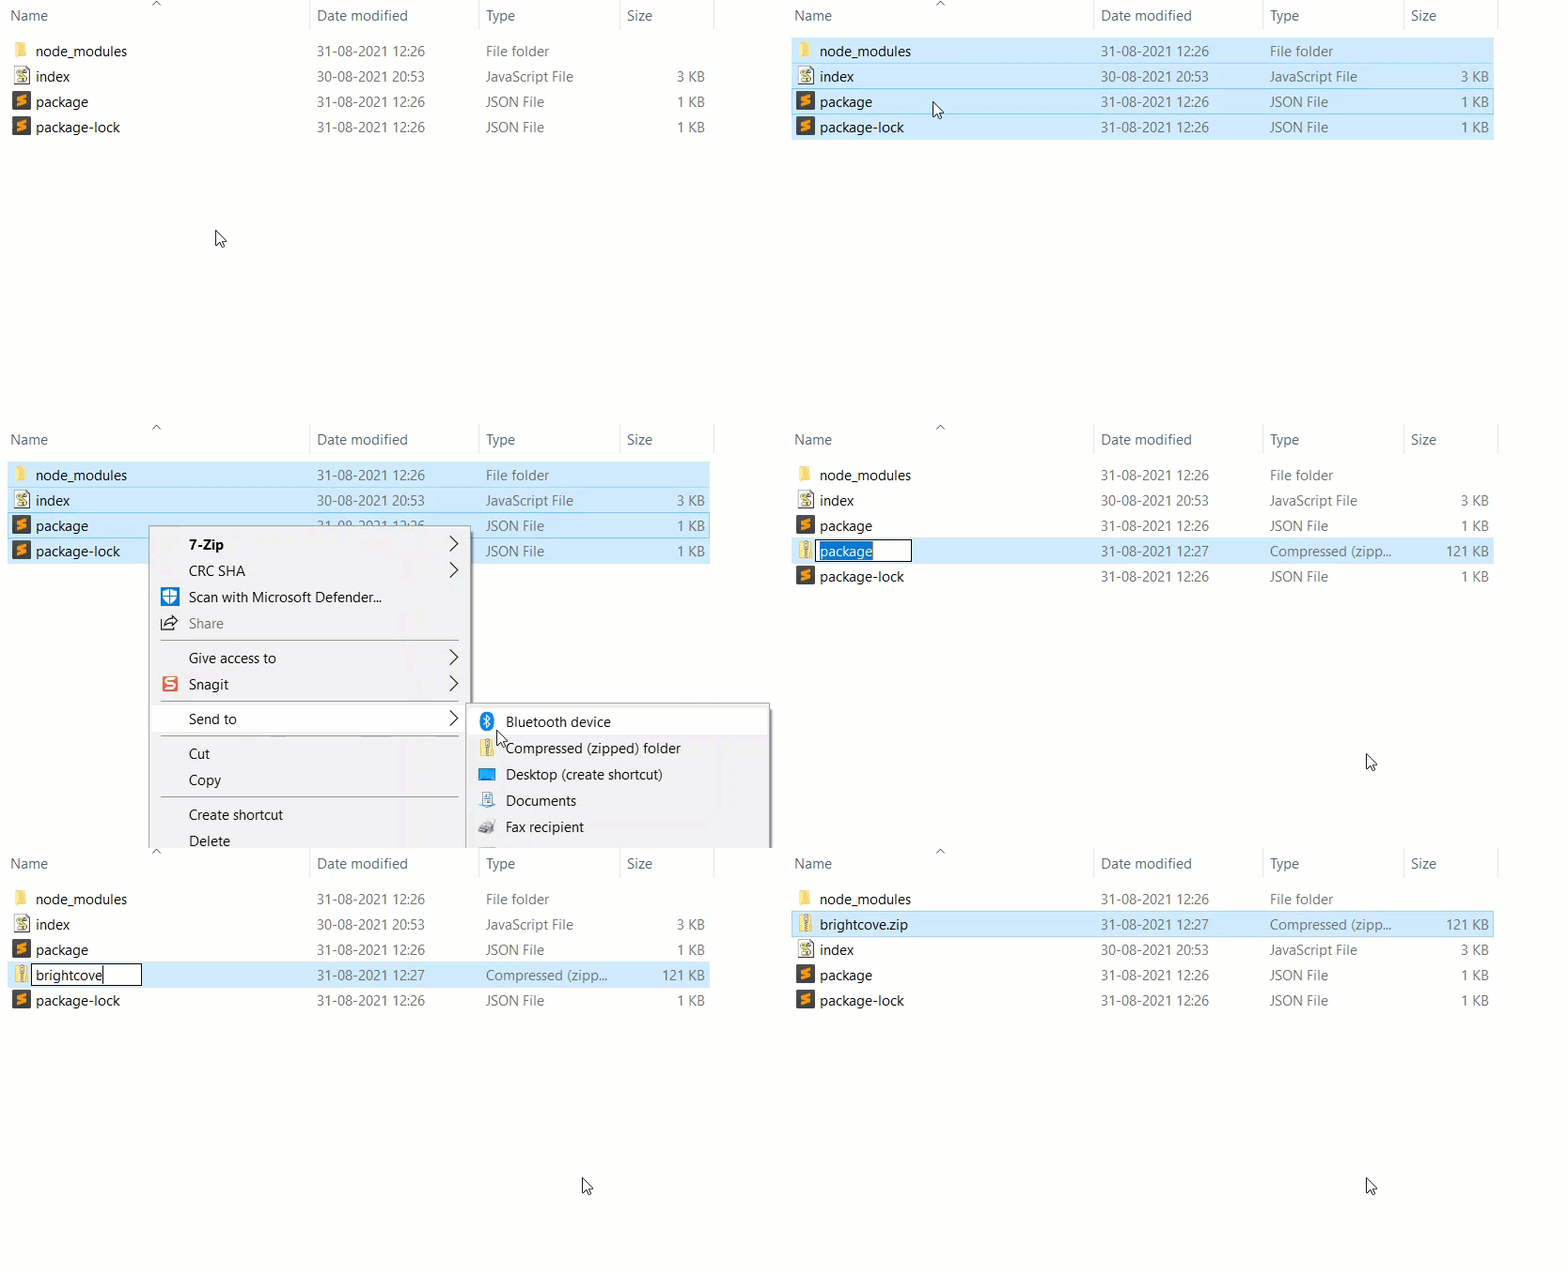
Note: The npm build command we discussed above will work for Mac and Linux users. If you are on Windows, the npm build command may not work. In that case, after installing the dependencies, you will have to manually zip the code files, name them brightcove.zip, and then upload them as shown below:
- Now in your AWS account, click on the Code tab (if not already selected). Inside the Code source section, click on the Upload from dropdown and select the .zip file option.
-
In the Upload a .zip file modal, click on the Upload button and select the zipped file that you just created. Then, click on Save.
-
In the Runtime settings option, keep Handler as index.handler.
-
Scroll up and select the Configuration tab. Click on the Environment variables option on the left and add the following variables inside it by clicking on Edit and then Add environment variable.

clientId: The value of clientId we generated in the above steps
clientSecret - The value of clientId we generated in the above steps
- Once added, click on Save. Your lambda function is now ready. Scroll up to the Function overview section and click on + Add trigger.
-
On the Add trigger screen, select API Gateway from the Select a trigger dropdown.
-
Select Create an API, from the API dropdown. Then, select REST API inside the API type block, Open from the Security dropdown, and click on Add.
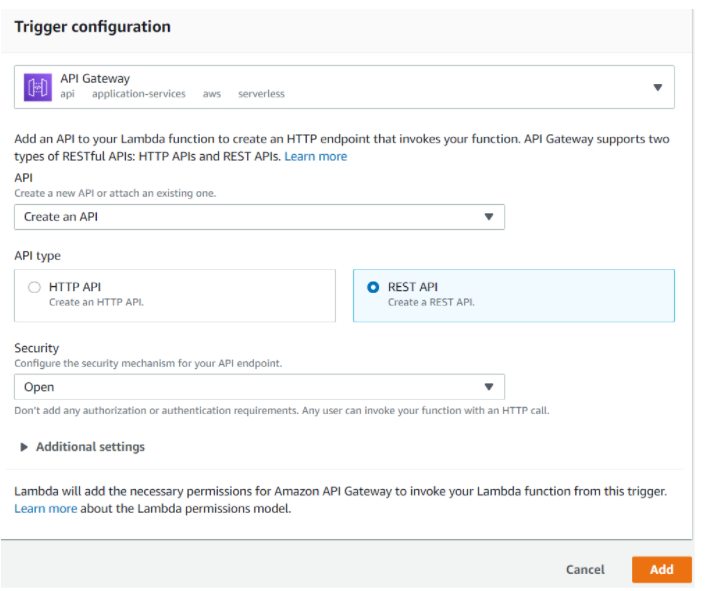
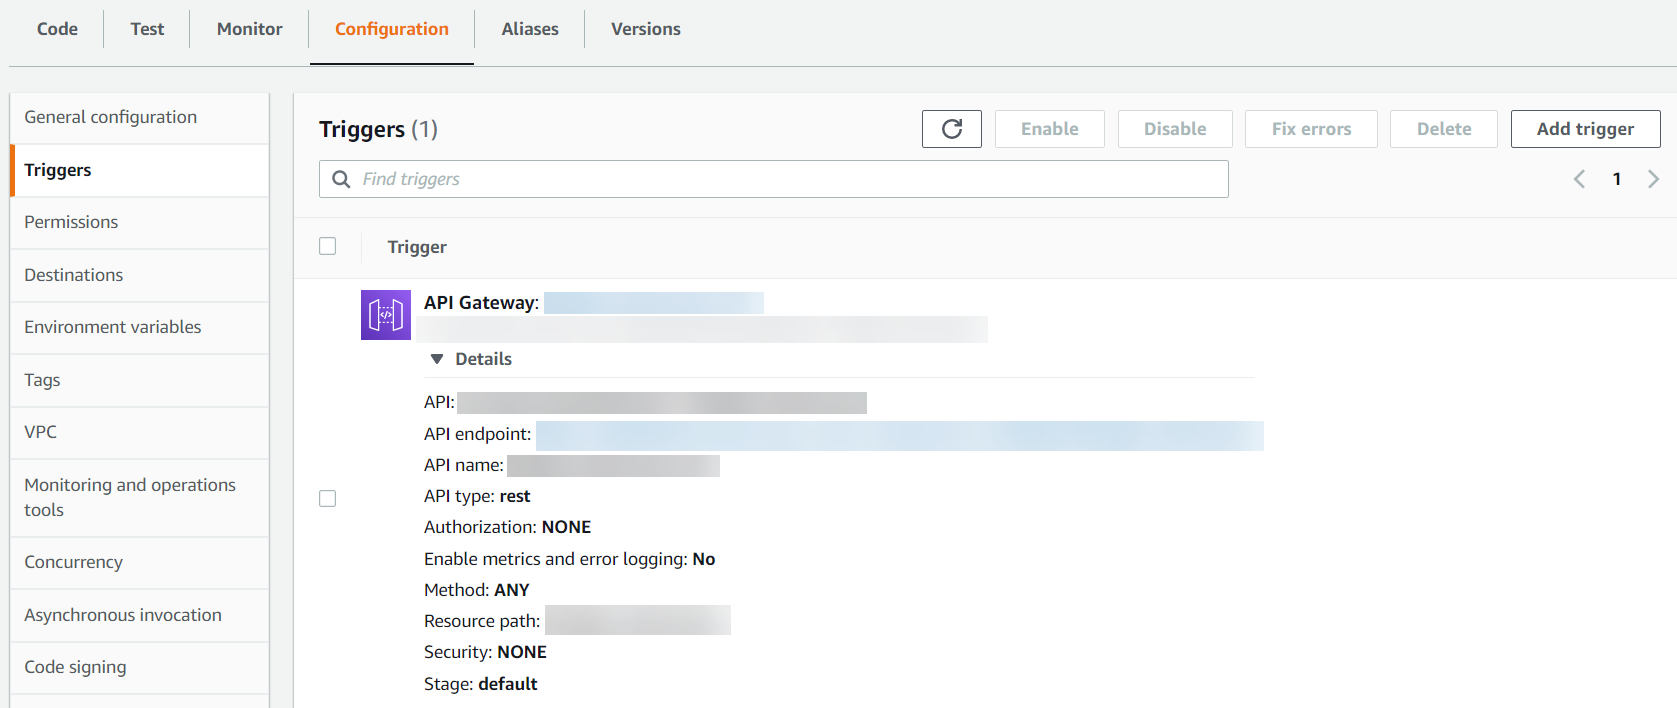
- An API gets created for your lambda function. Under the Configuration tab, click on Triggers you will see API Gateway.
Click on the Details link, you will find your API endpoint. Make a note of it as we will need it while setting up the Brightcove extension in Contentstack.
- We now need to enable CORS for our API Gateway. So click on the API Gateway name as shown below:
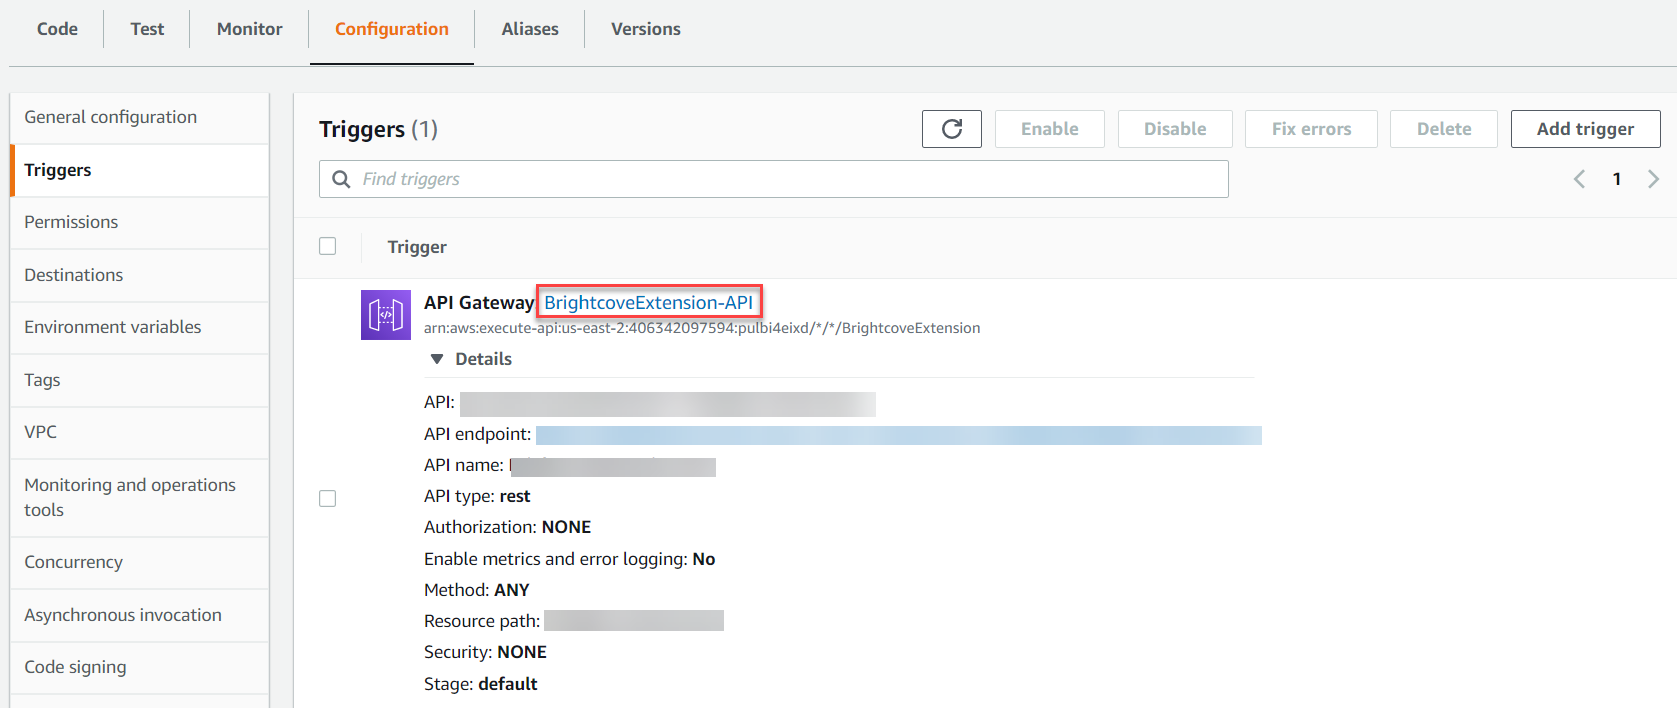
- On the Amazon API Gateway screen, click on the Actions dropdown and select Enable CORS. This is a mandatory step for the successful implementation of this extension.
-
On the Enable CORS screen, select DEFAULT 4XX from the Gateway Responses for BrightcoveExtension-API API option and click on Enable CORS and replace existing CORS headers as shown below:

- Upon receiving the Confirm method changes pop-up message, click on Yes, replace existing values.
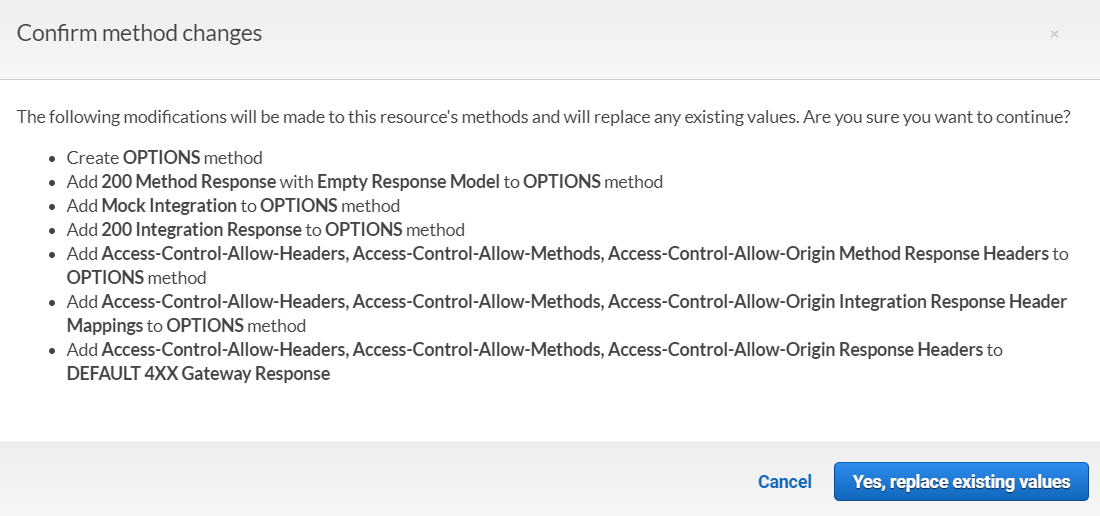
- After the successful completion of this operation, click on the Actions drop-down again and select Deploy API inside API ACTIONS.
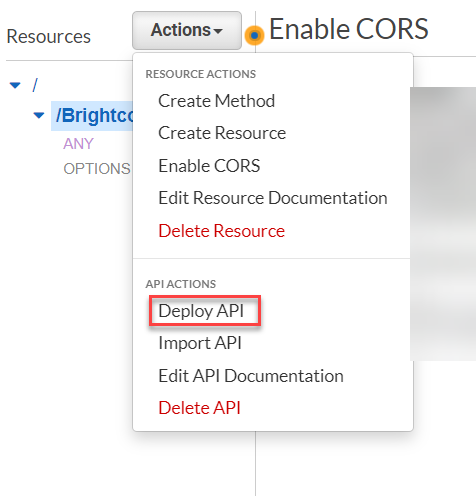
- On the Deploy API screen, select [New Stage] from the Deployment stage drop-down. Enter Dev (or whatever name you would like to name it) as the value for Stage name, and an optional description for Stage description and Deployment description. Click on Deploy.
-
On the next screen that you will get after clicking on Deploy, you will get an Invoke URL as shown below:
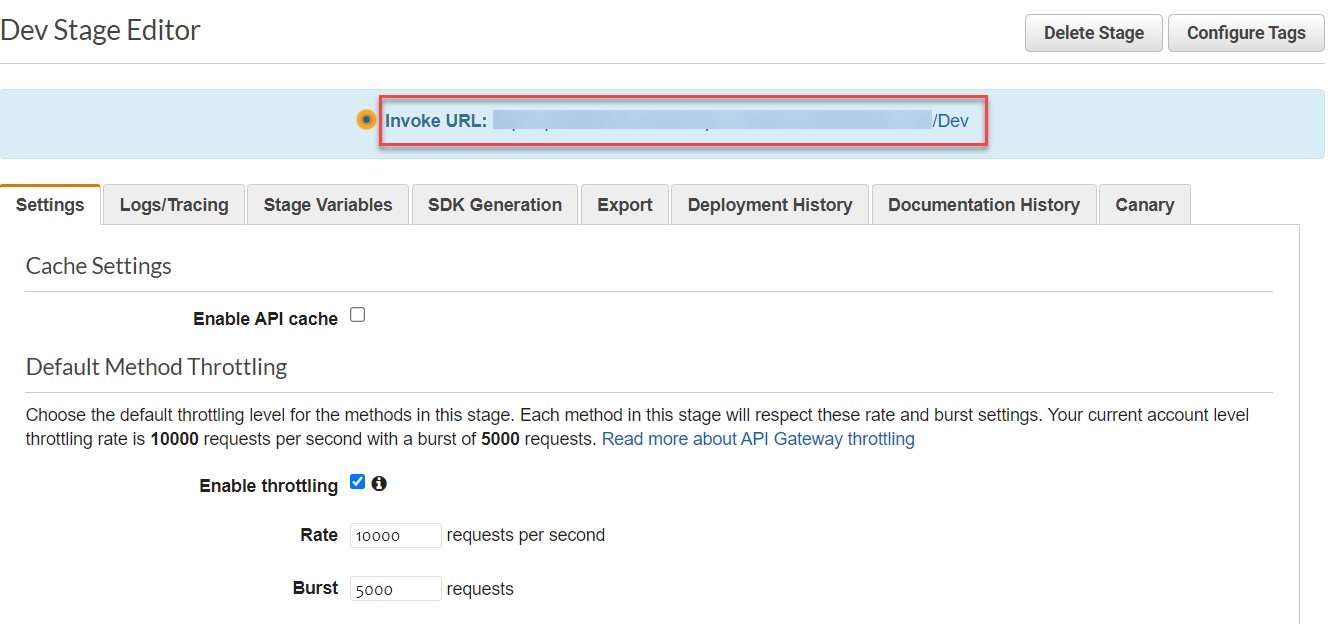
Make note of this URL as we will need it when we set up the configuration parameter for our extension in Contentstack.
-
Click on the Save button at the bottom.
Note: At the end of the Invoke URL, ensure to append the name of your lambda function. In our case, the name of the lambda function is BrightcoveExtension. So the invoke URL for us would be https://xxxxxxd.xxyyxx-api.us-east-2.amazonaws.com/Dev/BrightcoveExtension. This complete URL will become the value of our ProxyURL config parameter during the Extension setup.
With these steps, we have successfully set up our AWS lambda function and the API Gateway. Let's move ahead and create an extension in Contentstack.
Add the “Brightcove” custom field extension to your stack
To add this extension to your stack, log in to your Contentstack account and perform the following steps:
- Go to your stack, and click on the Settings icon on the left navigation panel.
- Click on Extensions. You can also use the shortcut keys “alt + X” for Windows OS users, and “option + X” for Mac OS users to access the extensions menu.
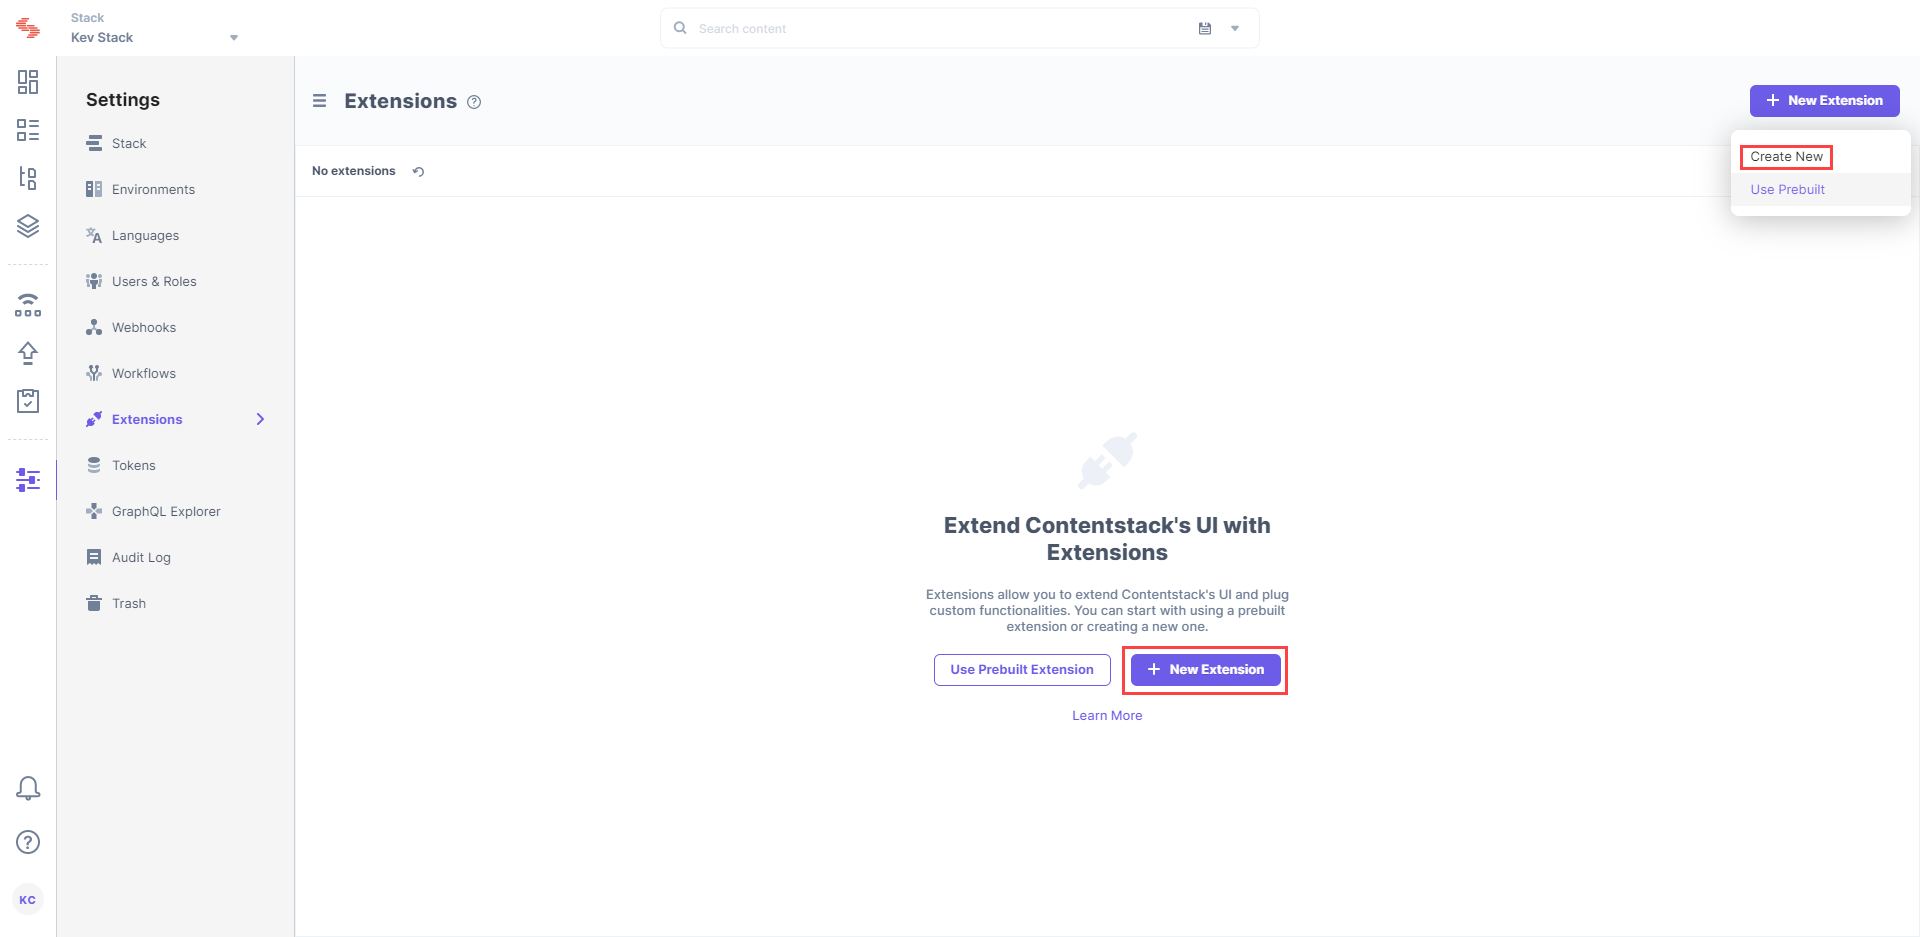
- On the Extensions page, click on the + New Extension button, and select Create new.
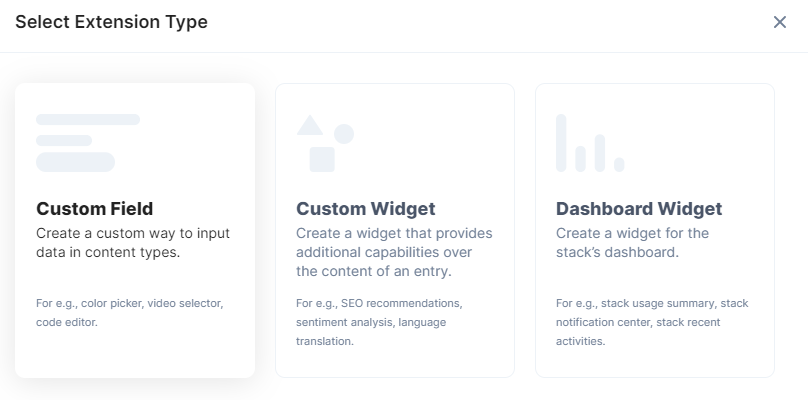
- In the Select Extension Type window, select Custom Field.
- On the Create New Extension page, enter values in the fields as given below:
- Title (required): Provide a suitable title, for example “Brightcove,” for your custom field. This title will be visible when you select the extension in the custom field in your content type.
- Field data type (required): Select the data type in which the input data of the field should be saved in Contentstack. In this case, select JSON.
- Multiple (optional): Select this option.
- Hosting method (required): Select Hosted by Contentstack as the hosting method for this content type.
- Extension Source Code (required): Specify the extension code here. Copy the source code from the index.html file located in the root folder, of the code file you received from our support team, and paste it in the Extension source code field.
- Config Parameter: Enter the configuration details in your custom field settings as shown in the example below:
{
    "proxyUrl": "Enter the Invoke URL after appending the lambda function name",
    "oauthUrl": "/v4/access_token",
    "brightcoveUrl": "/v1/accounts/{Brightcove User ID}/videos",
   "videocountUrl": "/v1/accounts/{Brightcove User ID}/counts/videos",
   "searchUrl": "/v1/accounts/{Brightcove User ID}/videos?query=",
   "saveFullResponse": false,
   "redirectUrl": "Redirect URL"</p>
}
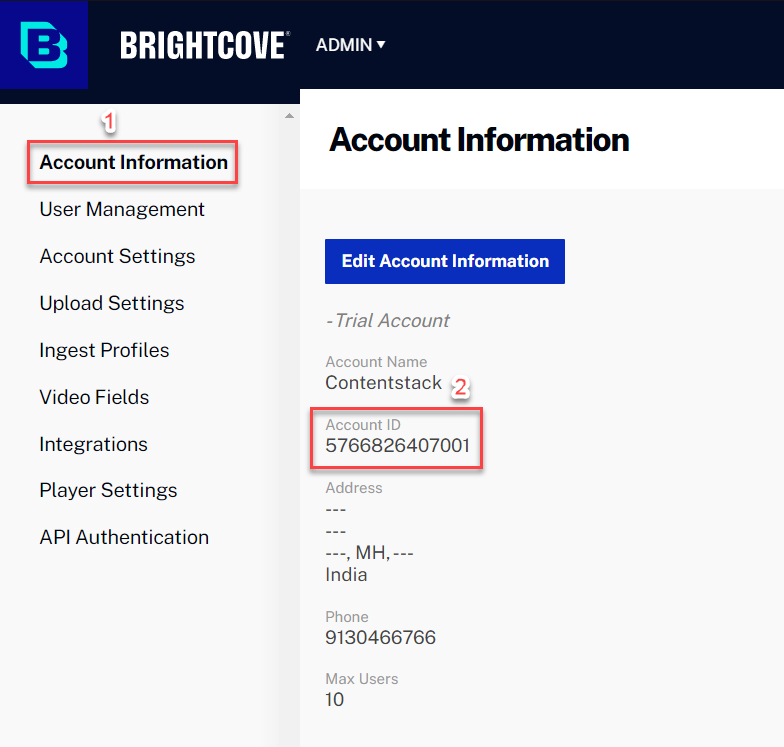
For Brightcove User ID, you need to enter your Brightcove Account ID. To get it, go to your Brightcove account dashboard, click on ADMIN and select Account Information. You'll find your Account ID as highlighted in the following screenshot:
For the redirectURL parameter, enter the URL of the index.html file that you uploaded as an asset.
Save the custom field.
Use your custom field
Once you have added a custom field, you can use it in your content type like any other field. To add a custom field in your content type, perform the following steps:
Click on the “Content Models” icon on the left panel and click the + New Content Type button.
Create a content type and add the Custom field to it by clicking on the “Insert a field” link denoted by a + sign.
Under Select Extension, select the “Brightcove” field that you created and set the other properties. You can add other fields as per requirements
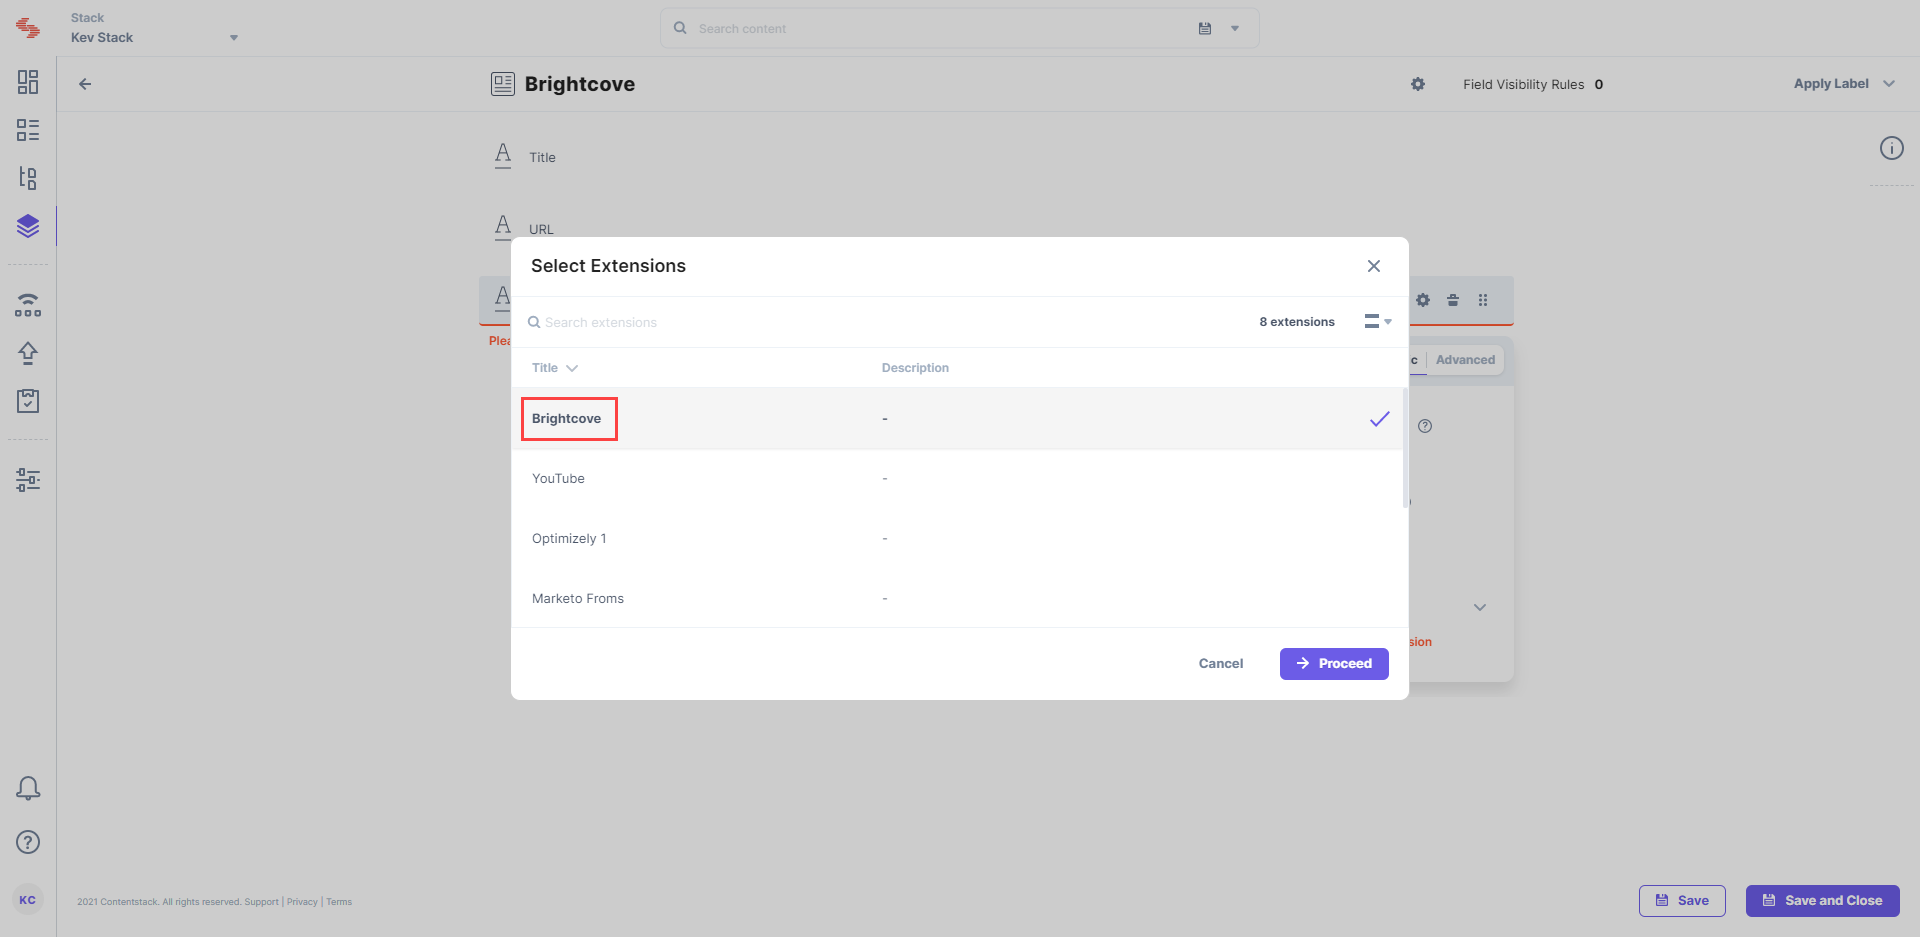
- Finally, click on Save and Close to save your changes.
- Next, create an entry for this content type, and you will see the Brightcove field in action.
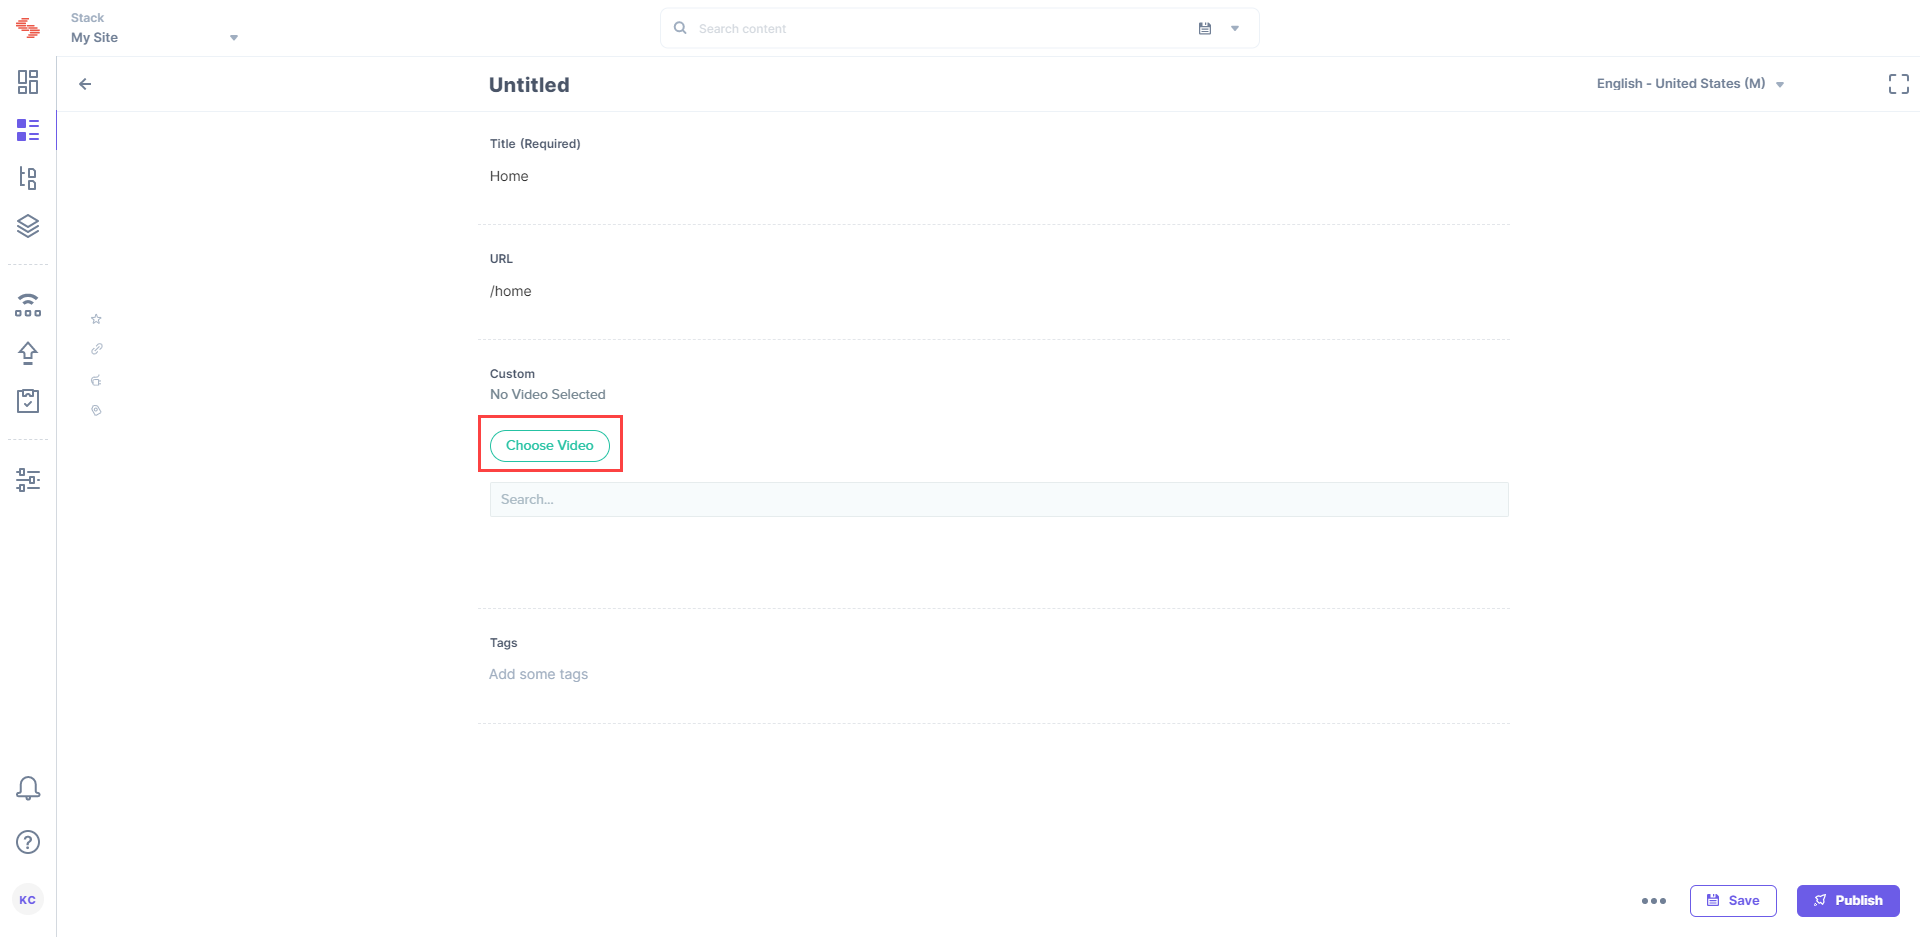
- Click on Choose Videos. Your Brightcove video playlist will appear. Select the videos you want to add in your entry and click on the Add Selected Videos button.
Additional Resource: You can also refer to our other documents on custom video extensions such as YouTube, Ooyala, and Vimeo.


