Was this article helpful?
Thanks for your feedback
Note: Only the owner of the organization has the right to set up SSO.
This is a general step-by-step guide explaining the process of setting up single sign-on in Contentstack with your SAML 2.0 Identity Provider.
In order to enable SSO for your organization, you would need the following:
In order to set up SSO for your Contentstack organization with any IdP, you need to proceed according to steps given below.
Let’s go through each of these steps in detail.
Log in to your Contentstack account, go to the Organization Settings page of your organization and click on the SINGLE SIGN-ON tab.
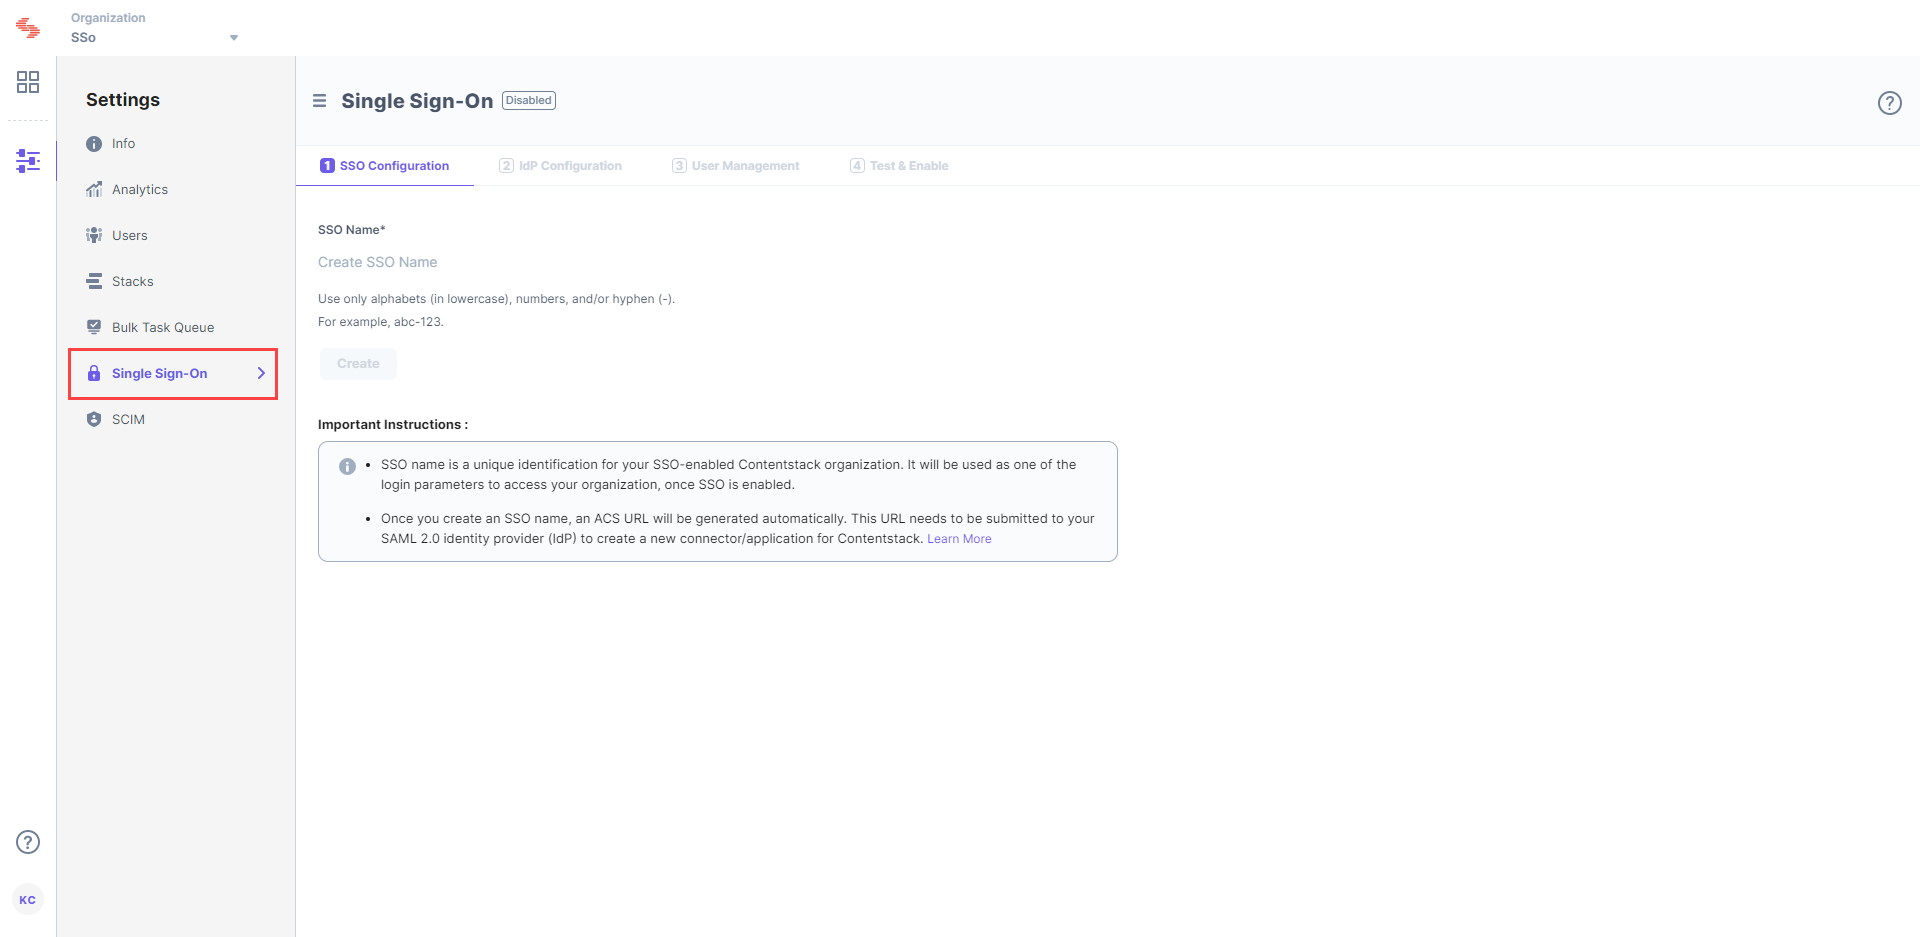
Enter an SSO name of your choice, and click Create. For example, if your company name is “Acme, Inc.,” enter “acme” here. This name will be used as one of the login credentials by the organization users while signing in.
Note: The SSO Name can contain only alphabets (in lowercase), numbers (0-9), and/or hyphens (-).
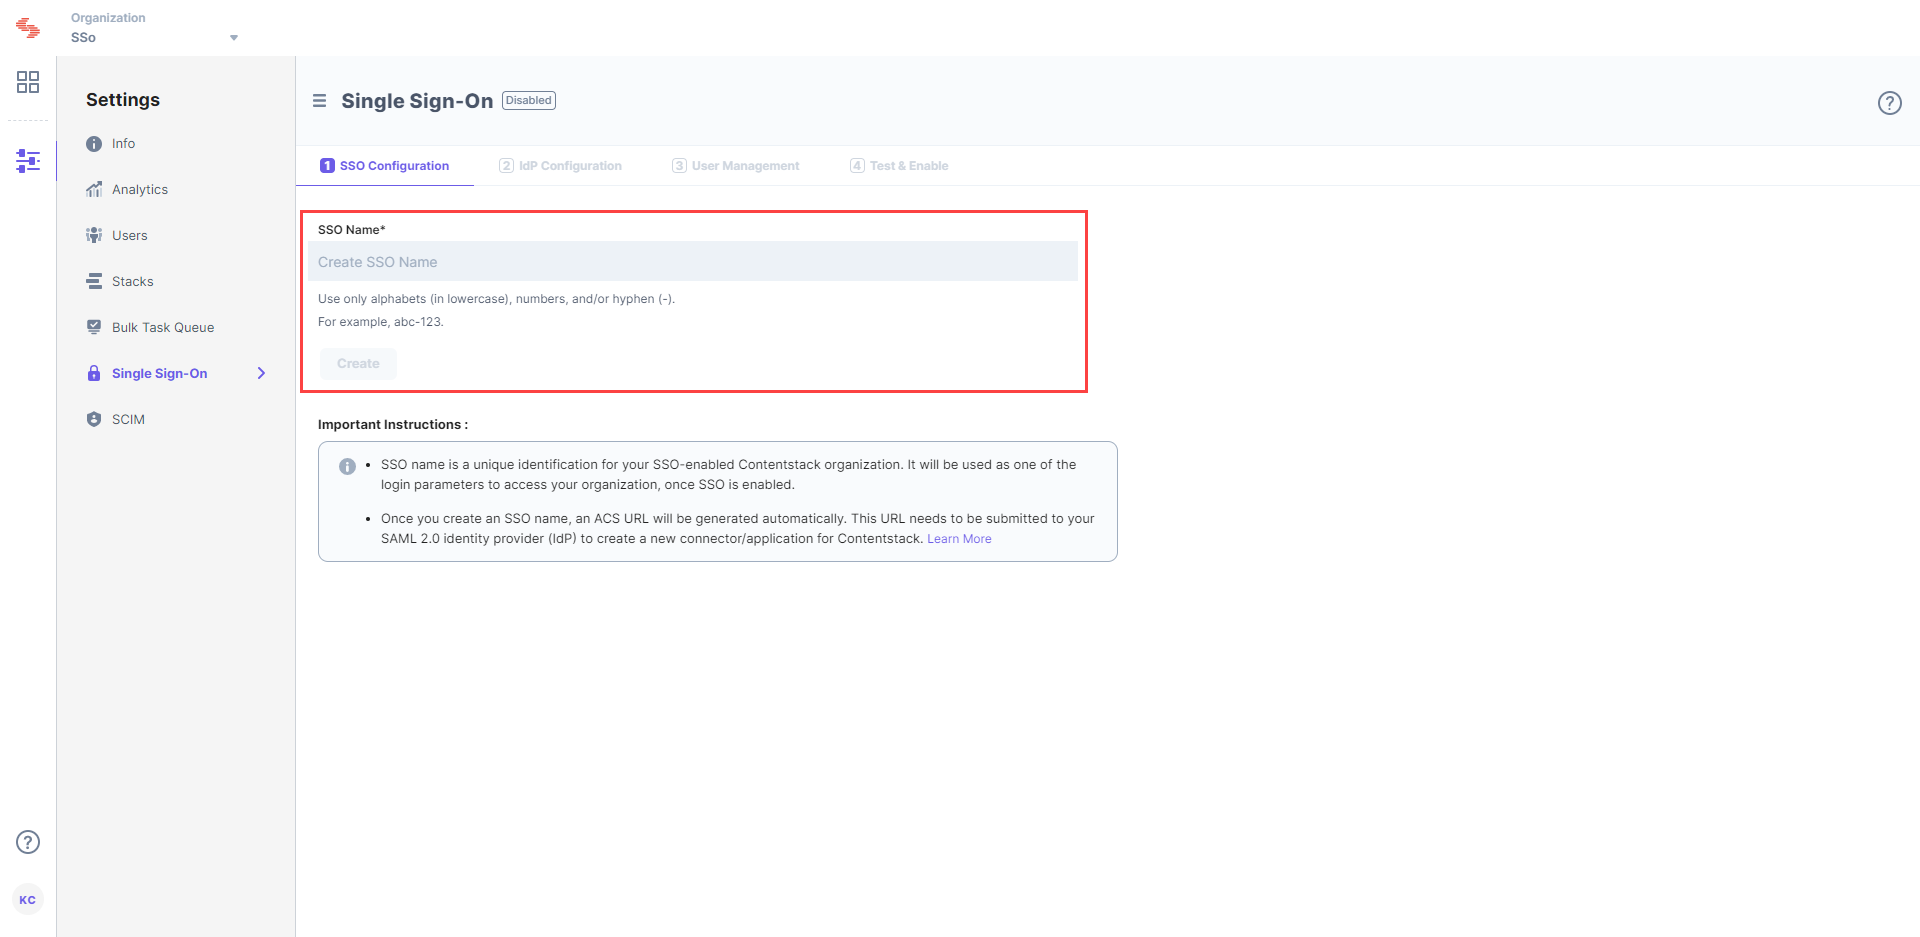
Let's use “test-sso” as the SSO Name.
This will generate the Assertion Consumer Service (ACS) URL and other details such as “Entity ID,” “Attributes,” and “NameID Format”. You will need these details in Step 2 for configuring the Contentstack app in your Identity Provider.
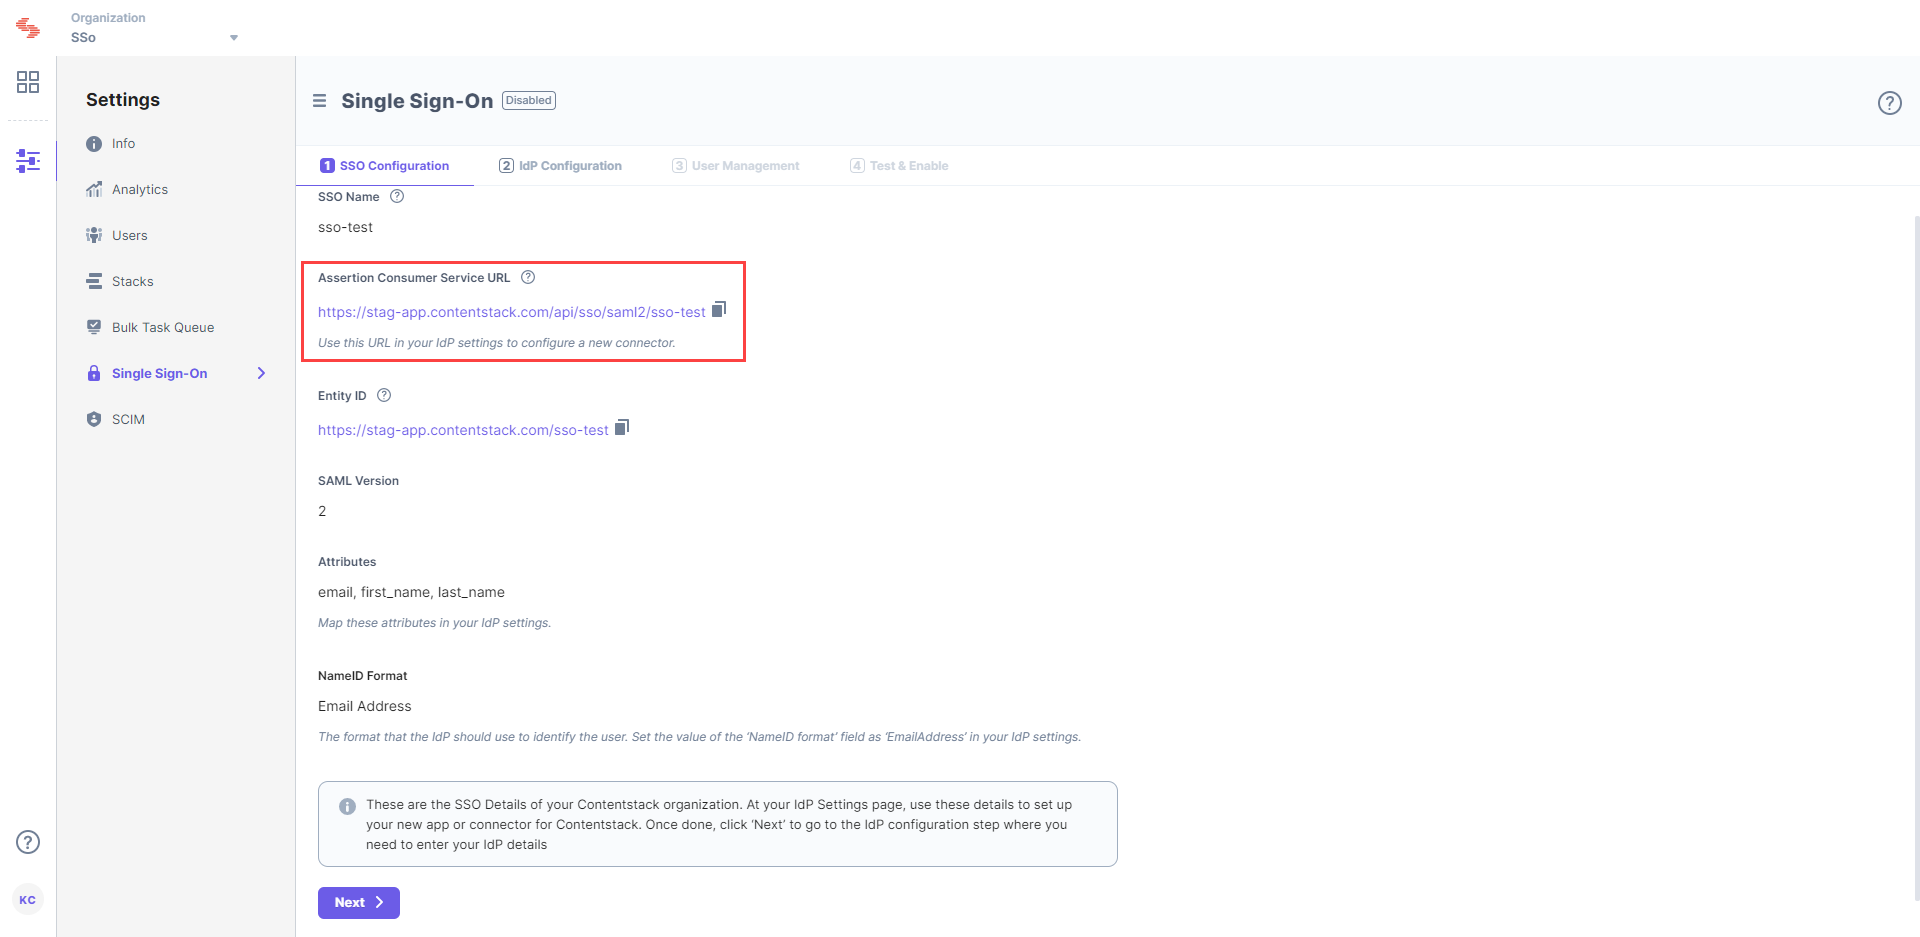
Keep this window open, as you may need these details for setting up the Contentstack app in your IdP in the next step.
In SAML settings, you need to provide the "SSO Configuration" details that you received from Contentstack in Step 1.
In your IdP, provide the following details:
[Optional Step] If you want to map IdP groups/roles to Contentstack roles, you need to add a new attribute called “roles” under Attribute Mapping, and return your IdP users’ roles or groups.
Note: Perform this step only if IdP Role Mapping is part of your Contentstack plan.
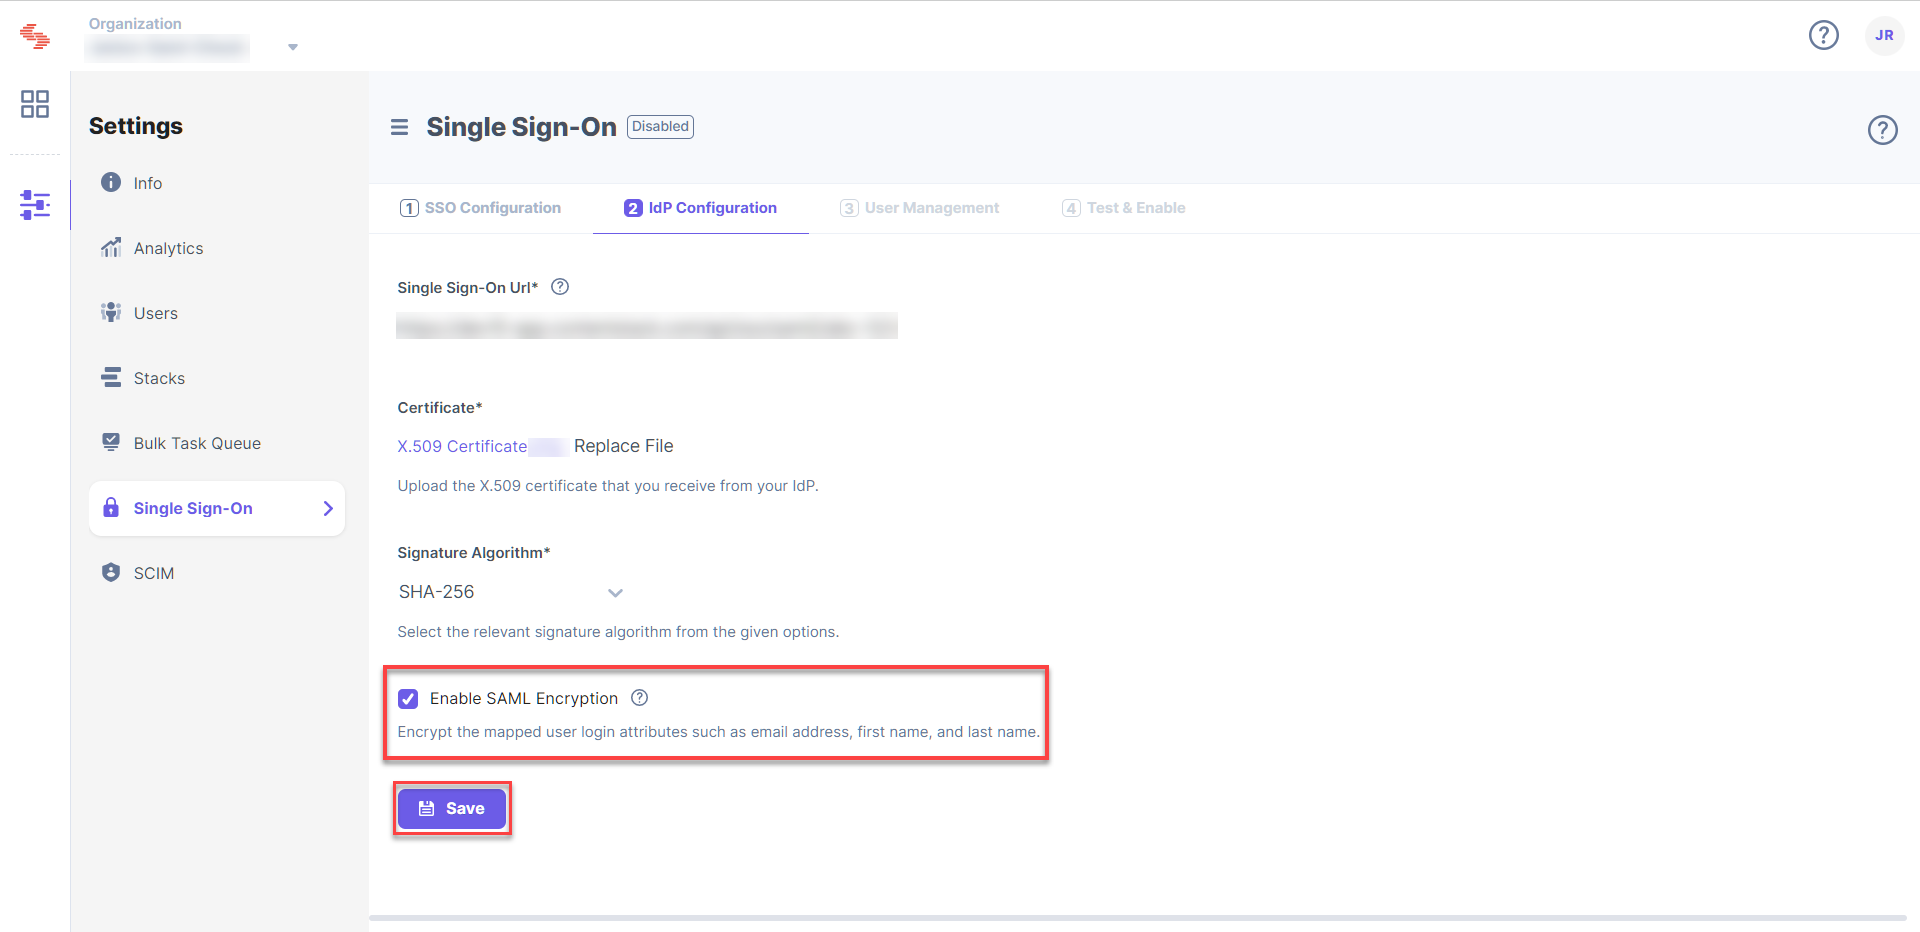
Tip: In some IdPs, you may have to assign the newly-created Contentstack application to the existing users of your IdP. You can find these settings under the Users section in IdP.
With this step, you have completed SSO settings in your IdP. However, you need to configure two more steps in Contentstack.
In Contentstack, go to 3. User Management. Here, you need to define important settings related to your users in your SSO-enabled organization. These settings include Strict Mode, Session Timeout, and Advanced Settings.
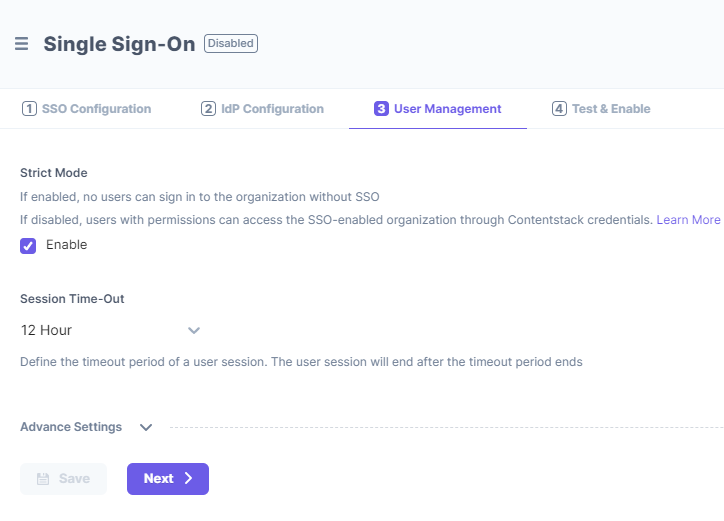
Strict Mode
Strict Mode lets you decide if you want to allow any non-IdP users (i.e., users that are not available in your IdP) to access the SSO-enabled organization in Contentstack.
Invite users to access organization without SSO
To allow users to access your SSO-enabled organization without SSO login (using Contentstack credentials), perform the following steps:
You can define the session duration of user signed in through SSO. By default, this is set to 12 hours. However, you can set anywhere between 1 hour and 24 hours. The session begins when the user logs in to Contentstack via SSO and will timeout after 12 hours (or the time period that you specify here).
Under Advanced settings, you will find more advanced settings related to user management, which includes IdP Role Mapping.
Note: The IdP Role Mapping feature is available only if it is part of your Contentstack plan. Consequently, only then will you find the Role Mapping section under Advanced settings. If you want to include this feature in your plan, contact
our Support team
IdP Role Mapping allows you to assign Contentstack roles to the users of a group/role in your IdP.
Before you add new role mappings, you must add the “roles” attributes in the “Attribute Mappings” section in your IdP. The steps are covered in Step 2 above.
To add new IdP role mapping, click on the + ADD ROLE MAPPING link. Enter the following details:
On the IdP side, you need to add “Group Mapping” or “Group Attributes” to map the roles.
Likewise, you can add more role mappings for your Contentstack organization.
In the Role Delimiter section, mention the character that serves as the delimiter for the roles. Depending on the IdP selected, the delimiter can be a space, comma (','), semicolon (;), or something else.
Finally, select the Enable IdP Role Mapping checkbox to enable this feature.
Note: After enabling IdP Role Mapping, the role management (in Contentstack) for the users of your IdP will be handled from your IdP, instead of from Contentstack.
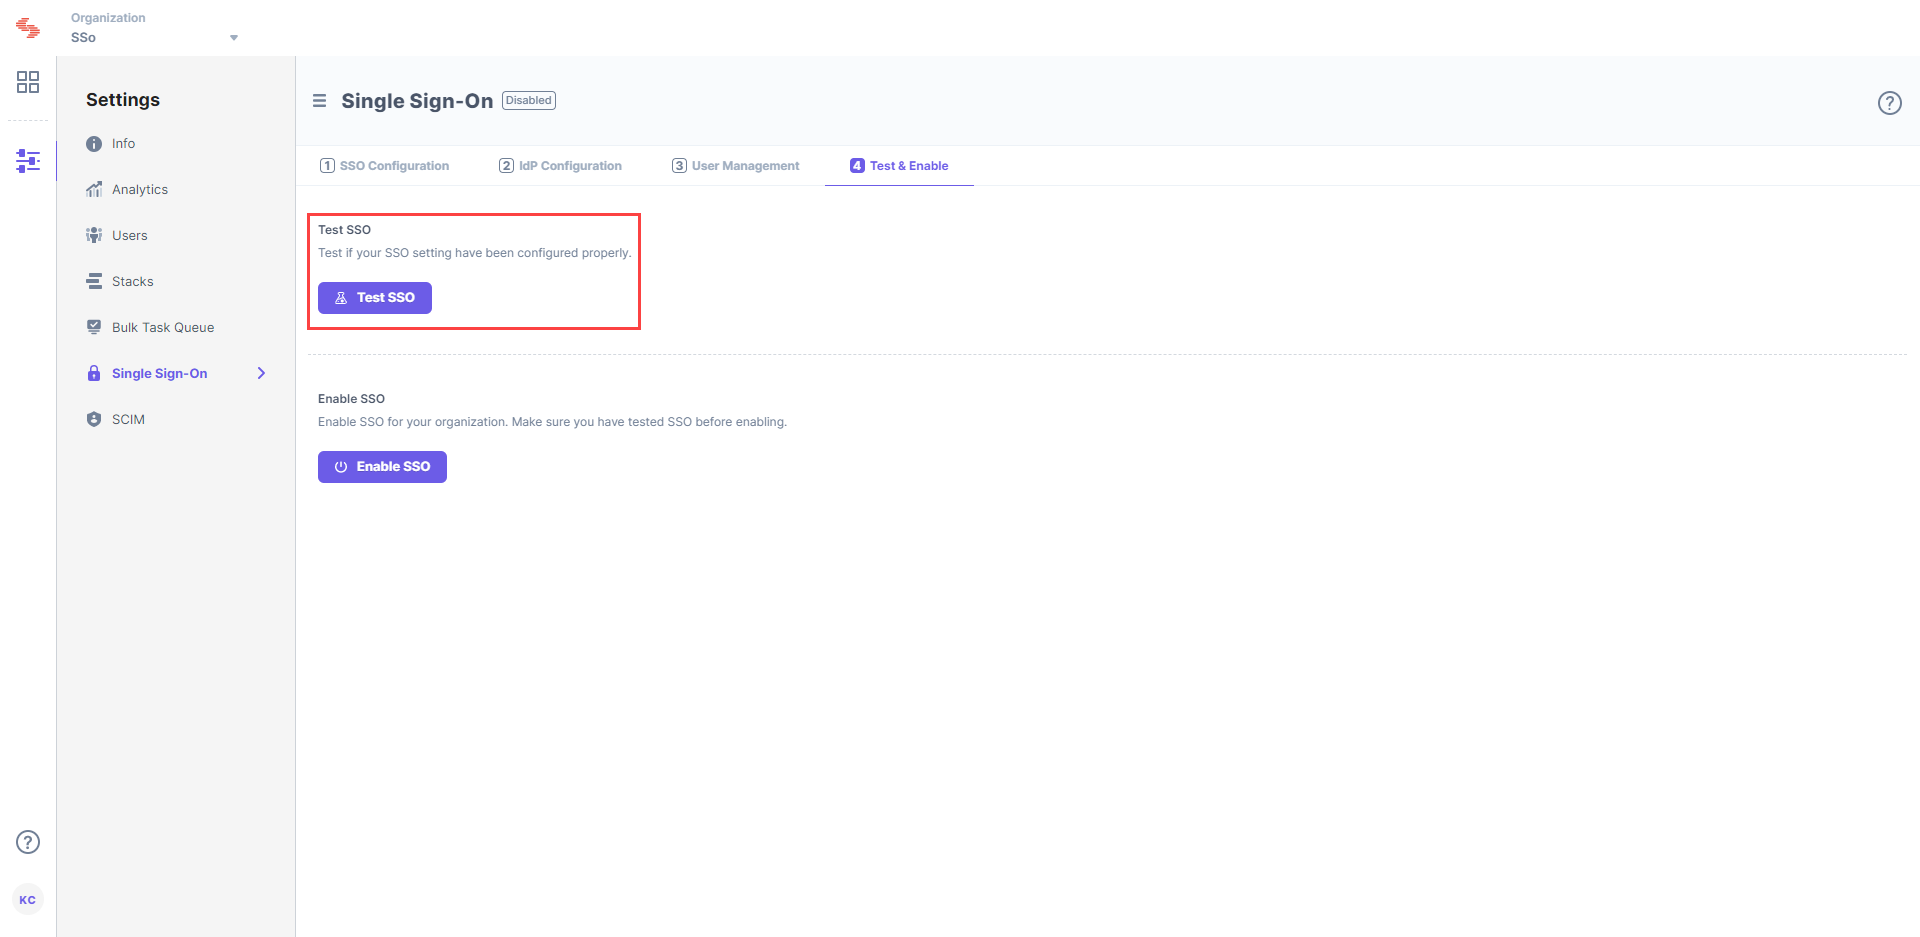
Before enabling SSO, it is recommended that you test it. To test it, perform the following steps:
Sign in to your account. If you are able to sign in to your IdP, your test is successful.
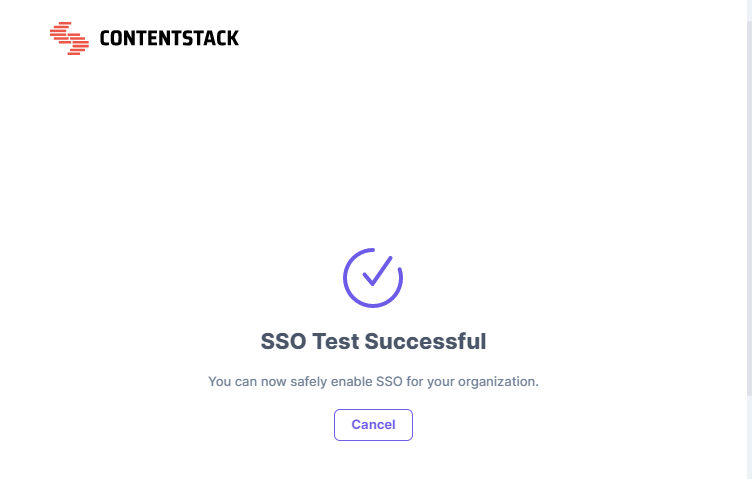
On successful connection, you will see a success message as follows:
If you have enabled IdP Role Mapping, you’ll find the following details in a new page:
Now, you can safely enable SSO for your organization.
Note: While testing SSO settings with IdP Role Mapping enabled, the test will be performed only for the IdP roles of the currently logged-in user (i.e., the user performing the test).
Click on Enable SSO to enable SSO for your Contentstack organization. Once this is enabled, users of this organization can access the organization through SSO login. You can disable SSO from the same page when required.
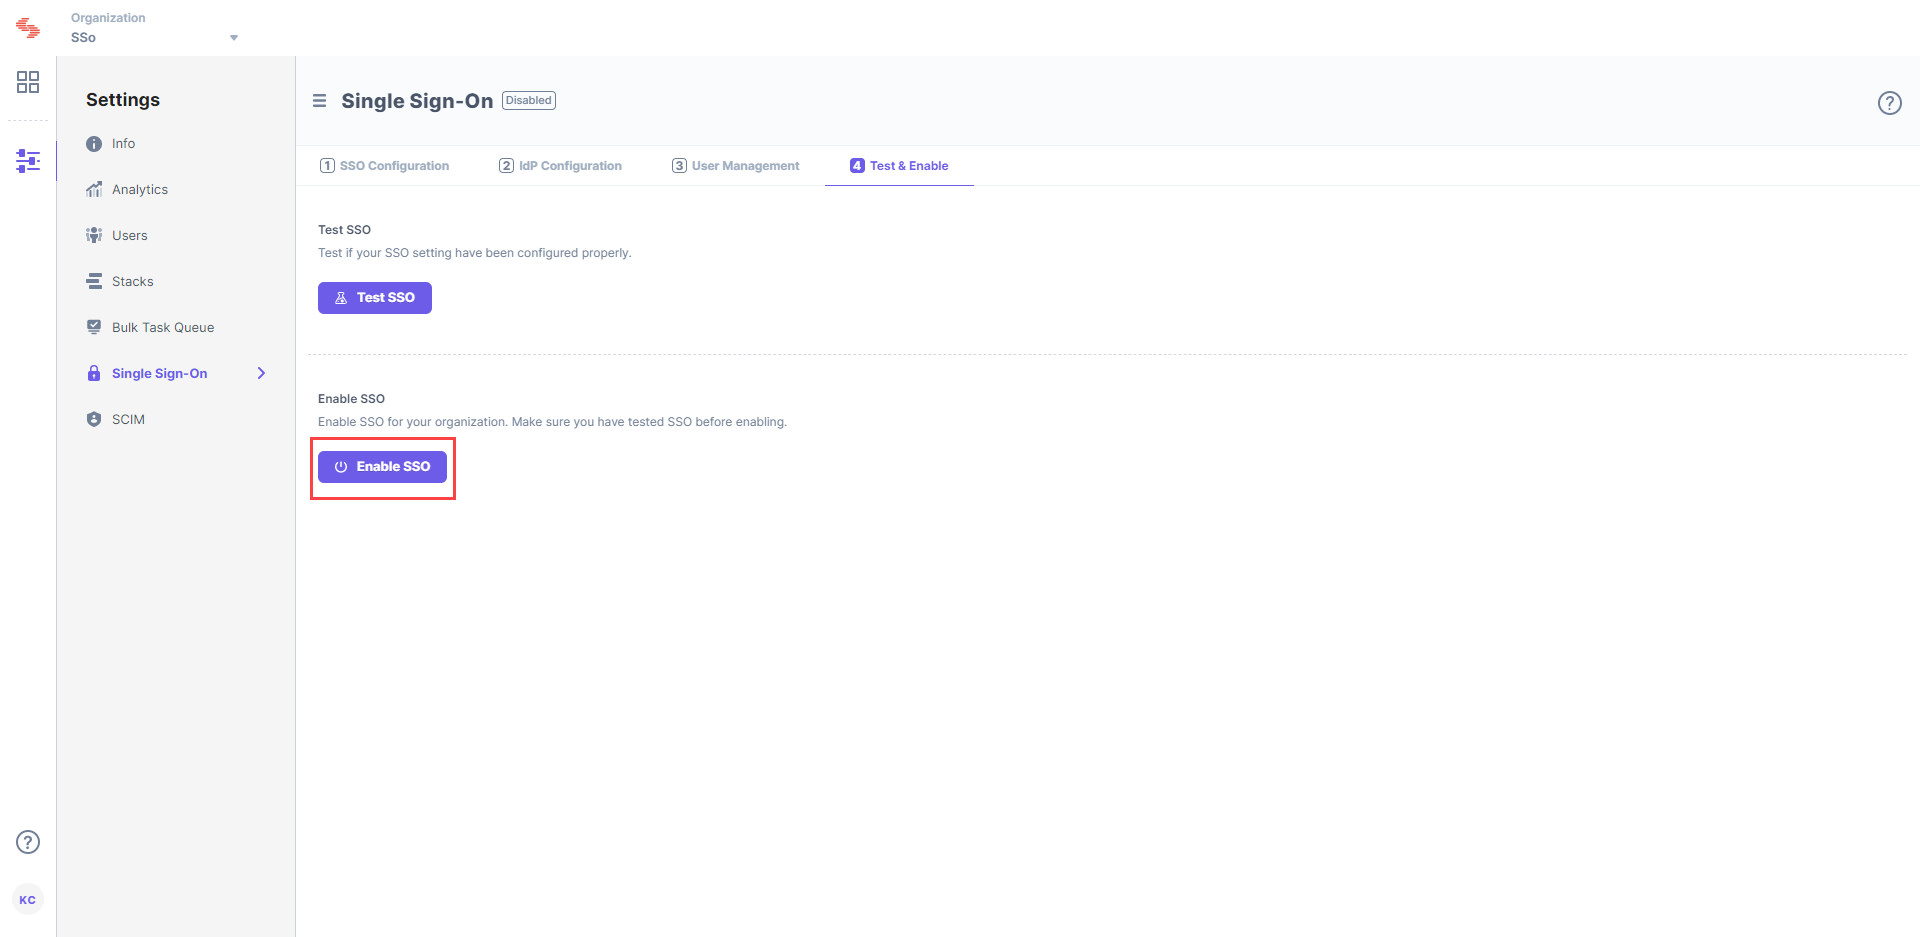
Note: If you've already logged into your SSO IdP, the trigger_sso_flow=<sso_name> query parameter automatically lets you log in to Contentstack via SSO, allowing you to skip the Contentstack login page.
After enabling SSO, you will see SSO One-click URL at the top of the SSO page. You can use this URL to directly go to Contentstack’s SSO login page. Bookmark this URL to skip multiple steps while logging in.
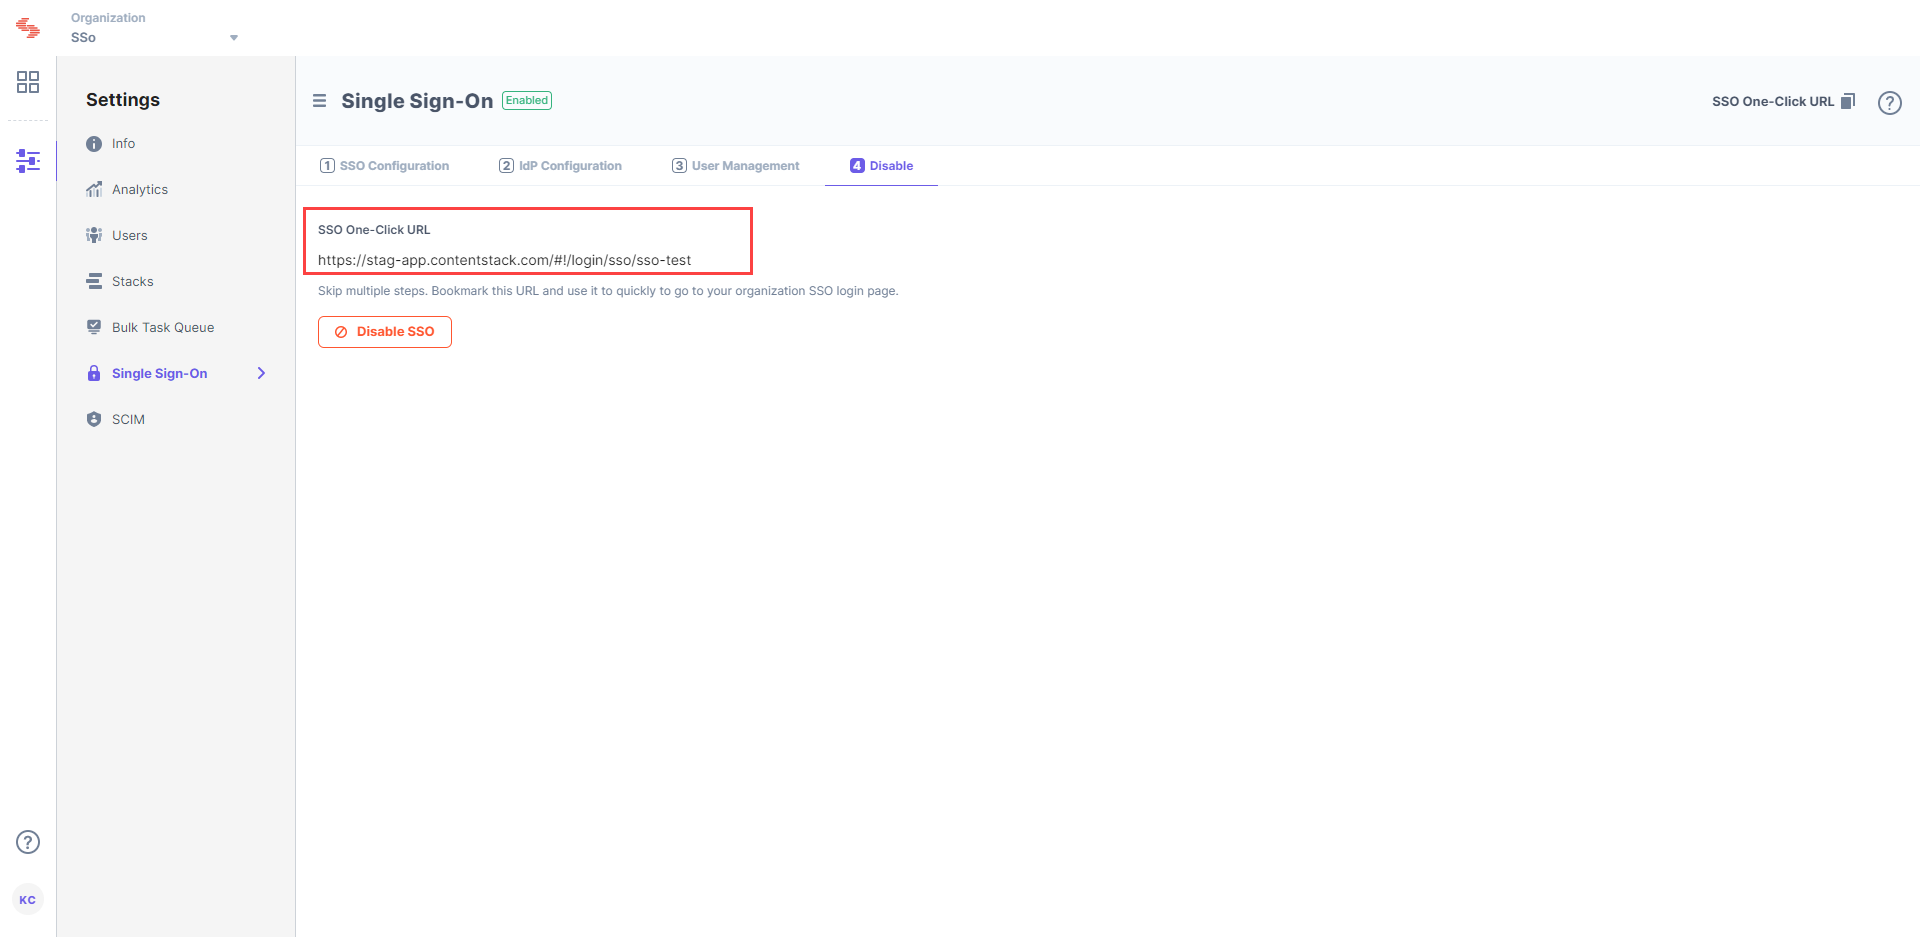
Note: Only the users invited to the SSO-enabled organization can access the organization if IdP Role Mapping is disabled. Your IdP users cannot directly access the organization if they have not been invited to this organization.
After enabling SSO, you will notice that 4. Test & Enable SSO changes to 4. Disable SSO in your SSO settings page. You can disable SSO for your organization anytime by clicking the Disable button.
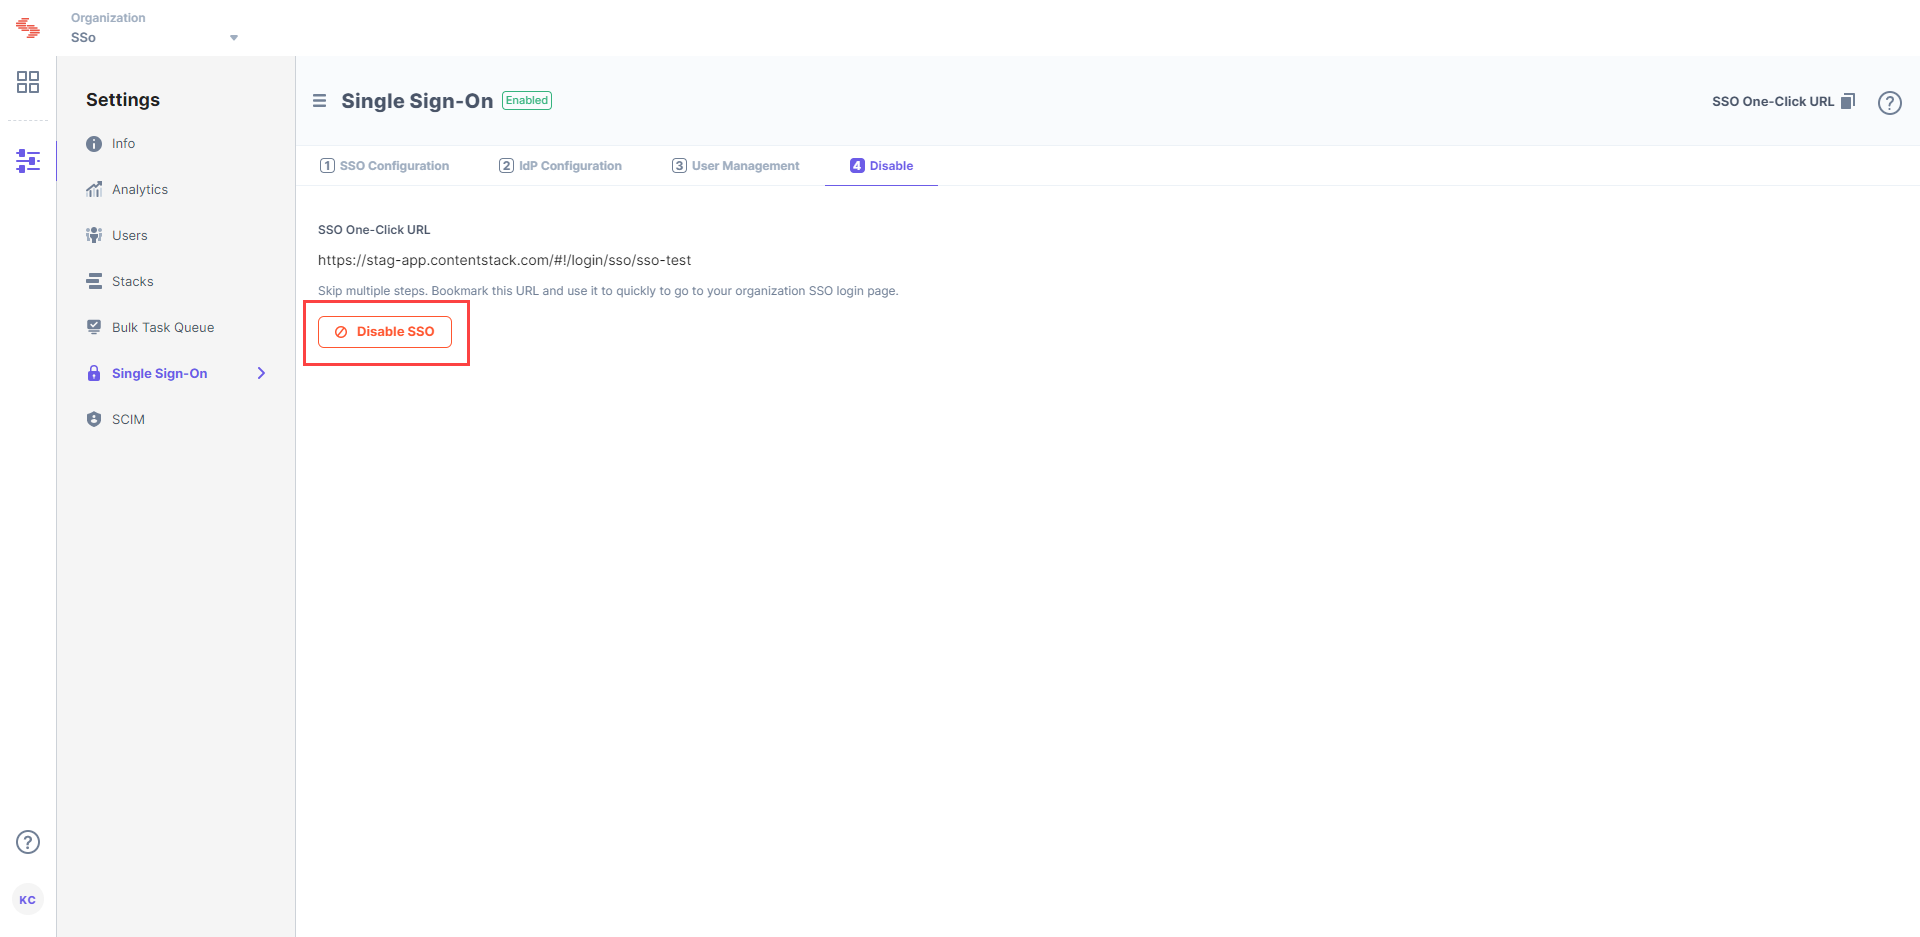
Once disabled, the existing users of your organization will have to use Contentstack credentials to sign in. In case the existing user does not have Contentstack credentials, the user will have to use the Forgot password link on the login page in Contentstack to create a new password for login.
Was this article helpful?
Thanks for your feedback