You can configure Contentstack as a provisioning app in Microsoft Azure Active Directory. This allows you to use Microsoft Azure AD to provision or deprovision users automatically with Contentstack.
Note: Before proceeding with this guide, ensure that SCIM is a part of your Contentstack plan.
Here’s a step-by-step guide that explains how you can do this.
- Enable SCIM in Contentstack
- Install Azure Generic SCIM App from Contentstack Marketplace
- Add Contentstack to Microsoft Azure AD
- Configure Provisioning in Microsoft Azure AD
- Add Users and Groups to your Application
- Create Group Mapping in Contentstack
Prerequisite
Enable SCIM in Contentstack
Note: Only the Owner or Admin users of an organization in Contentstack can perform this step.
To allow provisioning of users in Contentstack’s organization through Microsoft Azure AD, you need to enable SCIM in Contentstack by performing the following steps:
- Log in to your Contentstack account and go to the Organization Settings page.
- Go to the SCIM tab and select the Enable SCIM option.
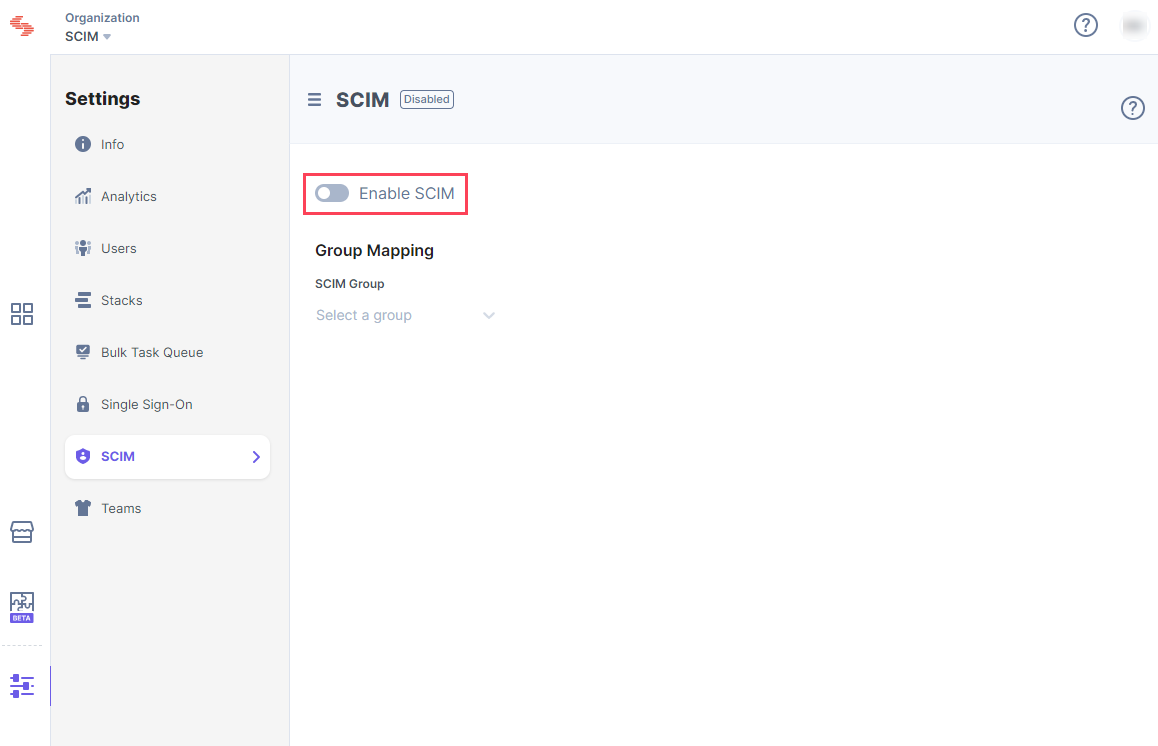
- On the resulting Enable SCIM modal, click Enable.
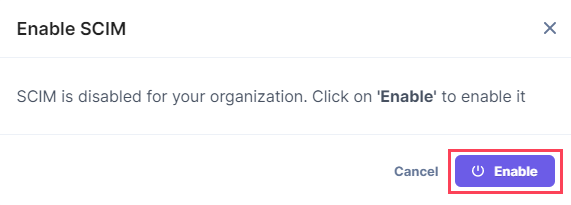
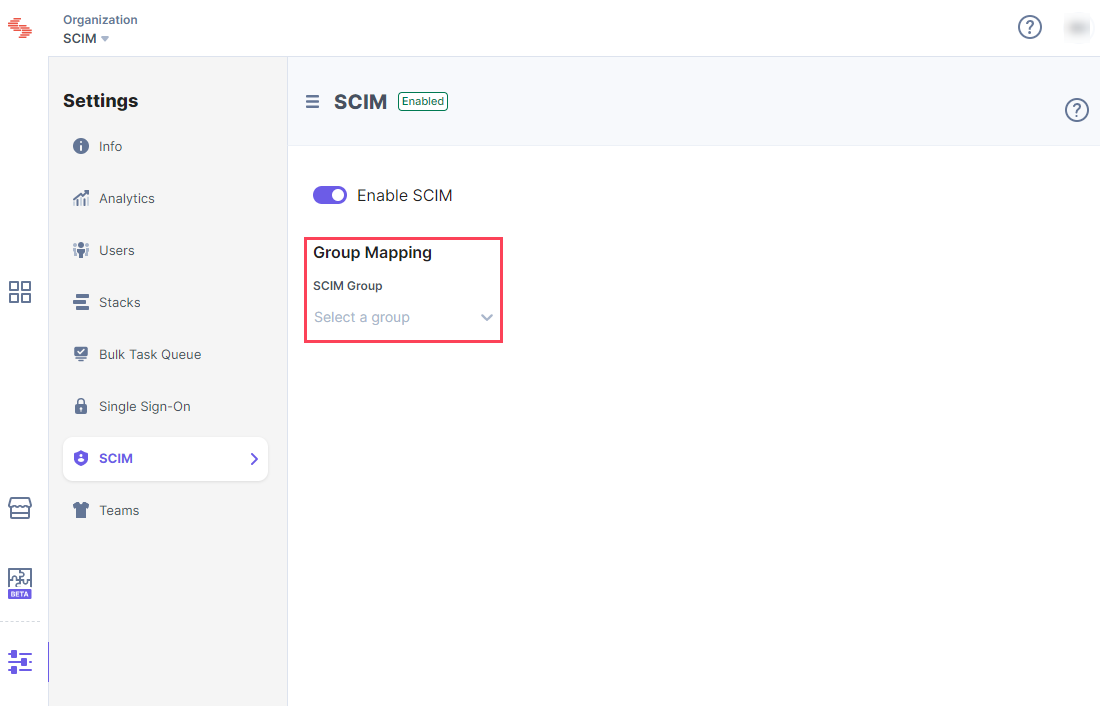
After enabling SCIM, you’ll see the Group Mapping section. This section will enable you to set permissions for a group of users provisioned via Microsoft Azure AD app.
Install Azure Generic SCIM App from Contentstack Marketplace
- On the left navigation panel, you will find the icon for Marketplace. Click the icon to navigate to Marketplace and then click Apps.
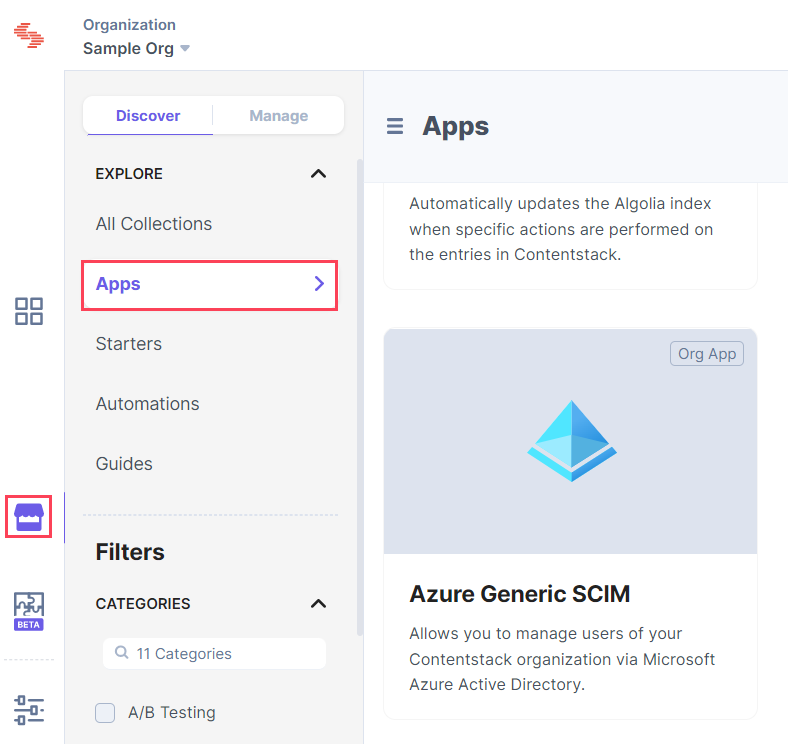
- Select Azure Generic SCIM and click Install App.
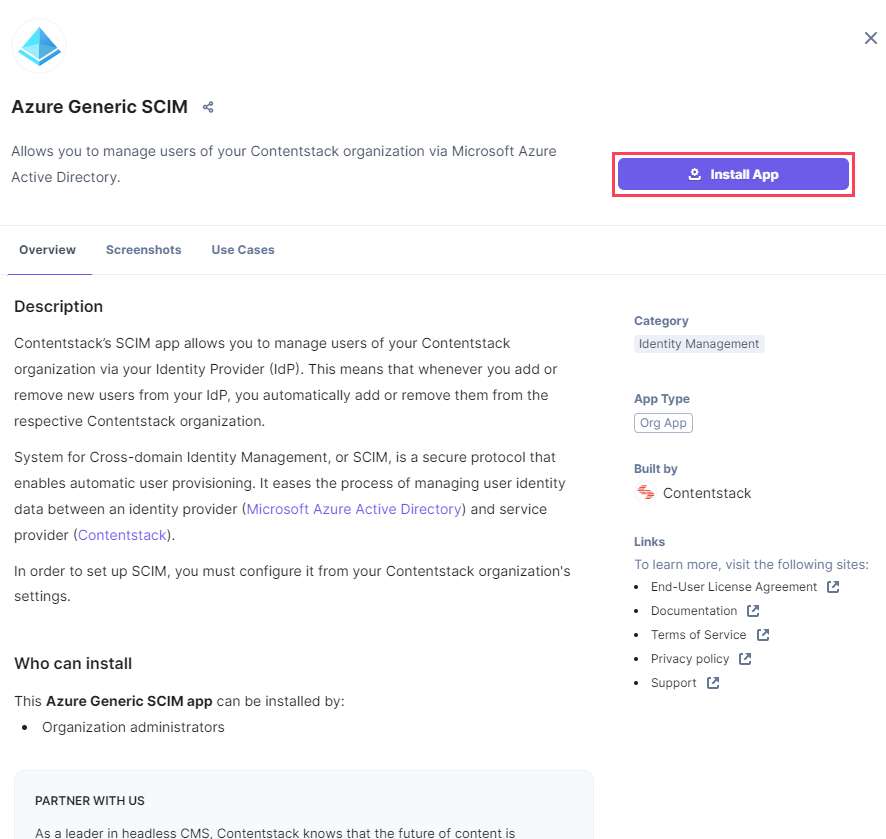
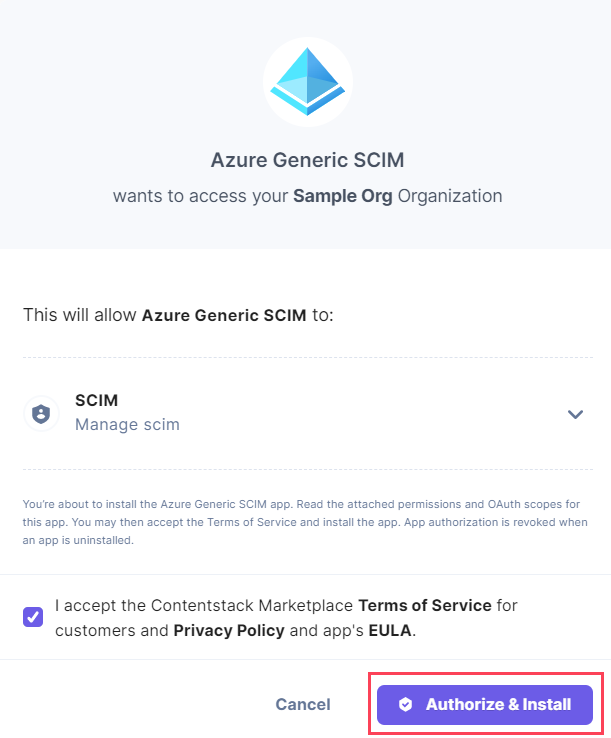
- In the resulting authorization window, click the Authorize & Install button.
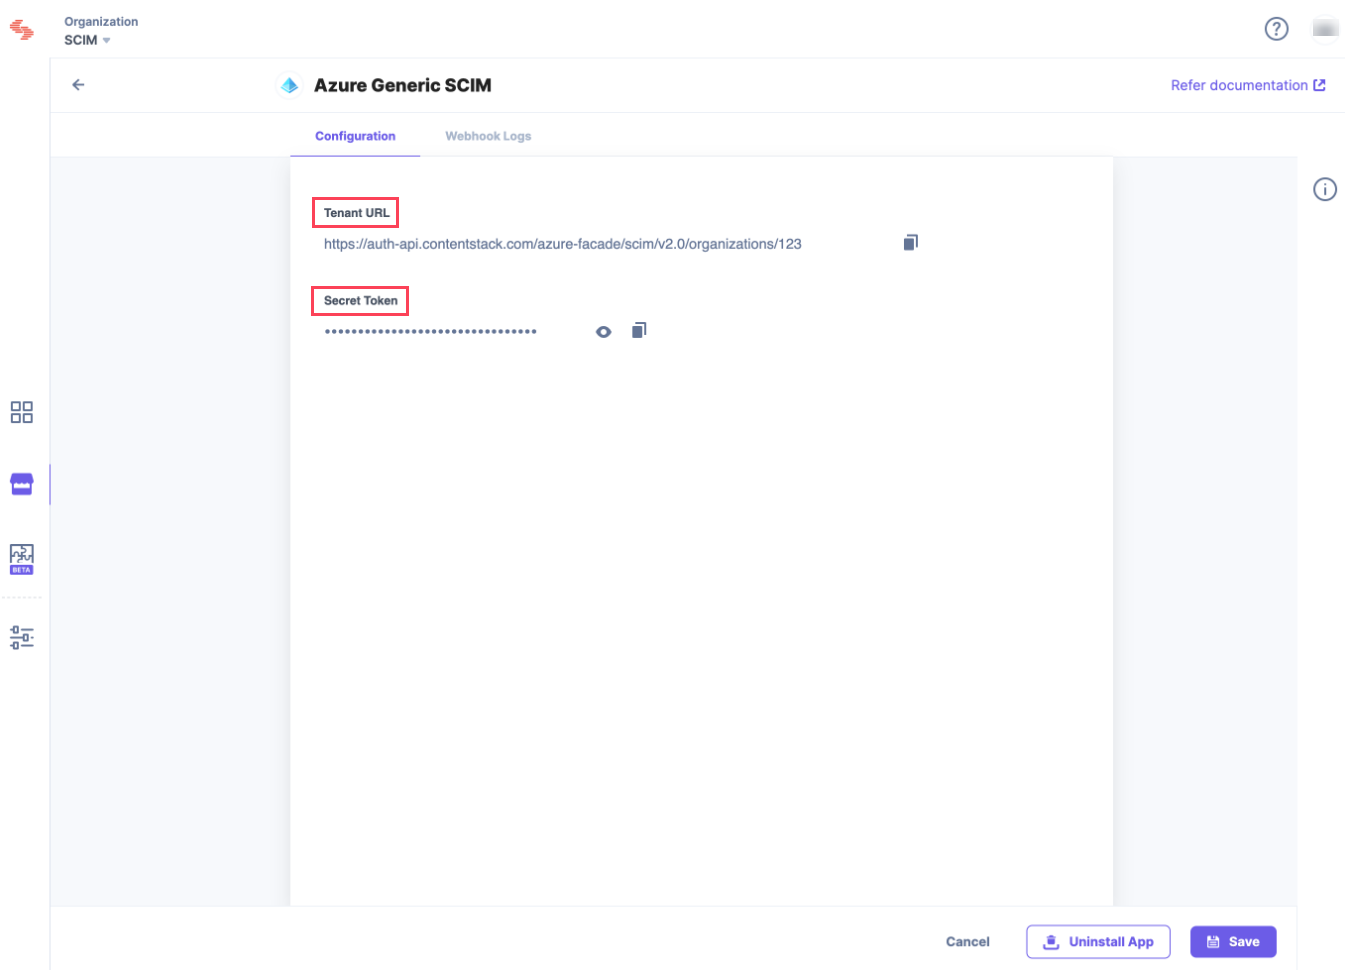
- A tenant URL and a secret token are generated on the successful installation of the app. Copy the tenant URL and the secret token for future reference.
Add Contentstack to Microsoft Azure AD
Note: In order to add Contentstack to the Azure AD application gallery, you must be a Microsoft Azure AD administrator. If you've already created an app for Contentstack to use SSO, you can skip this step.
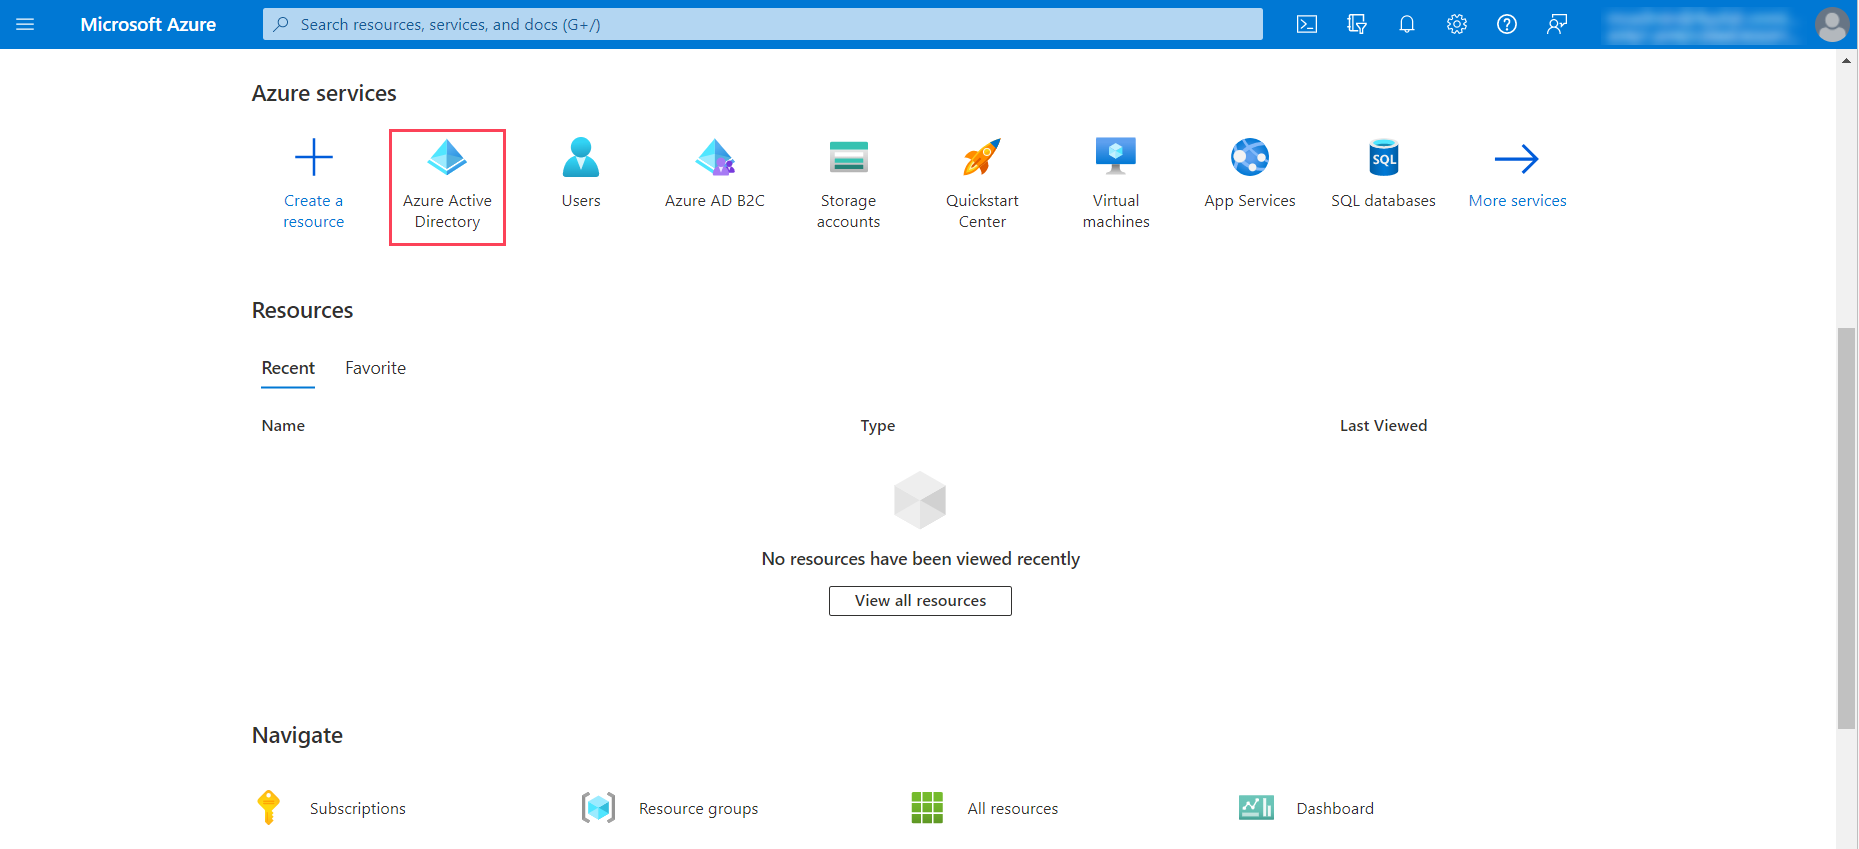
- Log in to the Microsoft Azure portal and click Azure Active Directory.
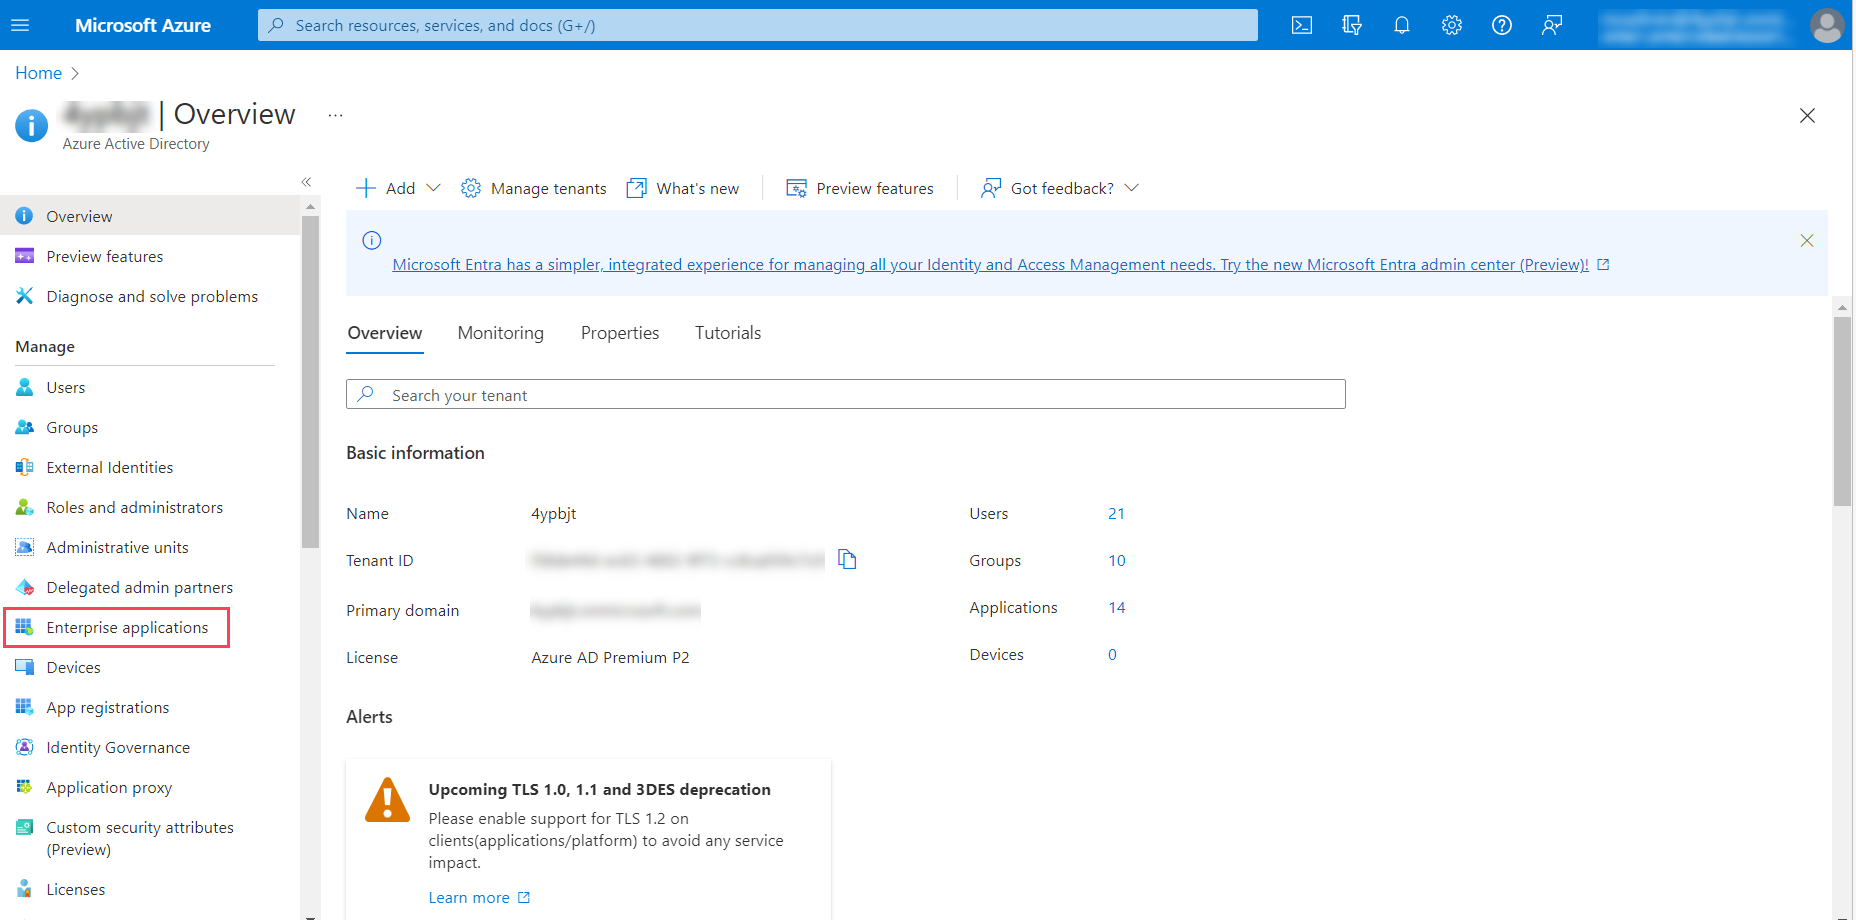
- Click Enterprise applications from the left navigation panel.
- Click + New application.

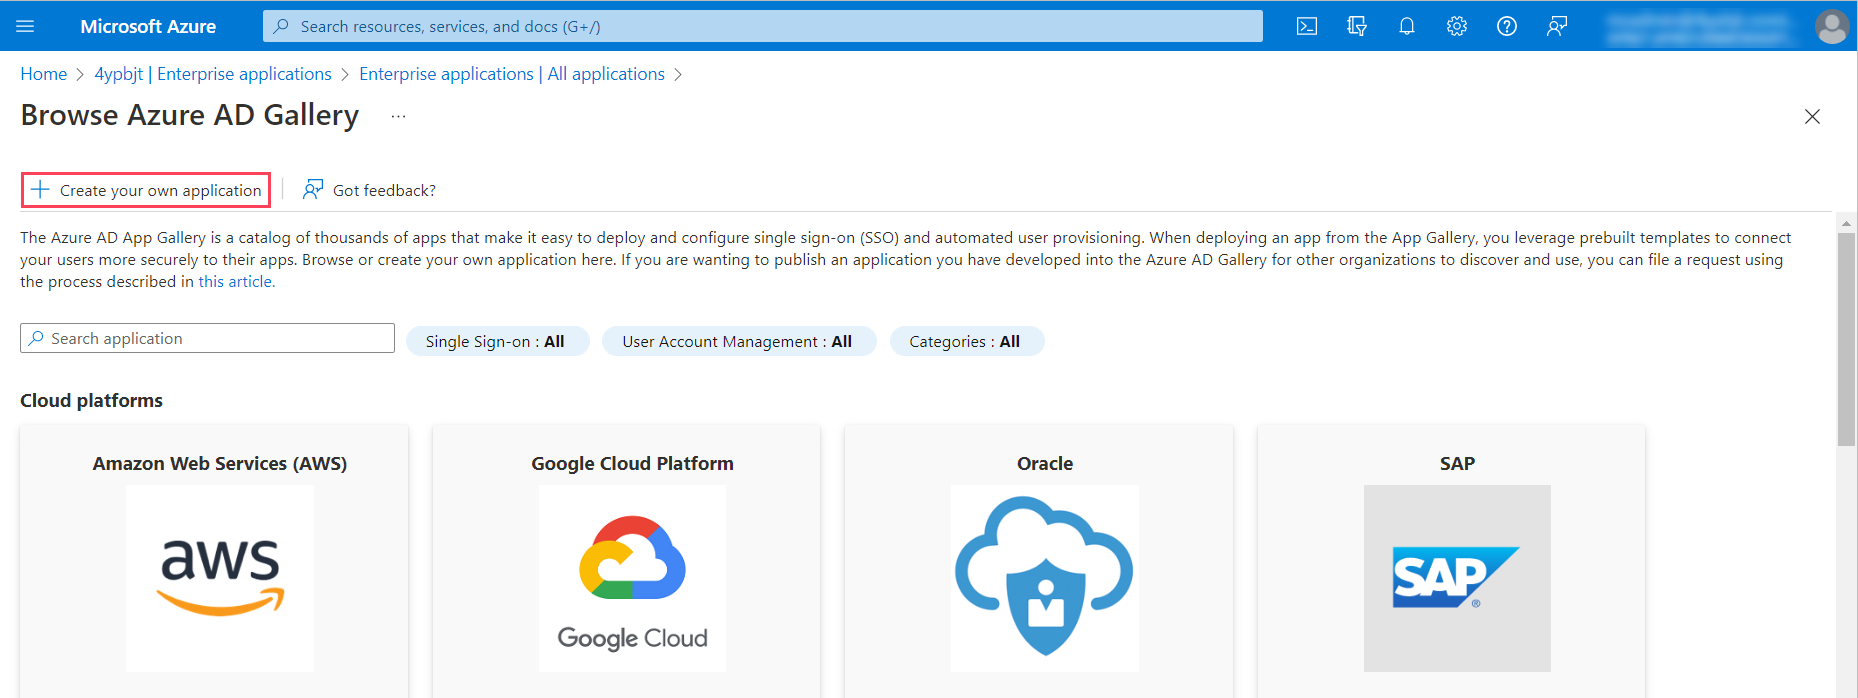
- Within the Azure AD Gallery, click Create your own application.
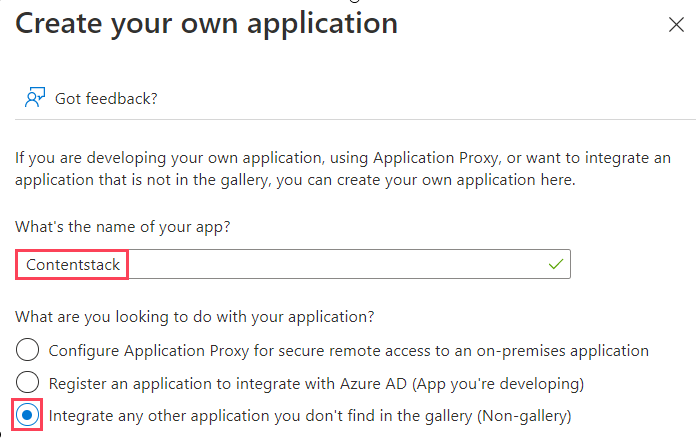
- In the resulting Create your own application panel, enter the application name, select the Non-Gallery option, and click Create to create the Contentstack app.
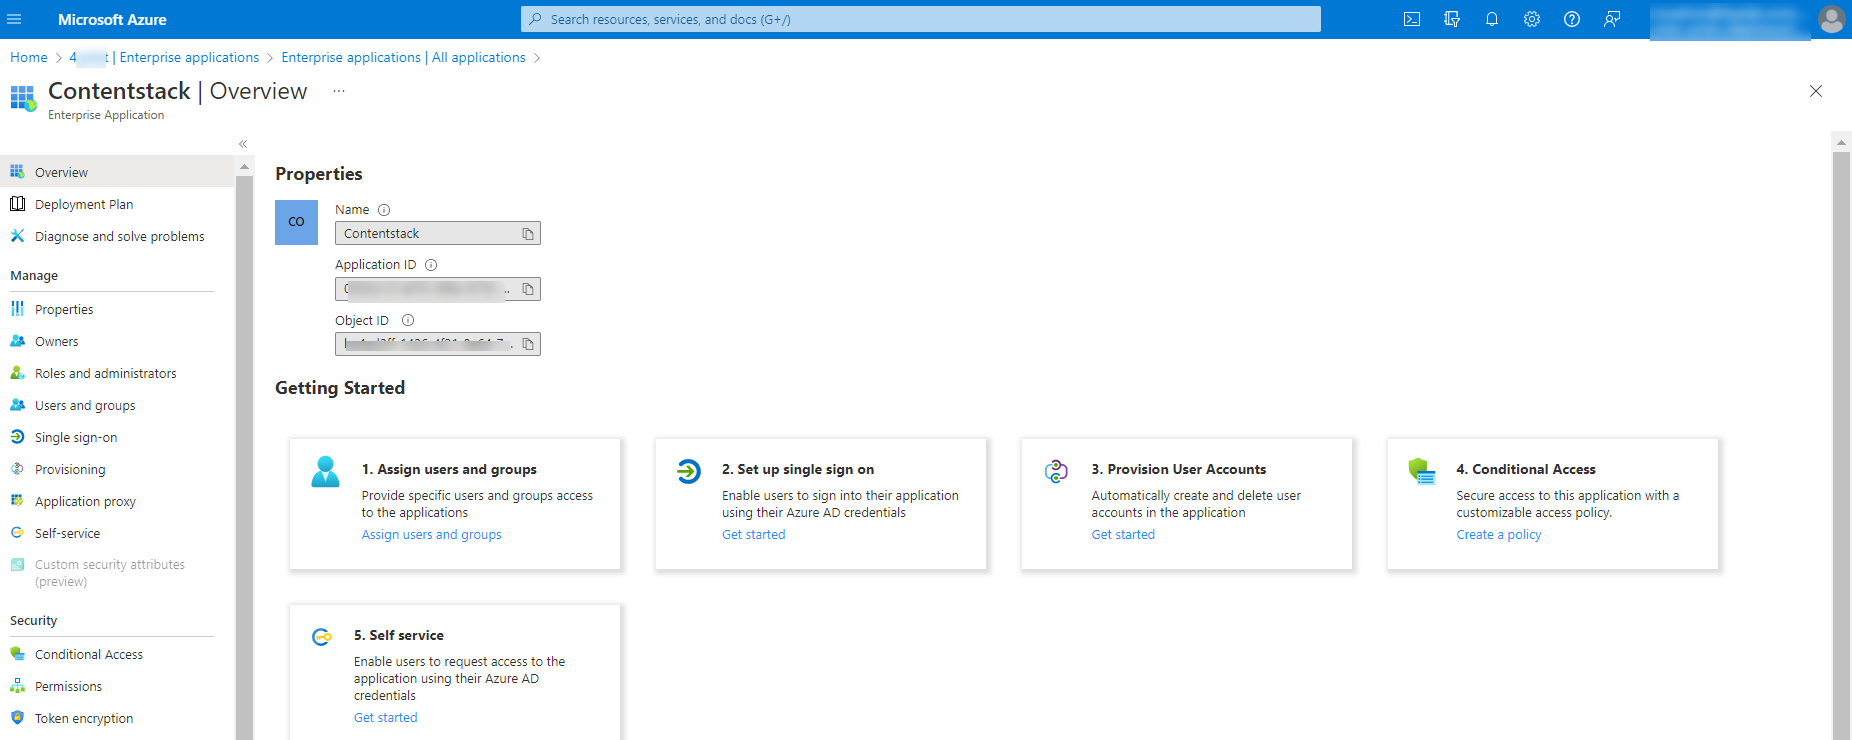
- Now, your Contentstack app is added to the Microsoft Azure Active Directory.
Configure Provisioning in Microsoft Azure AD
- Within your Contentstack app in Microsoft Azure AD, click Provisioning from the left navigation panel.
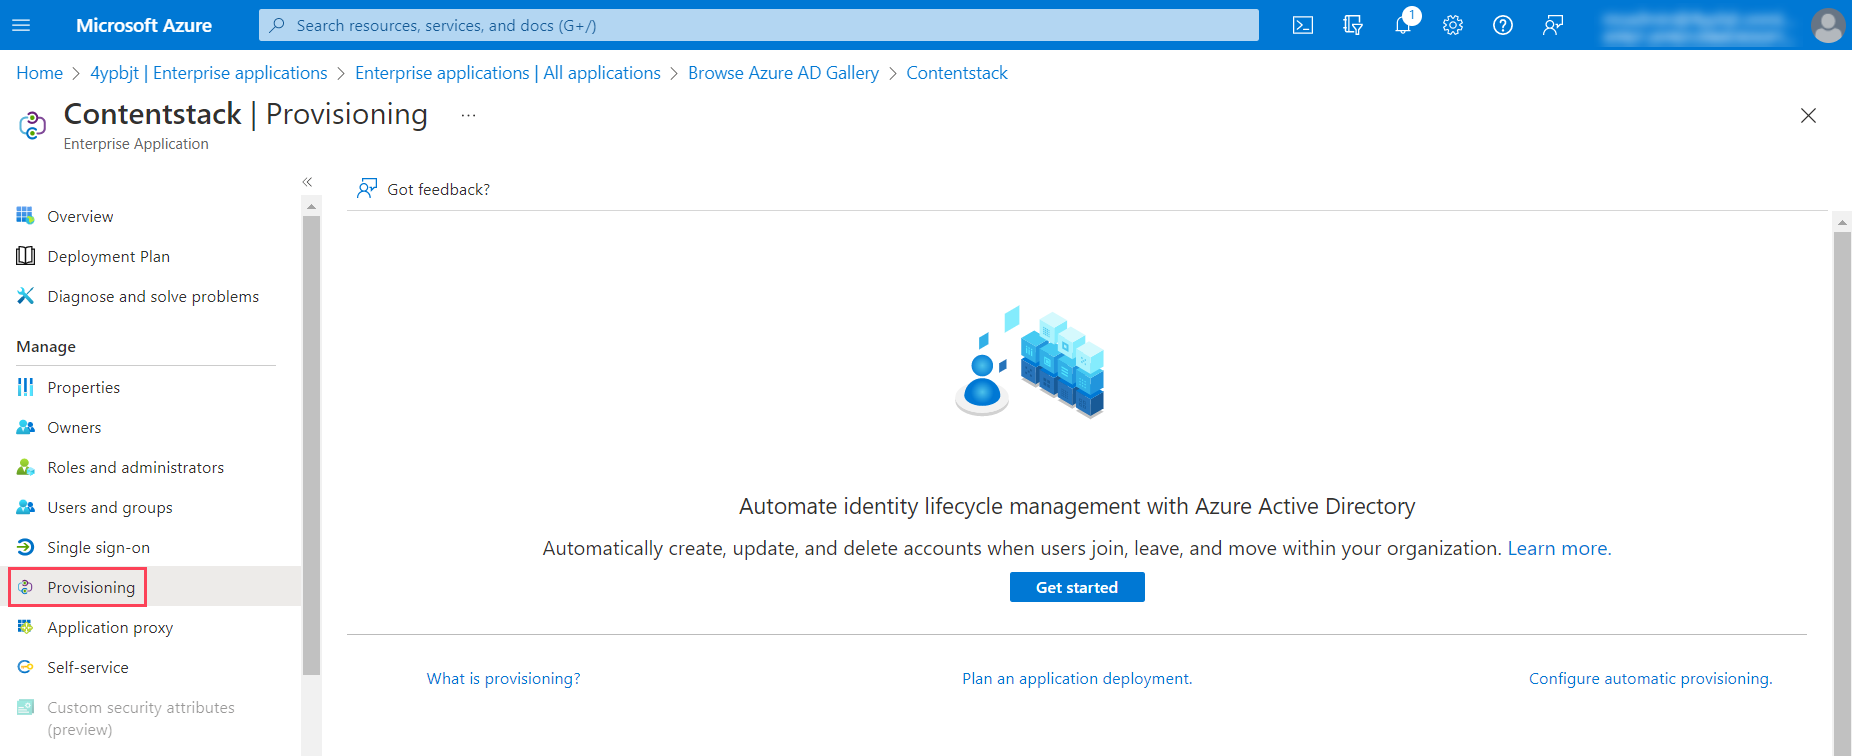
- Click Get started. It opens up in the Provisioning window. Change the Provisioning Mode to Automatic and provide the Admin credentials, such as Tenant URL and Secret Token of the installed Azure Generic SCIM app.
- Tenant URL: Contentstack’s SCIM URL is used as Tenant URL. Enter the tenant URL generated in step 2.4 while installing the Azure Generic SCIM app.
- For the Secret Token field, add the token generated in step 2.4 while installing the Azure Generic SCIM app.
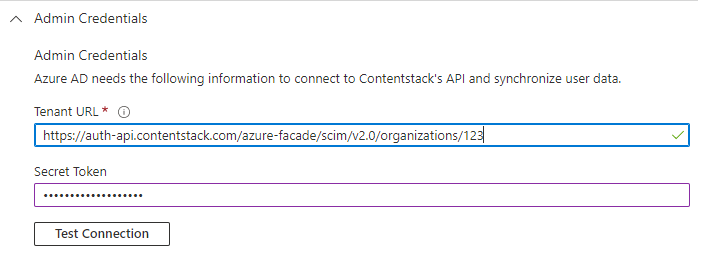
- Click Test Connection to ensure connection between the Azure AD and the Contentstack app. Click Save to save the app provisioning configurations.
- Under the Mappings section, select Provision Azure Active Directory Users.
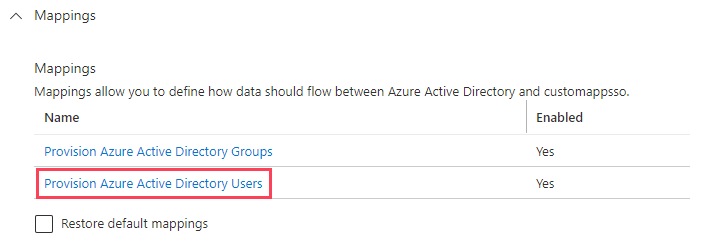
- In the Attribute-Mapping section, map user attributes, such as userName, givenName, surname, and IsSoftDeleted.

- Click Save to save the changes.
- Navigate back to the Mappings section and select Provision Azure Active Directory Groups.
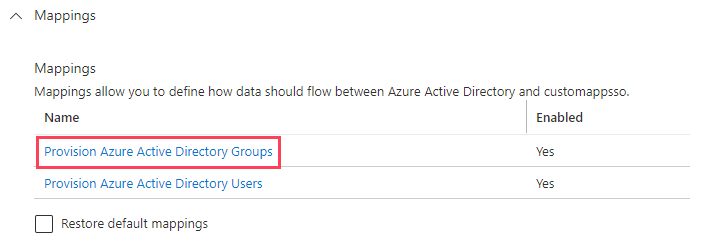
- In the Attribute-Mapping section, map group attributes such as displayName and members.

- Click Save to save the changes.
- Under the Settings section, for the Notification Email field, enter the email address of the person or group who should receive the provisioning error notifications. Check the “Send an email notification when a failure occurs” check box.

- For Scope, select a suitable option.

- Set the Provisioning Status to On for enabling Azure AD provisioning.
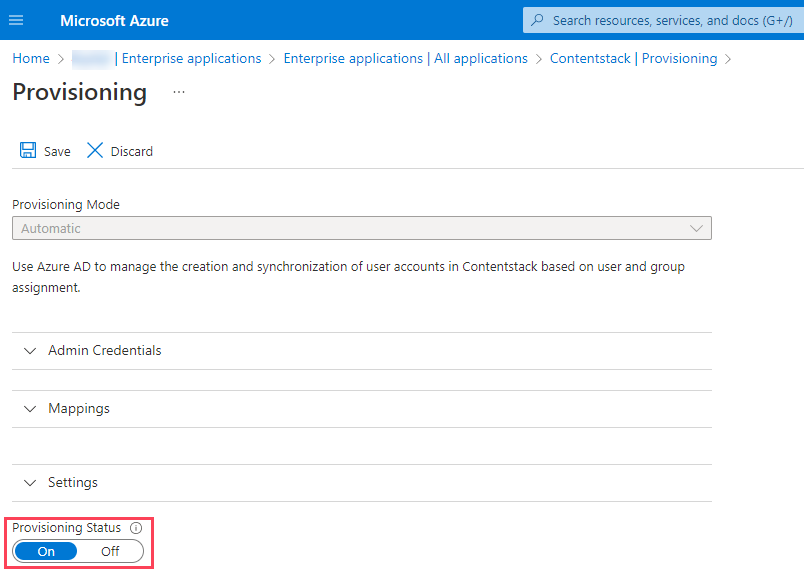
- Click Save to save the provisioning.
Add Users and Groups to your Application
After configuring the provisioning settings, you need to add users to your newly added application.
Note: Skip this step if you have selected "Sync All Users and Groups" in step 4.11.
To add Users and Groups to your Application, perform the following steps:
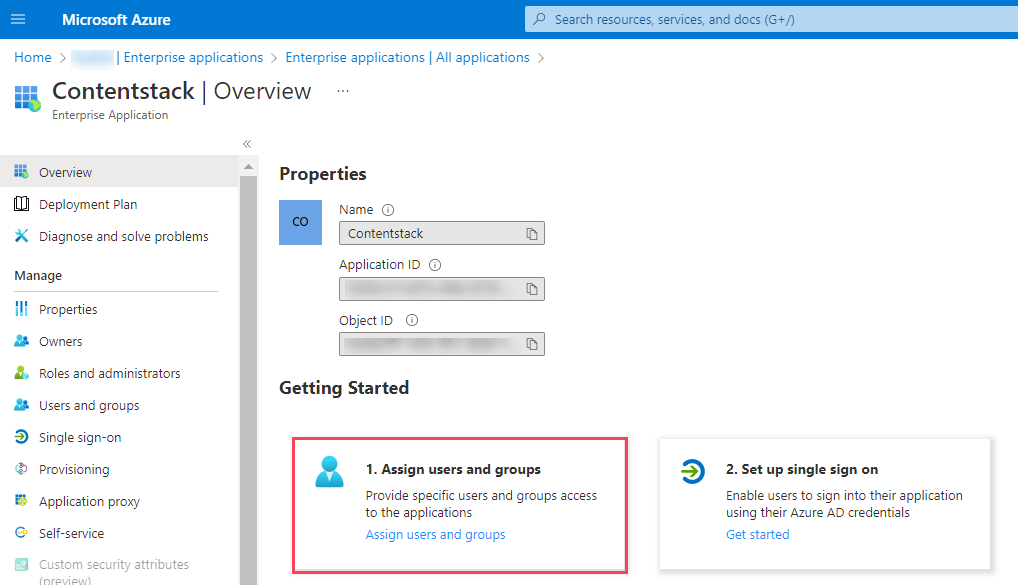
- Navigate to Azure Active Directory, select Enterprise applications, select All applications, and then select your application.

- Within the Getting Started section, click the Assign users and groups tab.
- Click the + Add user/group button.
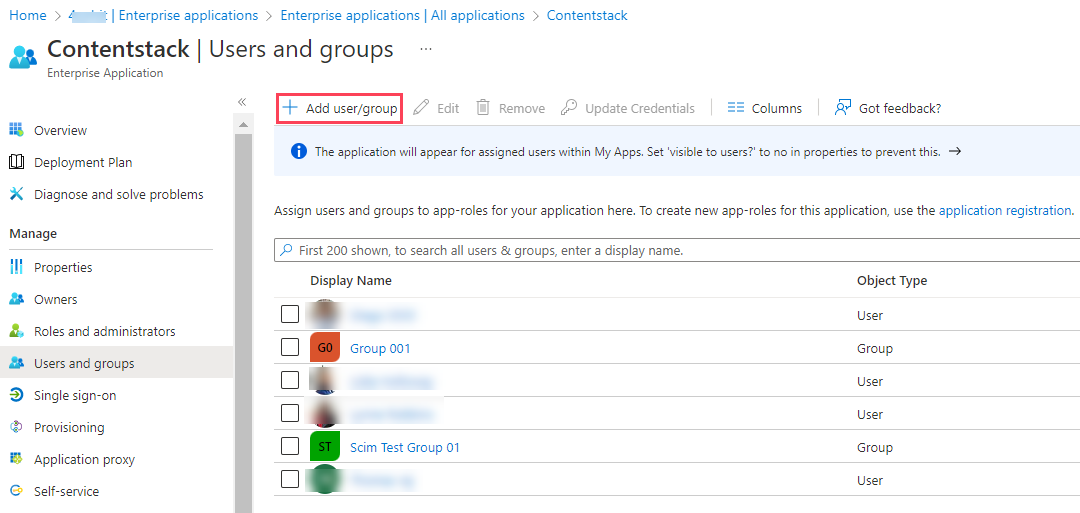
- In the resulting window, click None selected under Users and groups.

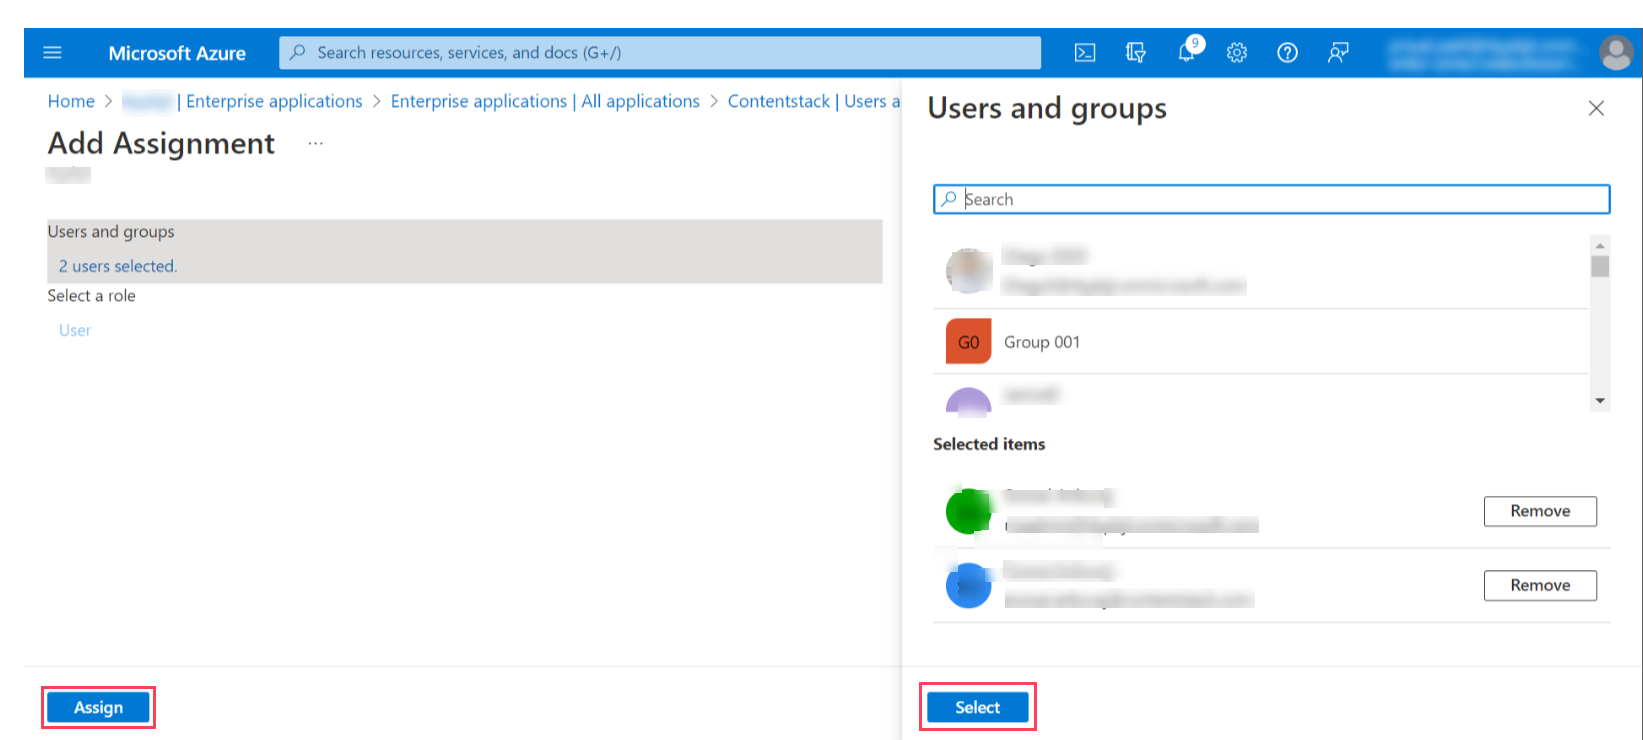
- A list of users appears in the resulting Users and groups modal. From the given list, click Select to select the users and groups and click Assign to assign them the app roles.
Create Group Mapping in Contentstack
Group mapping refers to the process of assigning permissions to the SCIM groups at the organization level and the stack level in Contentstack. The permissions you set for a particular group will be applicable to all the users added to that group.
To perform group mapping, perform the following steps:
- Go to the Organization Settings page in Contentstack and then to the SCIM tab.
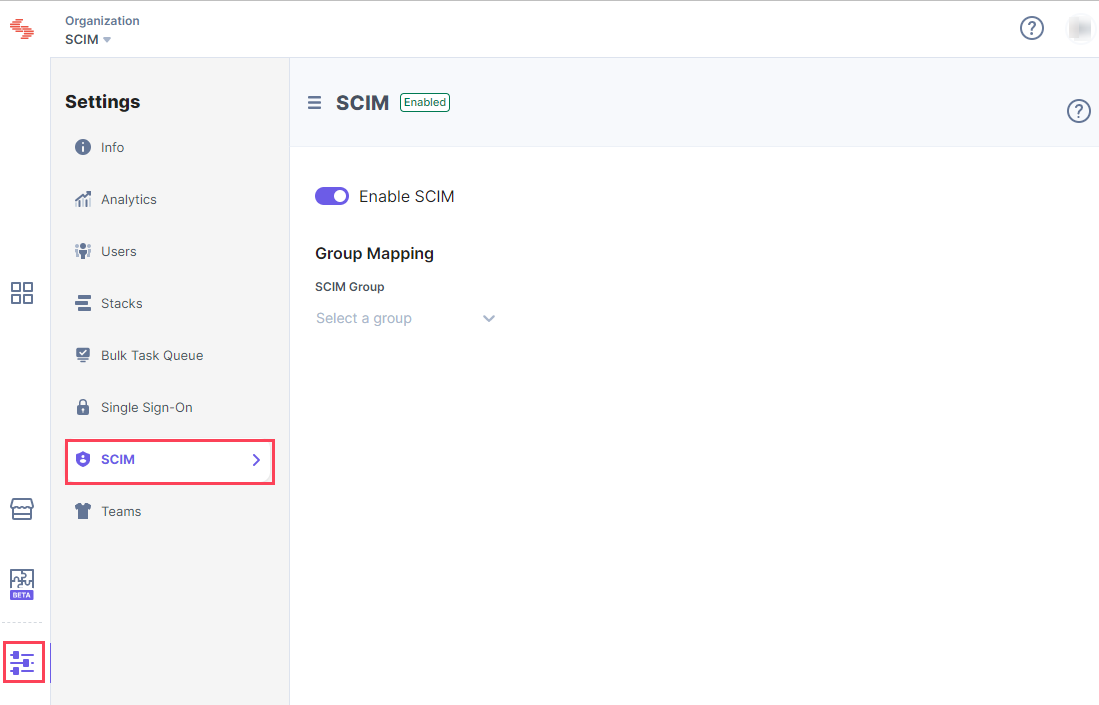
- From the SCIM Group dropdown, select the group for which you want to set permissions.
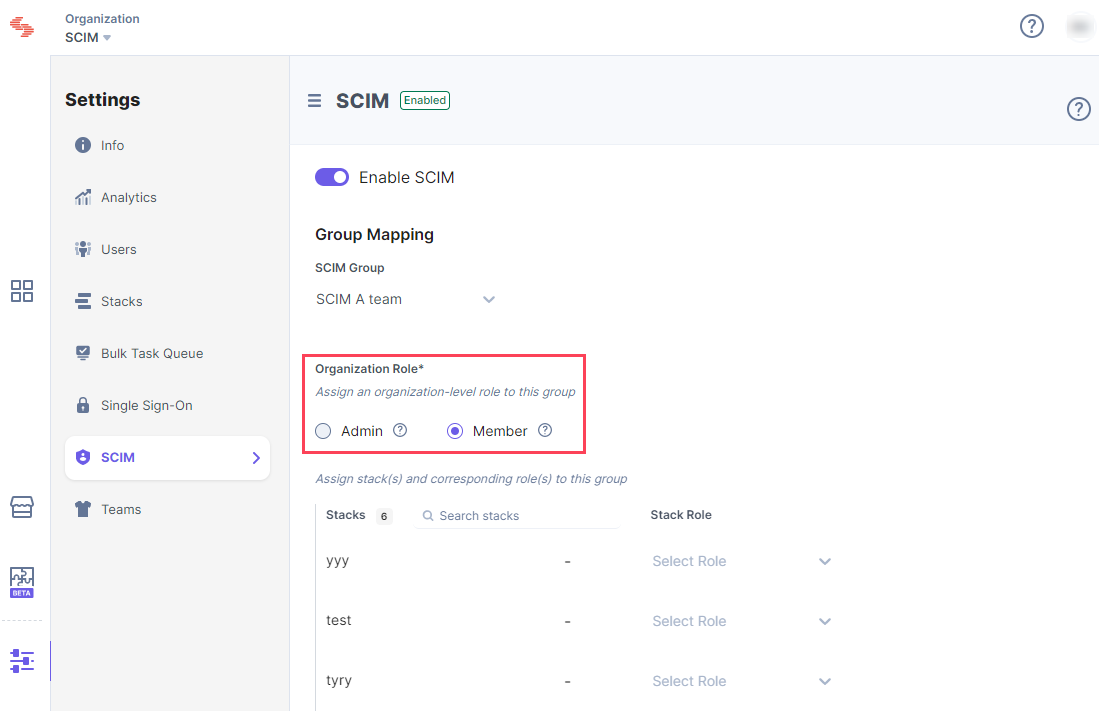
- Select the Organization Role for the group.
- Set Stack Role for the group. For example, if you set the “Developer” role for the “Developer stack” stack, users within the selected group will have a “Developer” role on that stack.
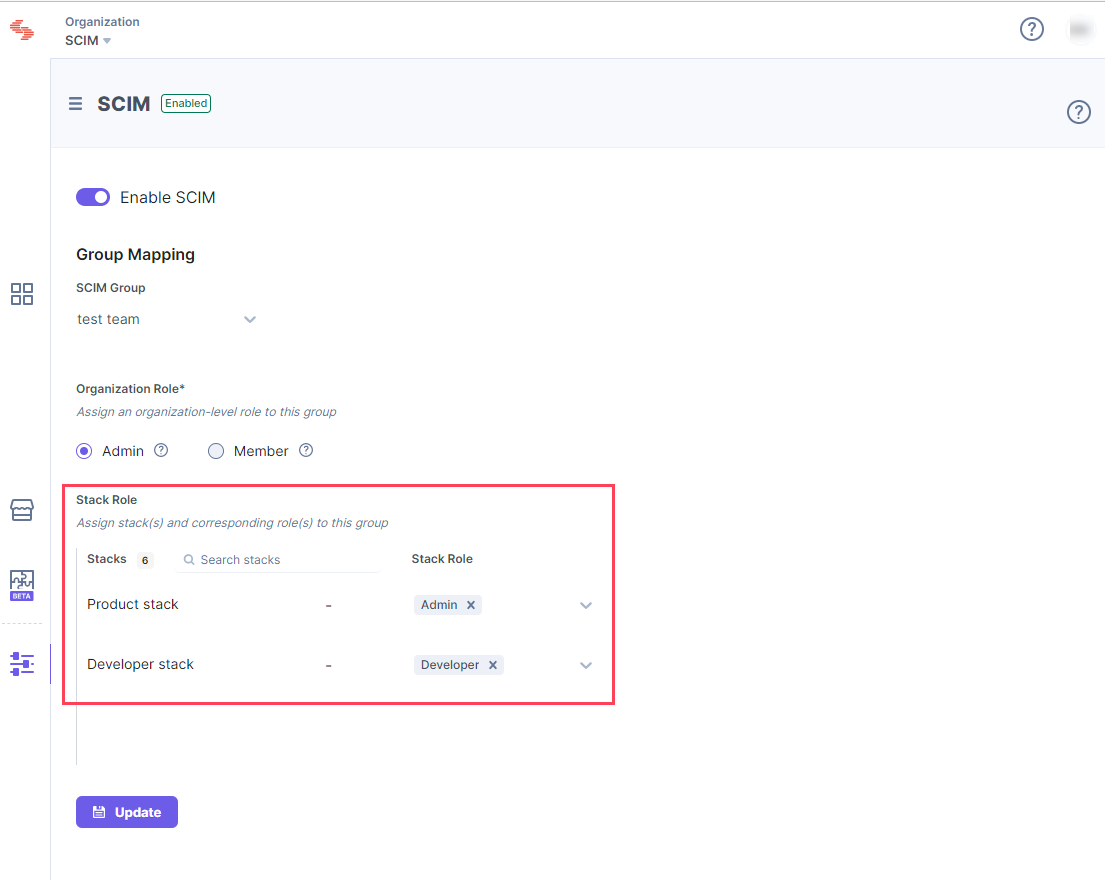
- Finally, click Update to update the changes in the group mappings.
This process sets up the SCIM Provisioning for your Contenstack account with the Microsoft Azure Active Directory.


