Marketplace App Boilerplate

A boilerplate is a fitting template to describe distinct repetitive segments of a project to help build projects quickly and efficiently.

They can define project-level elements or standard methods for one or more projects.

The following guide shows how to build an app using our Marketplace App boilerplate. For more information about the Marketplace App boilerplate, you can check the GitHub repository here.

Why should you use the Marketplace App Boilerplate?

  • The boilerplate code includes all categories of applications you can create in Contentstack, i.e., custom fields, sidebar widgets, and dashboard widgets.
  • Creating any application is prompt since you only need to use the required routes and corresponding components.
  • We have built a boilerplate that incorporates all the best practices you can use while building your application in Contentstack.
  • With this template, you can save a considerable amount of development time.
  • The boilerplate also provides the venus components library to make your application correspond with our new Contentstack user interface.
  • You can use the JSON RTE plugin within the Boilerplate App. For more information, please refer to the JSON RTE plugin documentation.

Structure of the Marketplace App Boilerplate

The boilerplate folder structure consists of relative files and references, making it easy to acclimate within your project. This structure also allows the boilerplate to be thoroughly portable between different stacks in Contentstack.

Below is the folder structure of the boilerplate:

MARKETPLACE-APP-BOILERPLATE
├─ rte
|  ├─ src
|  └─ package-lock.json
|  └─ package.json
|  └─ README.md
|  └─ tsconfig.json
|  └─ webpack.common.js
|  └─ webpack.dev.js
|  └─ webpack.prod.js
├─ src
|  ├─ components
|  └─ hooks
|  └─ images
|  └─ routes
|  |  ├─ AppConfiguration.tsx
|  |  └─ AssetSidebar.tsx
|  |  └─ CustomField.test.tsx
|  |  └─ CustomField.tsx
|  |  └─ EntrySidebar.tsx
|  |  └─ StackDashboard.tsx
|  └─ store
|  └─ test-utils
|  |  ├─ App.tsx
|  |  └─ function.ts
|  |  └─ index.css
|  |  └─ index.tsx
|  |  └─ MarketplaceAppProvider.tsx
|  |  └─ react-app-env.d.ts
|  |  └─ reportWebVitals.ts
|  | └─ setupTests.ts
|  |  └─ types.ts
|  └─ .gitignore
|  └─ package-lock.json
|  └─ package.json
|  └─ playwright.config.ts
|  └─ README.md
|  └─ tsconfig.json

Below are the App routes for each location in App.tsx:

function App() {
  return (
    <ErrorBoundary>
      <MarketplaceAppProvider>
        <Routes>
          <Route path="/" element={<div>Nothing to show here</div>} />
          <Route
            path="/custom-field"
            element={
              <Suspense>
                <CustomFieldExtension />
              </Suspense>
            }
          />
          <Route
            path="/entry-sidebar"
            element={
              <Suspense>
                <EntrySidebarExtension />
              </Suspense>
            }
          />
          <Route
            path="/app-configuration"
            element={
              <Suspense>
                <AppConfigurationExtension />
              </Suspense>
            }
          />
          <Route
            path="/asset-sidebar"
            element={
              <Suspense>
                <AssetSidebarExtension />
              </Suspense>
            }
          />
          <Route
            path="/stack-dashboard"
            element={
              <Suspense>
                <StackDashboardExtension />
              </Suspense>
            }
          />
        </Routes>
      </MarketplaceAppProvider>
    </ErrorBoundary>
  );
}


Using Marketplace App Boilerplate To Develop Custom Applications

To get started with building applications using the boilerplate, follow the steps given below:

Prerequisites

Install Dependencies

  • Navigate to the root directory of the downloaded zip file.
  • Run the following command to install the necessary packages:
    npm install
  • After you install the packages, run the following command  to get started:
    npm start

Creating Project Using The Boilerplate

To use your application, you need to upload it to Contentstack. To do so, perform the steps given below:
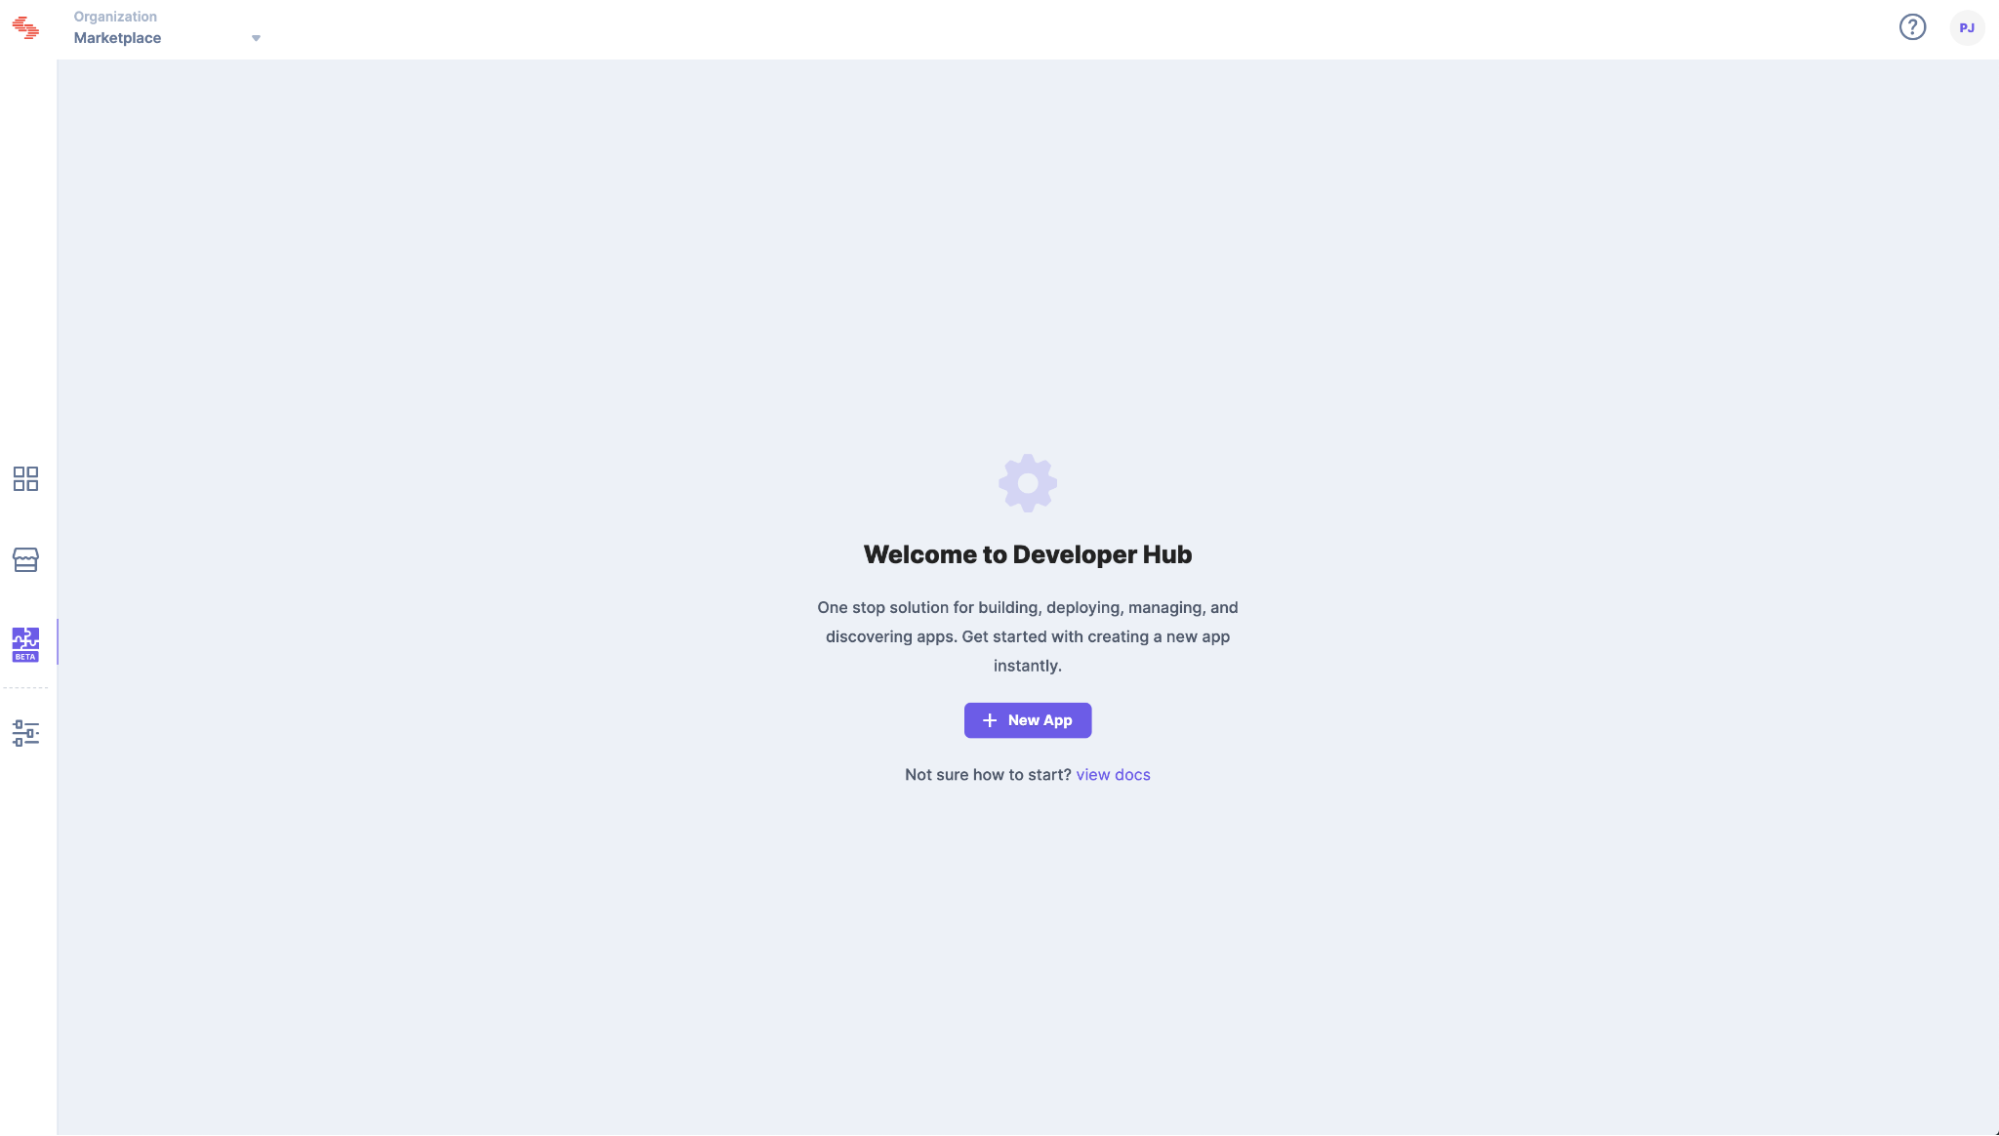
  • Log in to your Contentstack account.
  • On the left-hand-side primary navigation, you will find a new icon for Developer Hub (as shown below). Click the icon to go to the Developer Hub.
    Click_Developer.png
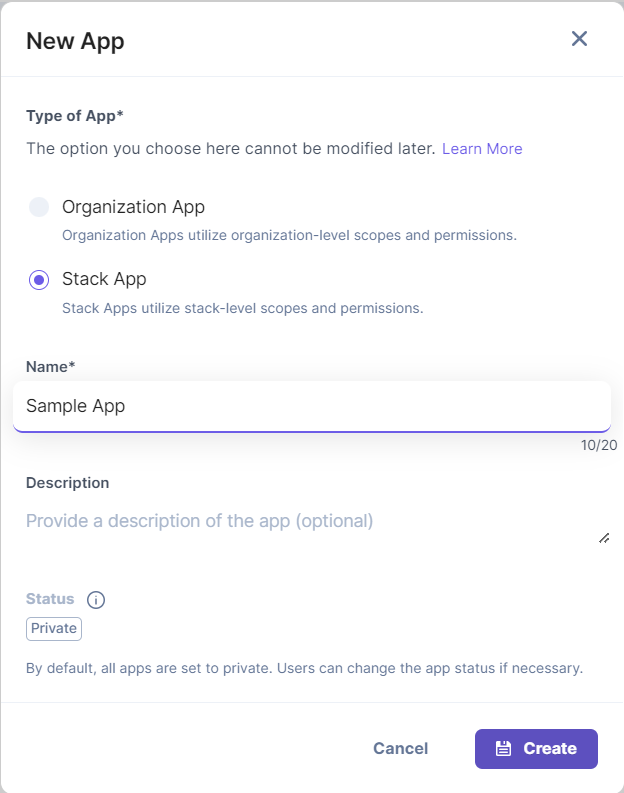
  • Click the + New App button. 
  • In the New App modal, give a suitable name and description.
    New_Sample_App.png
  • Click Create.
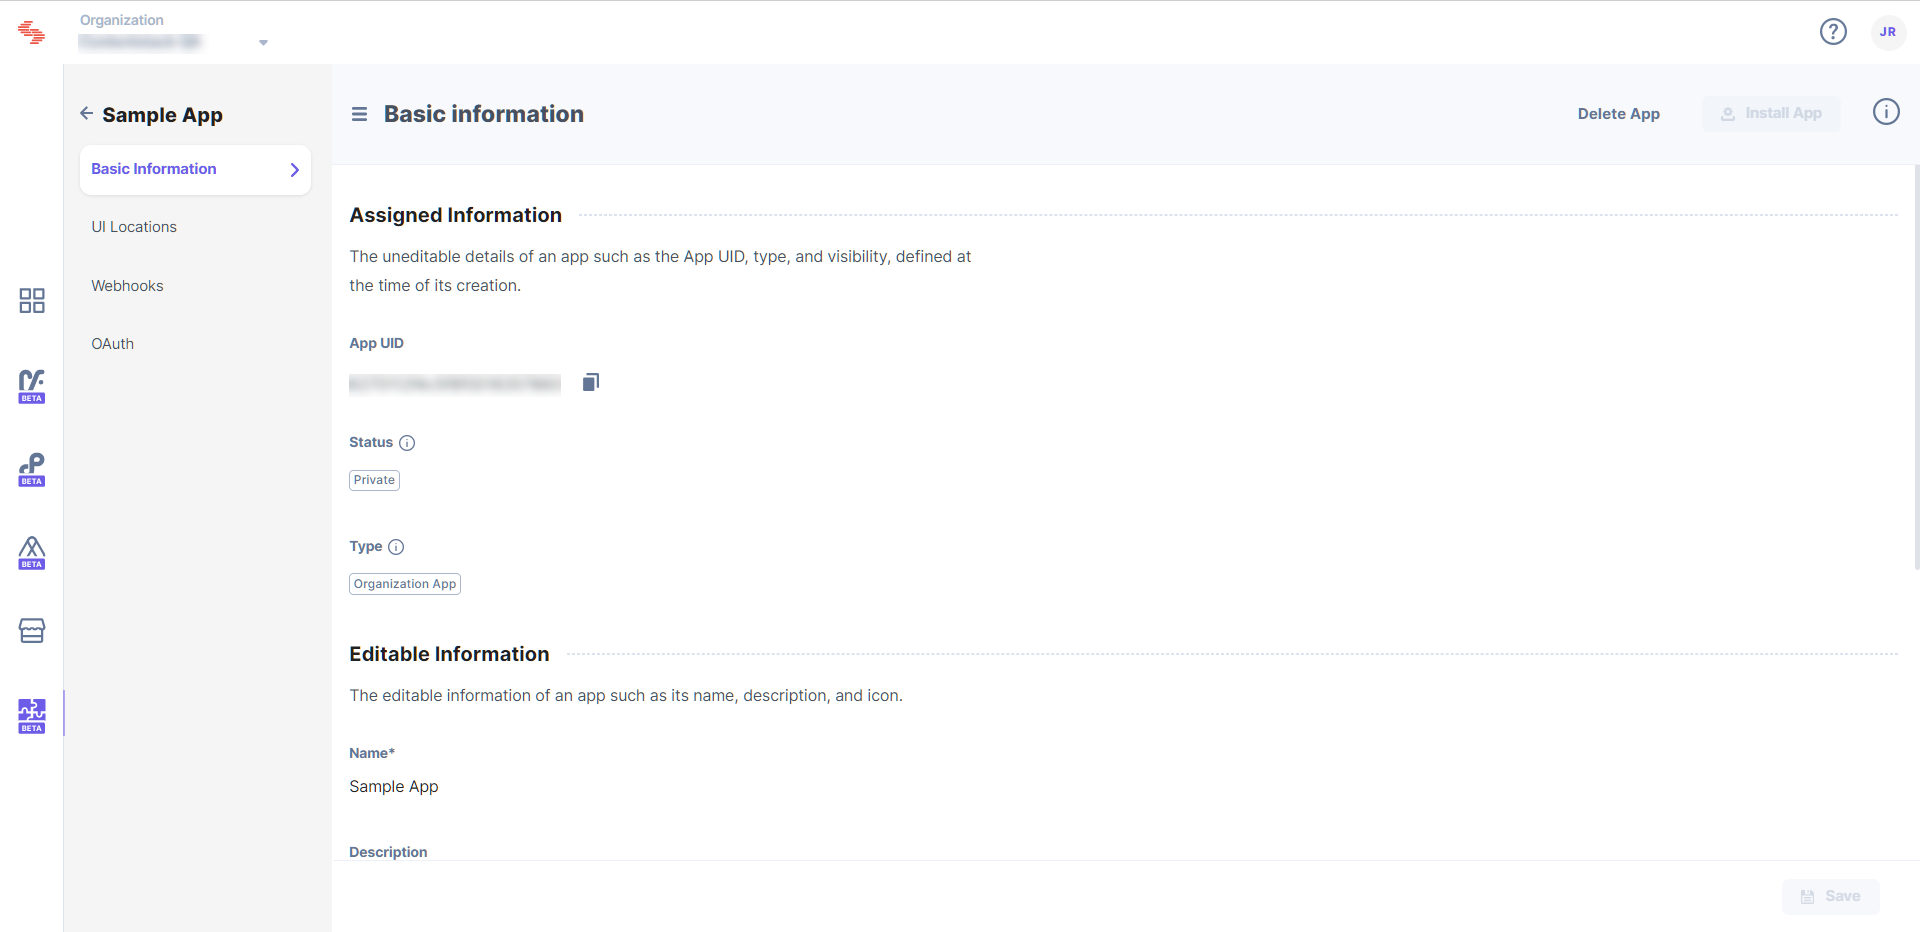
  • On the resulting Basic Information page, upload your app's icon and Save the changes.
    Basic_Info.png
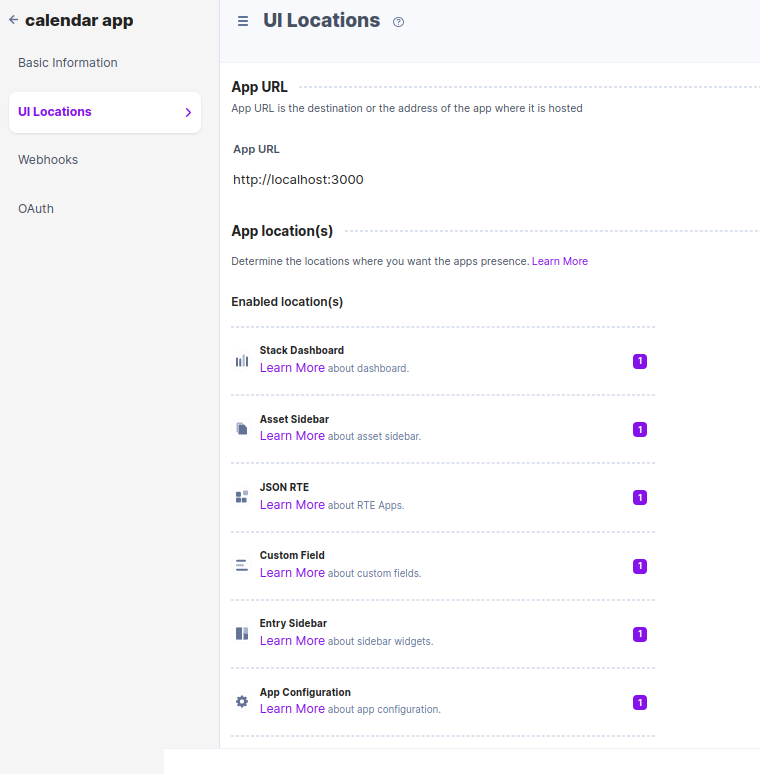
  • Add the UI Locations as per your requirement
    UI_Locations.png
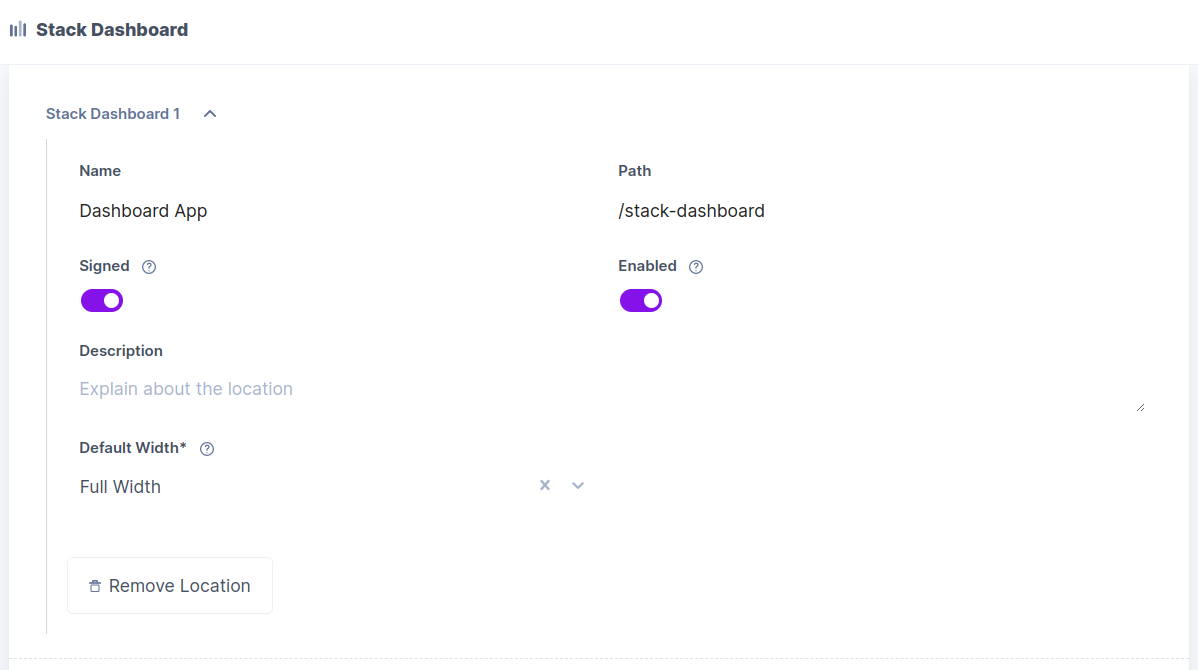
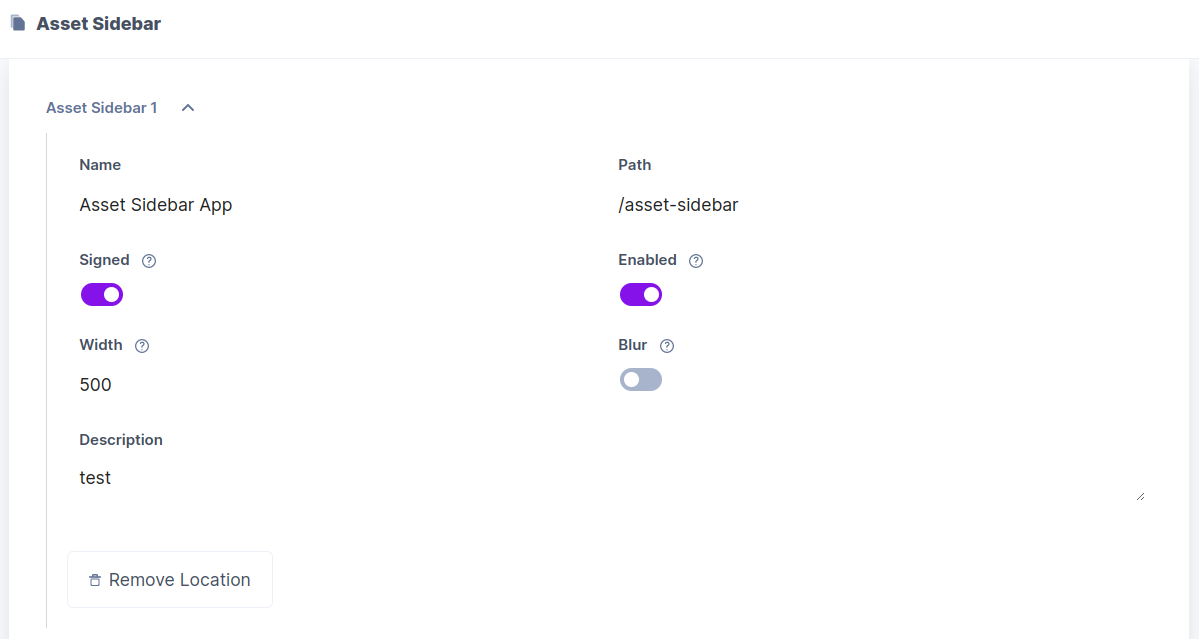
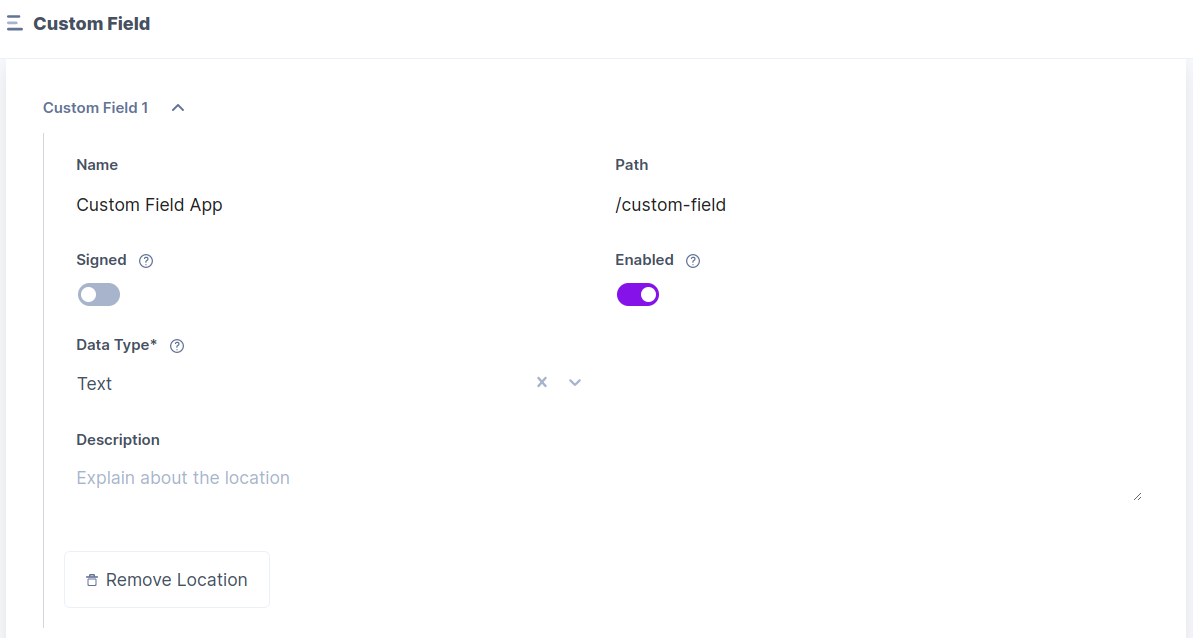
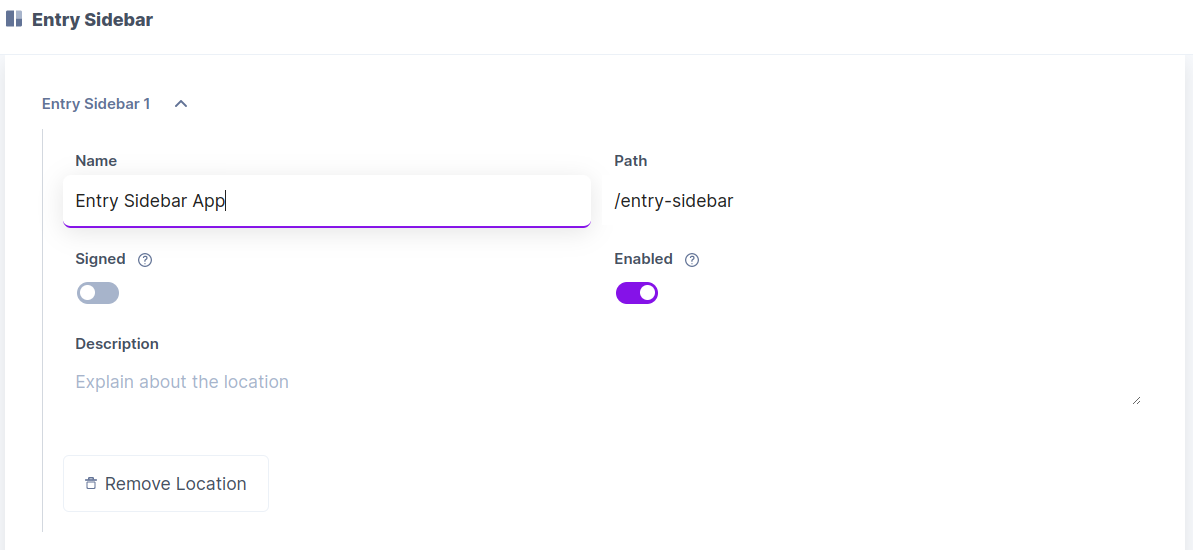
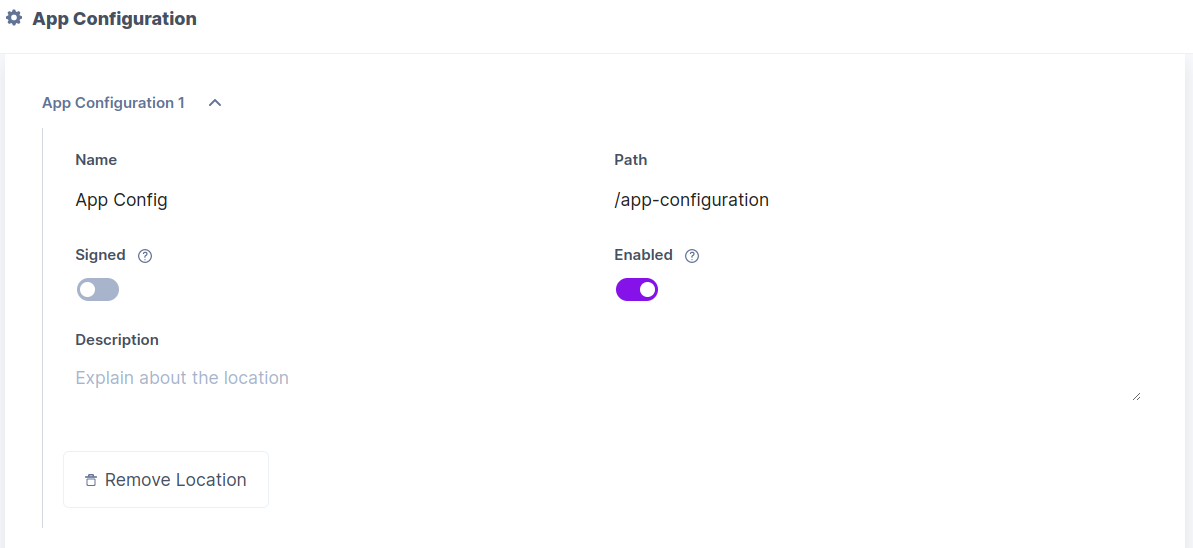
  • Add the below routes for each UI Location to get the desired results
    • Stack Dashboard
      Stack_Dashboard.png
    • Asset Sidebar
      Asset_Sidebar.png
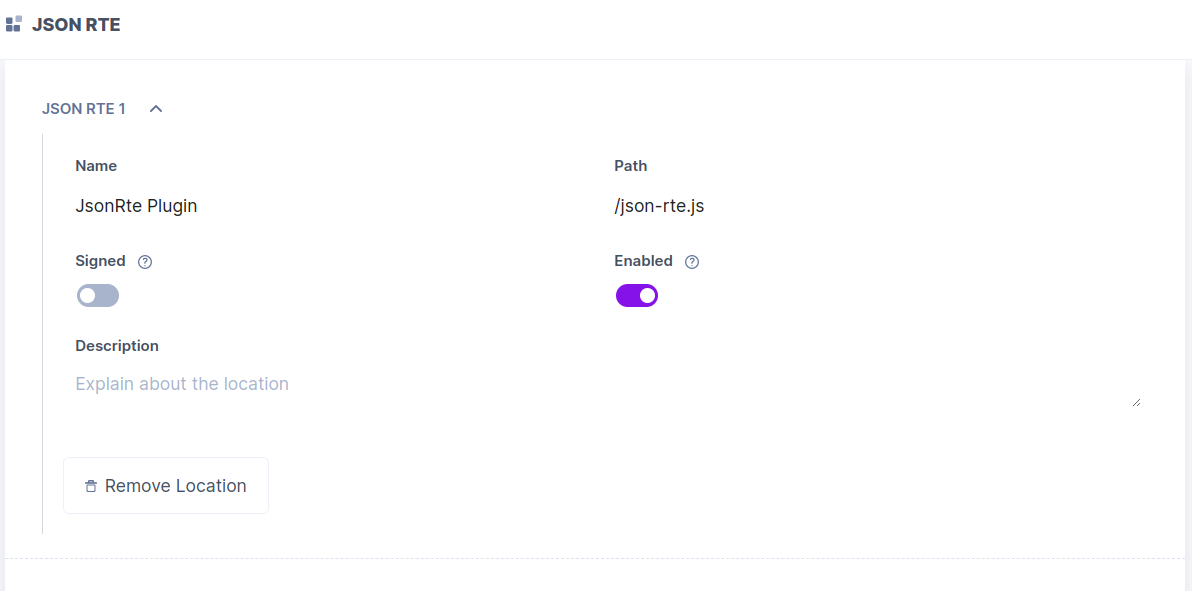
    • JSON RTE
      JSON_RTE.png
       
    • Custom Field                                                                                                       Custom_Field.png
    • Entry Sidebar  
      Entry_Sidebar.png
    • App Configuration  
      App_Config_UI_Location.png

      Note: After adding each route, click save.
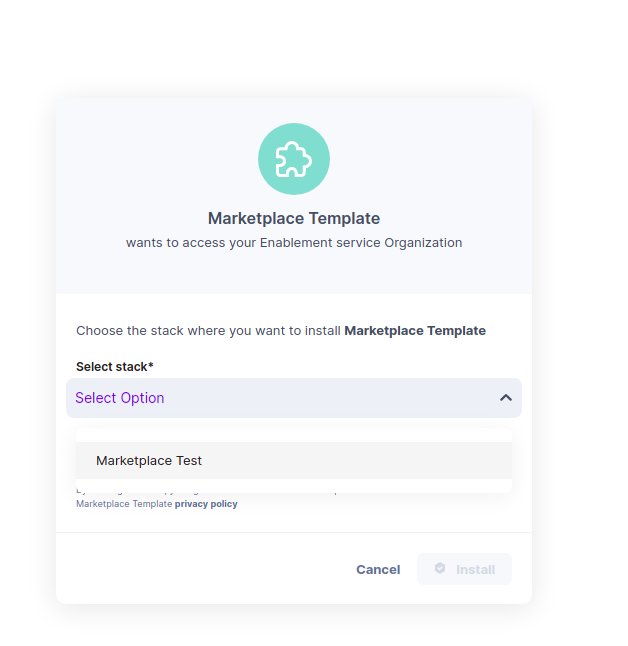
  • To install the app, click the Install button in the top right corner of the screen. Select the stack where you want to install the app and click the Install button.                                                                              imageG.png
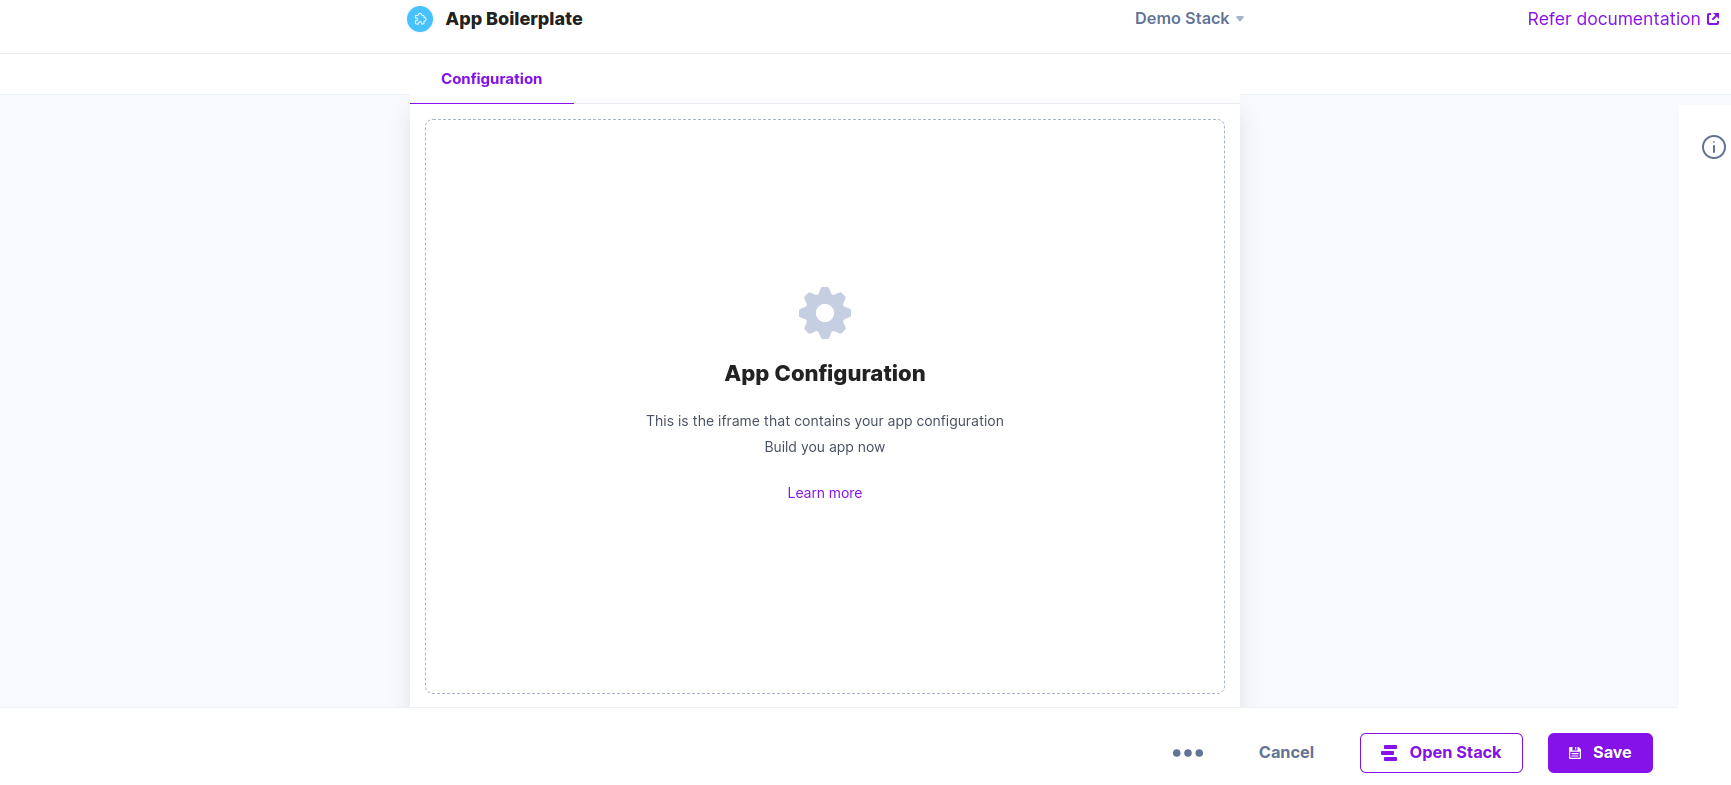
  • You will be redirected to the configuration page of the app. Fill in the necessary details to configure your app.  App_Config.png
  • Click the Open Stack button to start using your application within your selected stack.

Installing JSON RTE Plugin

  • Navigate to rte subfolder as shown below. The folder structure will look like this:

├─ rte
|  ├─ node_modules
|  └─ src
|  |  ├─ public
|  |  └─ type
|  |  |  ├─ index.css
|  |  |  └─ plugin.tsx
|  |  └─ package-lock.json
|  |  └─ package.json
|  |  └─ README.md
|  |  └─ tsconfig.json
|  |  └─ webpack.common.js
|  |  └─ webpack.dev.js
|  |  └─ webpack.prod.js
  • Perform the following steps:
    • Run the following command to install the necessary packages:
      npm install
    • Run the following command to get started:
       npm start
  • After you run the npm start command, localhost on port 3000 will serve a file json-rte.js i.e., https://localhost:3000/json-rte.js
  • The localhost is up and running and you have already configured the JSON RTE Plugin in a stack.
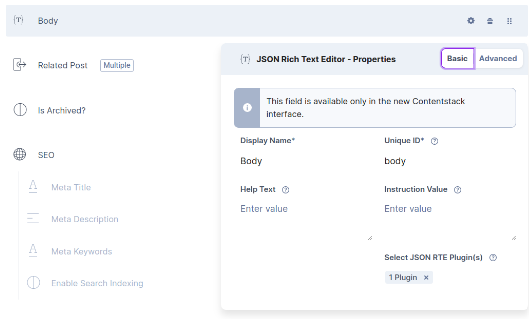
  • Edit the content type where you are using the JSON RTE to select the plugin as shown below and save.
    JSON_RTE_Plugin_edit_content_type.png
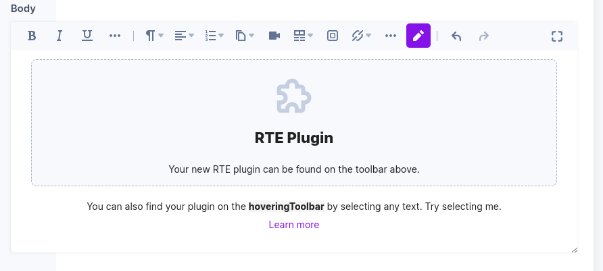
  • When creating an entry consisting of JSON RTE you will find an icon within the app component within the JSON RTE, as shown below. Click the icon, and the below component will appear. JSON_RTE_Plugin.png

Next Step

Next, you can refer to the Get Started with Building Apps using Contentstack’s App SDK guide to start using the Contentstack App SDK in creating your apps.

Was this article helpful?

Thanks for your feedbackSmile-icon

More articles in "Quickstart"

On This Page

^