Was this article helpful?
Thanks for your feedback
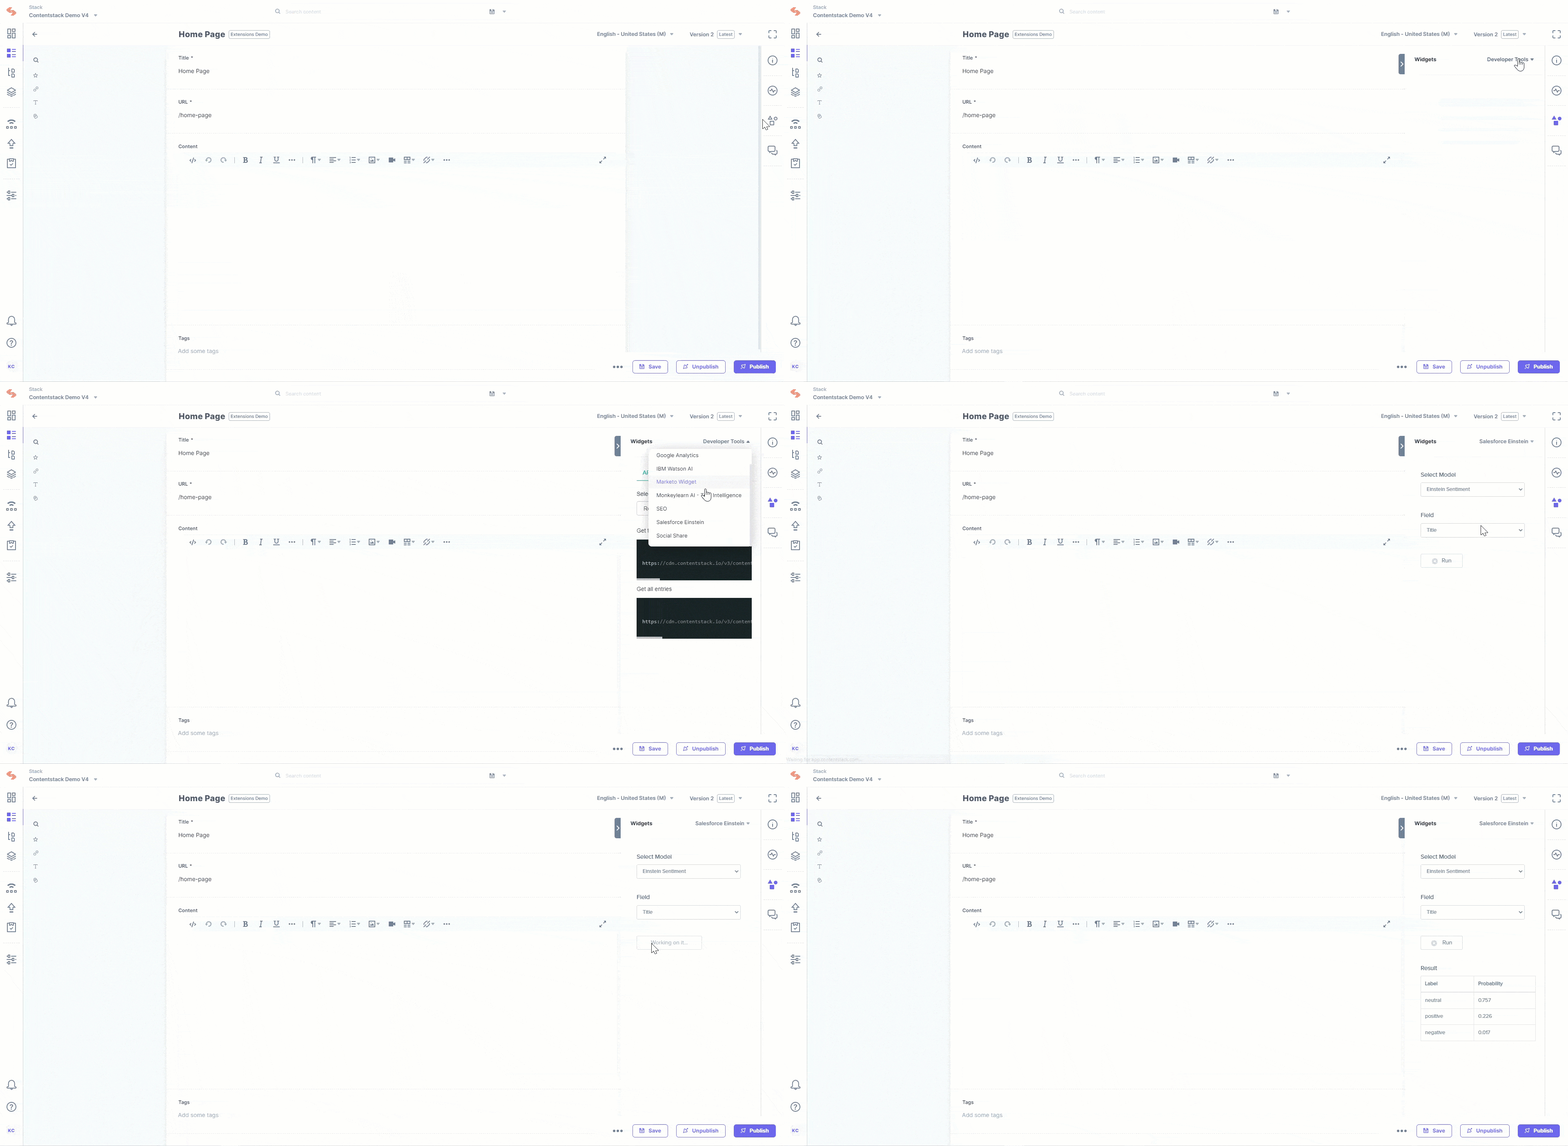
The Salesforce Einstein Sidebar Extension analyzes the text content of your entry, and using Einstein’s Language APIs, infers the sentiment or intent behind the content and displays the findings on the sidebar of your entry page.
Einstein Language APIs are categorized into the following:
In this step-by-step guide, we will see how to create the Salesforce Einstein Sidebar Extension in Contentstack. This widget extension makes use of the Einstein Sentiment APIs to infer the sentiments of your content. The steps are as follows:
In order to use this extension, you will need your Salesforce Einstein Platform Services Account Private key. This Private key will allow you to access the Einstein Language APIs.
In case you don’t have an account, read the instructions given here to create one.
On the activation page, download and save the private key (einstein_platform.pem). You can even copy and paste your private key into a text file and name it as per your need.
You will need this private key file to authenticate the Einstein Language APIs in Step 2 while configuring the Lambda function of your extension in Contentstack.
To protect sensitive information (such as API Key and URL) and avoid Cross-Origin Resource Sharing (CORS) issues, you can use Lambda function for this extension.
The lambda function provided with the Extension code folder contains all the required files, however, you need to provide additional details such as your private key.
Note: Refer Step 4 for the source code along with the lambda function of the Salesforce Einstein extension.
To provide additional details to your lambda function, perform the steps given below:
npm installThis downloads the required node modules within your lambda function.
Note: If you are using Linux, use the zip -r index.zip * command in your lambda code folder to zip it.
When creating your Lambda function in AWS Lambda, upload your project zip file. Select 8.10.0 as the Node.js version.
In the Environment Variables section, enter the credentials against the variables as follows:
ACCOUNT_ID = Your_Einstein_Platform_Account_ID
Note: Please ensure that these are added exactly as shown above, else your lambda function will not work.
Under the Configuration section of your lambda function, add an API Gateway trigger. You will get an API Gateway URL, like this, https://abcde1234.execute-api.us-east-1.amazonaws.com/default/contentstack-google-analytics-widget.
Store this URL, as you will need this while configuring the extension in the next step.
For additional security, you can configure an API Key for the API Gateway trigger and use this API Key when configuring your lambda function.
To add this Sidebar Extension to your stack, log in to your Contentstack account and perform the following steps:
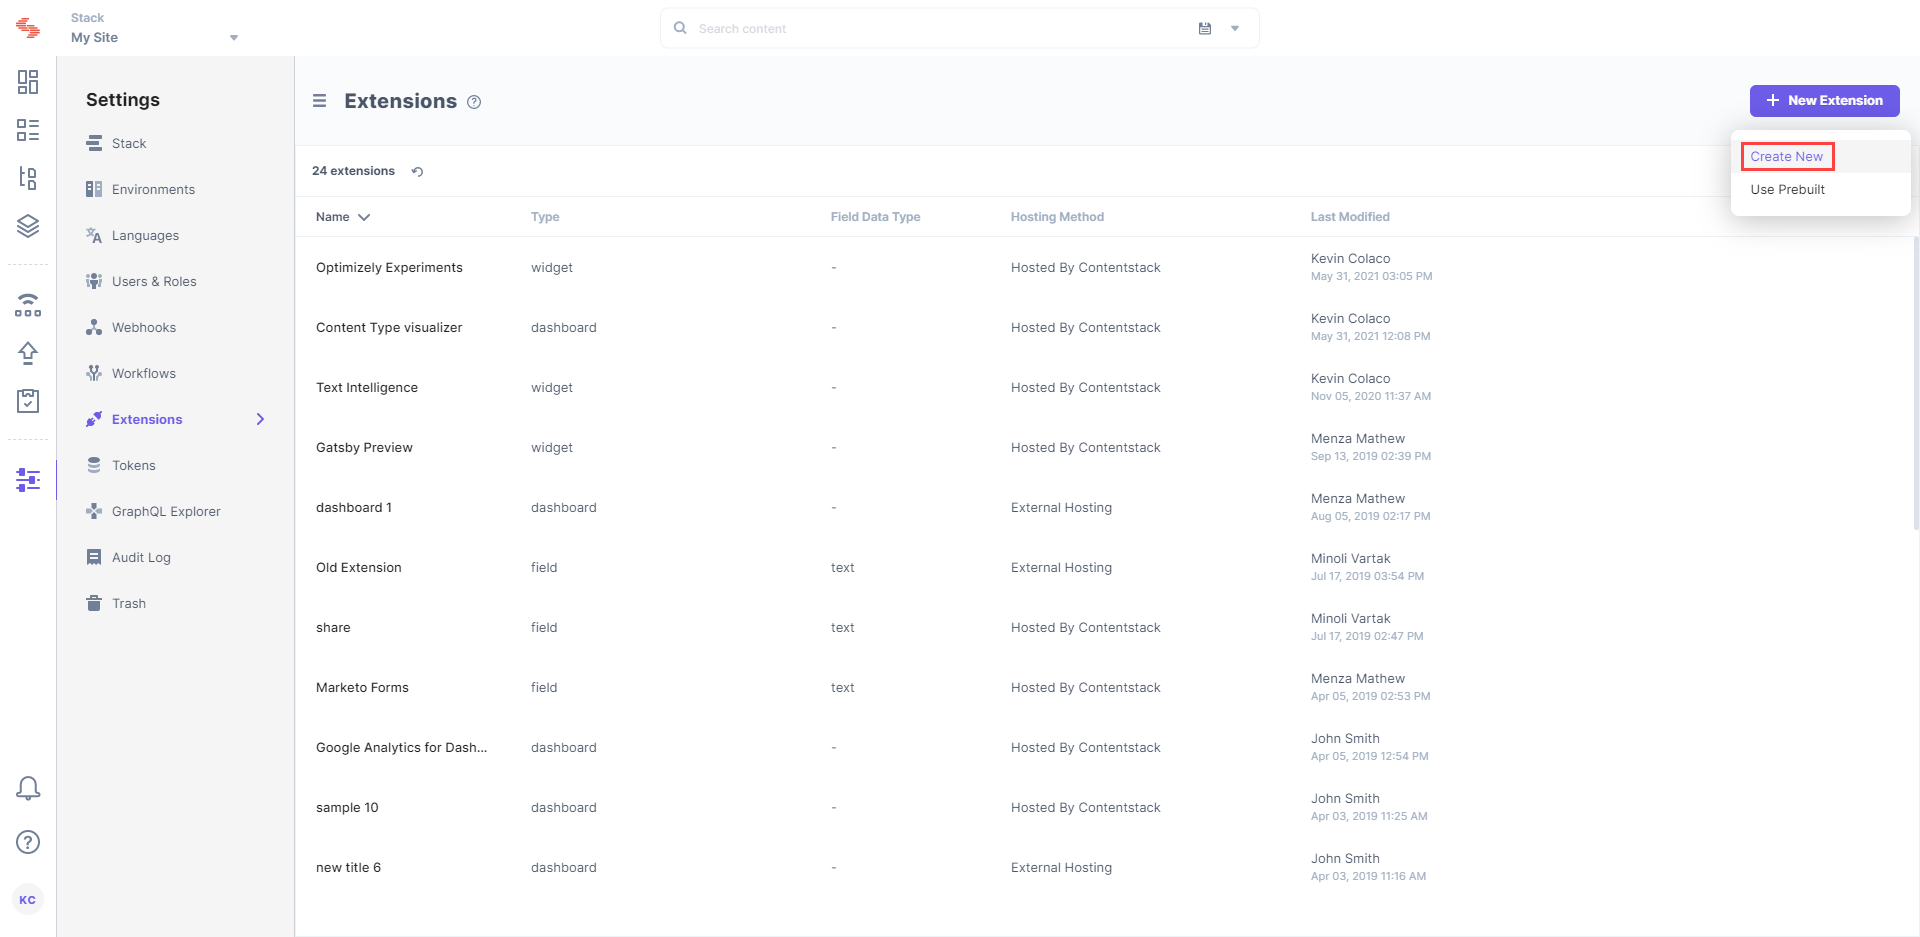
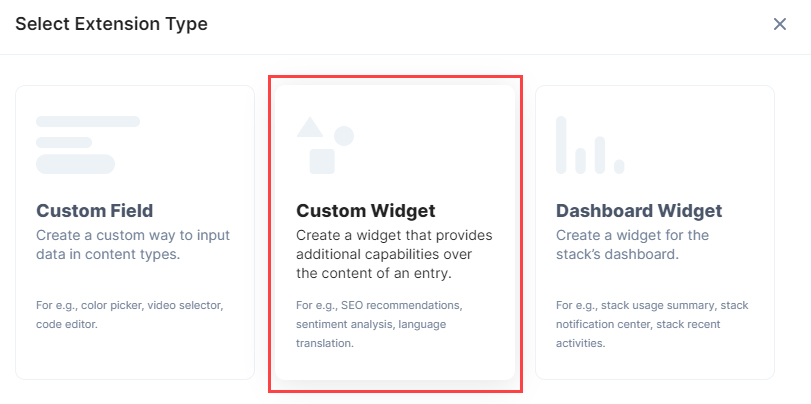
{
    "url": "https://abcde1234.execute-api.
        us-east-1.amazonaws.com/default/
        salesforce-einstein-widget",
    "X-api-key": "SSS111Sss1ssSSsssS11s11SS11SS"
}
Now, let’s understand how to use this Sidebar Extension in your entries.
Once you have added your Sidebar Extension, you can use it in your entries of the selected content type(s). Let’s look at the steps involved in using the Sidebar Extension.
Go to your stack and click on the “Entries” icon on the left navigation panel.
Select the content type for which you have enabled the Sidebar Extension.
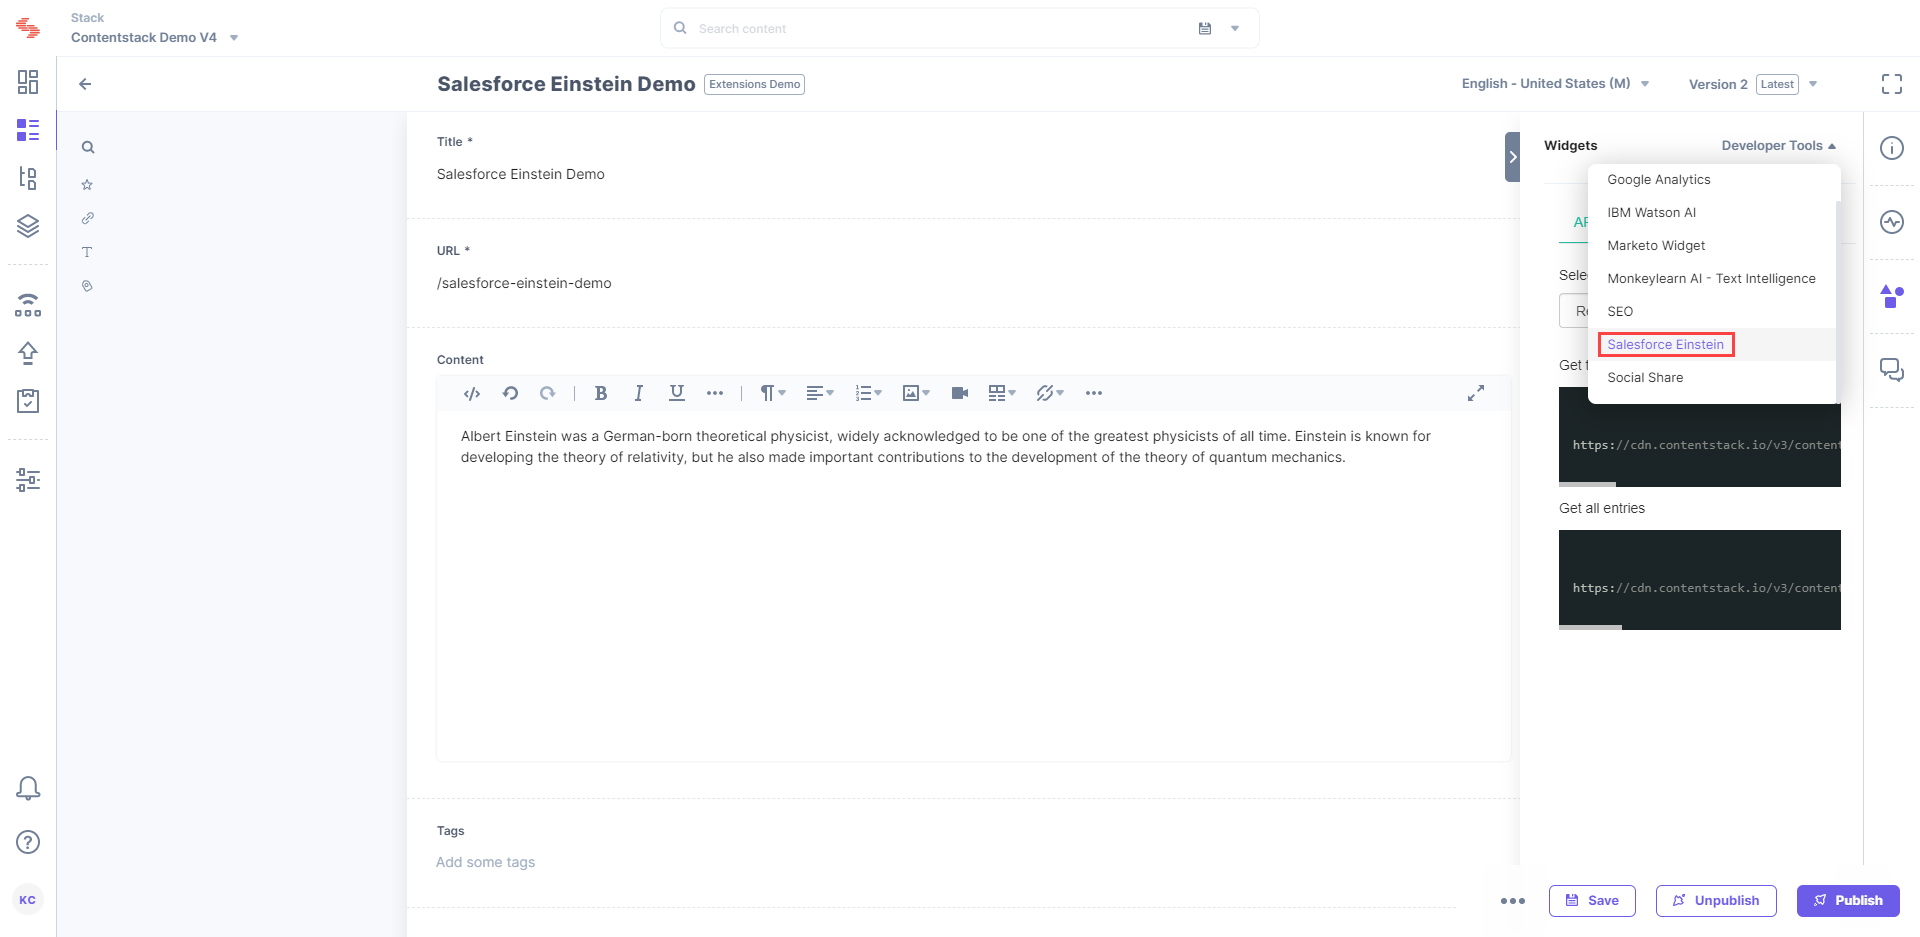 The selected Sidebar Extension expands on the sidebar.
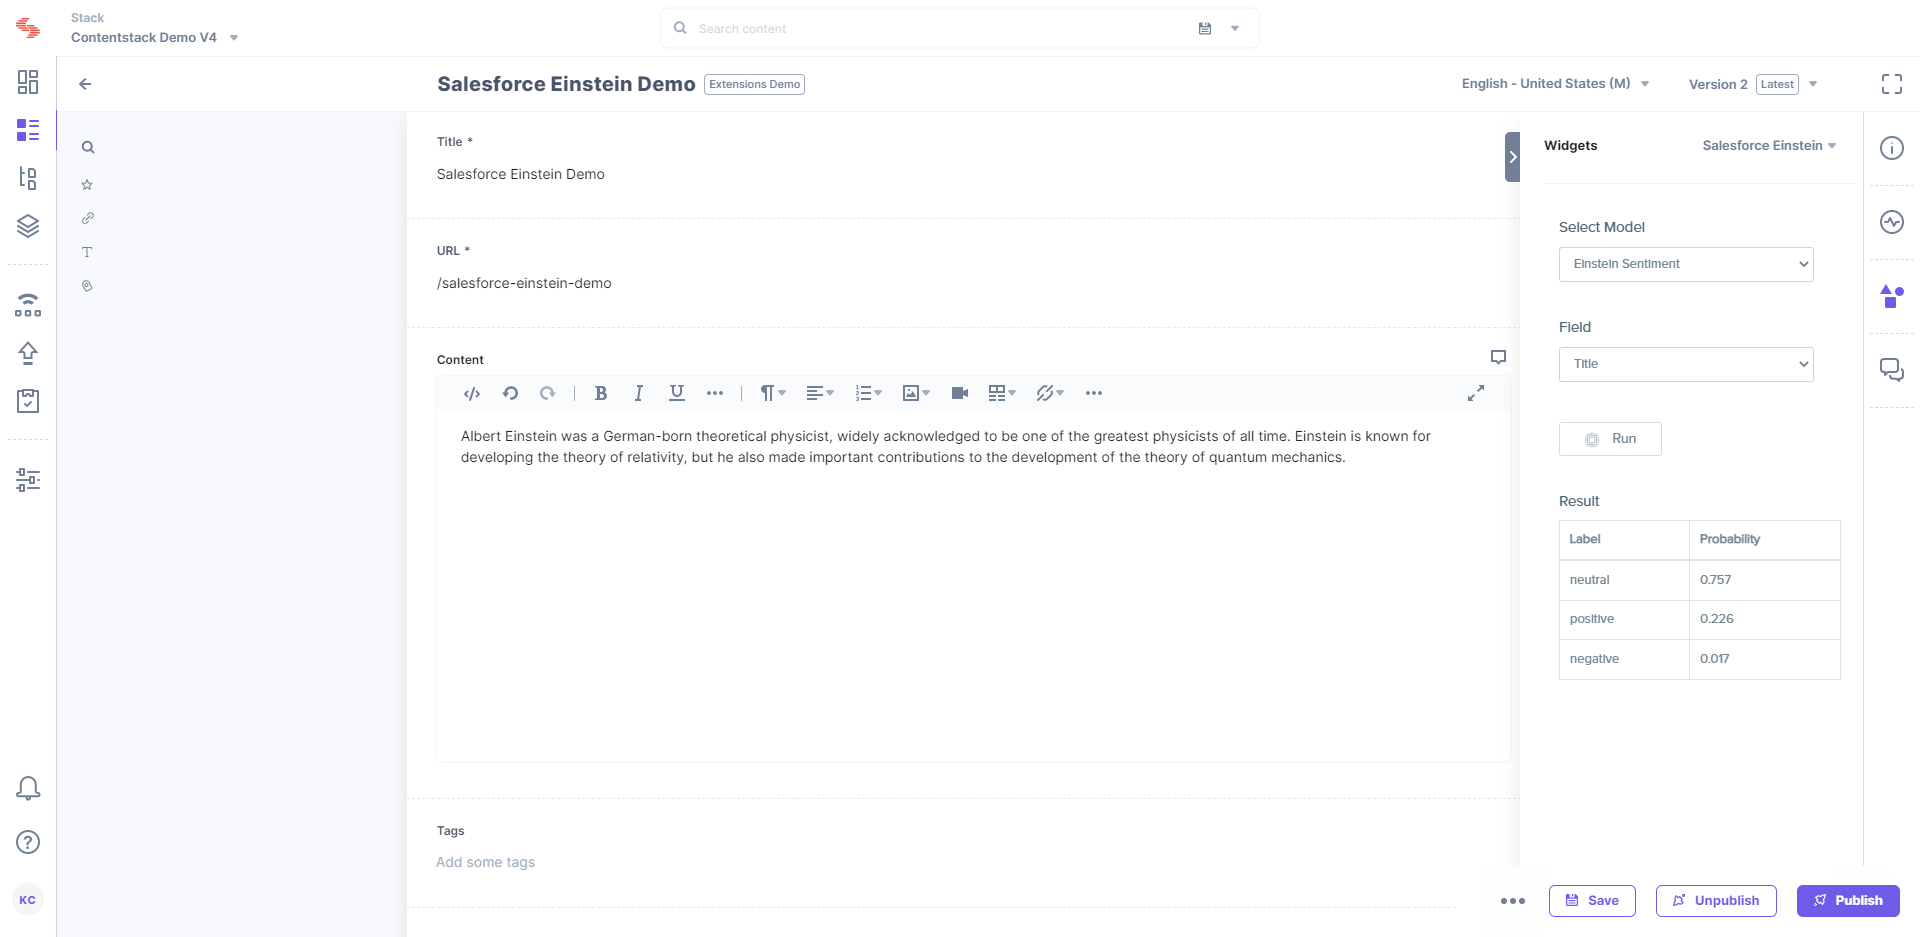
In the above sections, we successfully added the Salesforce Einstein Sidebar Extension's Sentiment model that used the Einstein Sentiment APIs.
Now, to use the Einstein Intent API, you need to create a model that you need to first train in order for it to analyze your text and infer what the content intends to.
After creating your Salesforce Einstein Platform Services Account, the additional steps that you need to perform to create your Einstein Intent Model are as follows:
In this step, you will define the labels for your intent model. The intent model will use these labels to categorize your data. For each label, you need to gather text data in a file as per your requirement.
The Einstein Language APIs support data in these file formats: .csv (comma-separated values), .tsv (tab-separated values), and .json. So, the format of your text data file should be in these formats.
For more information, refer the instructions given in the quick start guide.
Next, you need to generate the JSON Web Token (JWT) to access the Einstein Platform Services APIs. Open the Einstein Platform Services Token generation page, use the private key you downloaded after creating your account, and perform the steps mentioned in the Set Up Authorization page.
Once you have gathered your data and generated the OAuth token, it’s time to create and host your dataset.
To upload your dataset, run the POST API call: https://api.einstein.ai/v2/language/datasets/upload
Add the following parameters and replace <TOKEN> with your JWT token and <PATH_OF_YOUR_DATA_FILE> with the path of the data file that you created above:
| Parameters | Values |
| Header |
|
| Body |
|
Tip: You can try the call manually in any REST API client, such as Postman.
This is the Einstein Intent API call that will create and host your dataset. For more information, refer the steps given here.
In the response body of this call, you will find your Dataset ID. We will use this ID value to generate the Model ID in the next step.
Next, you need to train your dataset and create a model. You will get the model ID that will be used to configure the extension.
Run the POST API call: https://api.einstein.ai/v2/language/train
Add the following parameters and replace <TOKEN> with your JWT token and <DATASET_ID> with the dataset ID retrieved in the above step:
| Parameters | Values |
| Header |
|
| Body |
|
Tip: You can try the call manually in any REST API client, such as Postman.
In the response body of this call, you will find your Model ID. We will use this value while configuring your extension in Step 8.
For more information, refer the steps given here.
In the Salesforce Einstein Sidebar Extension details page, enter the Model ID of your Intent Model and the Model Name.
{
    "intentModels": [
        {
            "modelId": "RRRR2CCCC2KKKKKKKK2CCCC",
            "modelName": "User-defined Model Name"
        },
        {},
    …]
}
Note: You can create multiple such models and add their model IDs in the configuration settings of your Salesforce Einstein Sidebar Extension.
Once you have added your custom Einstein Intent Model, you can use it in your entries of the selected content type(s).
Let’s look at the steps involved in using the Einstein Intent model in your entry page.
Was this article helpful?
Thanks for your feedback