The “Developer Tools” widget extension provides developers with quick tools (API endpoint, JSON, etc.) to work with an entry or all entries of a content type and do a lot more. Let’s explore more about this extension.
The Developer Tools widget extension, which can be accessed on the right-hand side of the entry page, primarily has two tabs: API Details and JSON View.
- API Details: This tab provides the REST API endpoints or queries (in any language of your choice) that you can readily use to access/fetch the current entry or all entries of the content type. You need to select the Platform, copy the endpoint/query, add the environment name, and use it as required to fetch the entry.
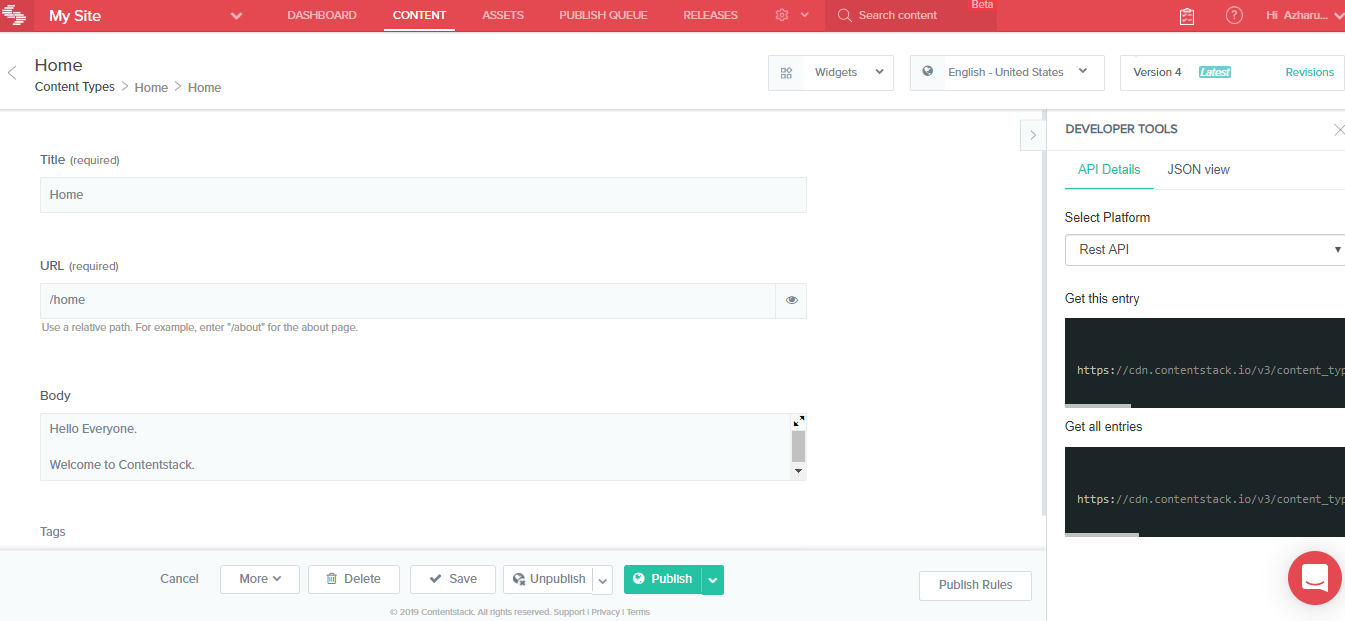
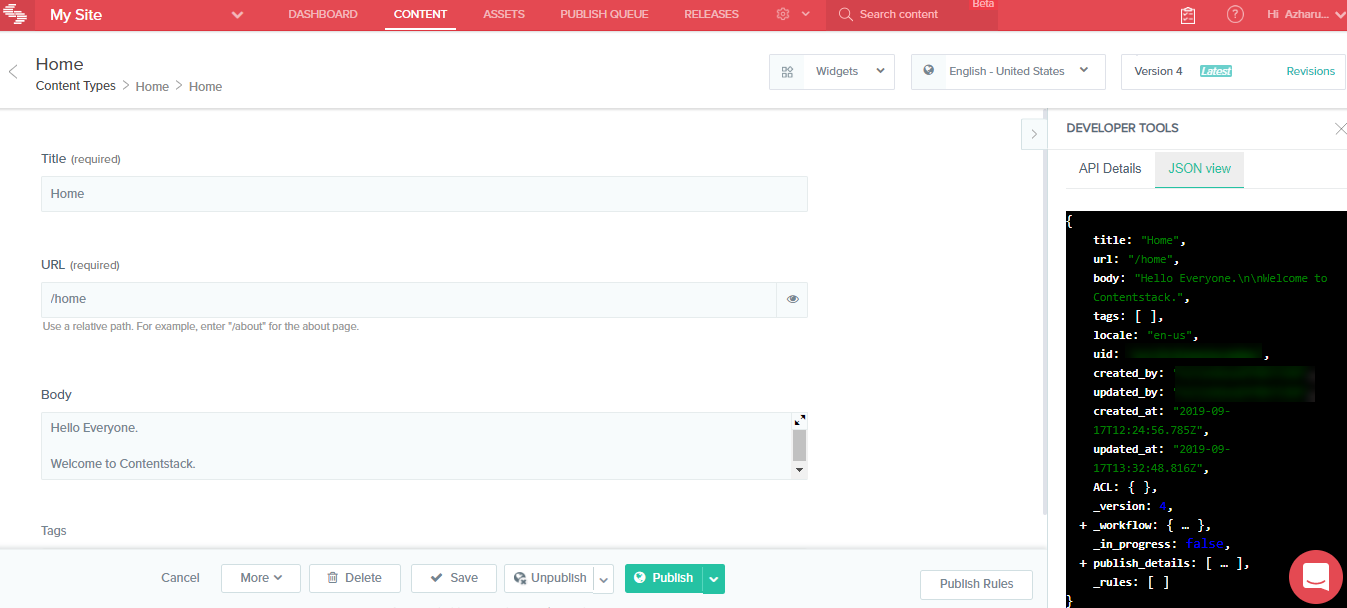
- JSON View: The JSON view tab displays the JSON data of your entry. You can then copy this JSON and use it as per requirement or import it to other content types.
This step-by-step guide explains how to create Developer Tools custom widget for your content types.
Steps for Execution
- Create Developer Tools Custom Widget
- Use the Extension
Create Developer Tools Custom Widget
To create a Developer Tools custom widget, log in to your Contentstack account and perform the following steps:
- Go to your stack and click on CONTENT.
- Hover over the “Settings” icon and select Extensions.
- Click on + Add Extension and select Create new.
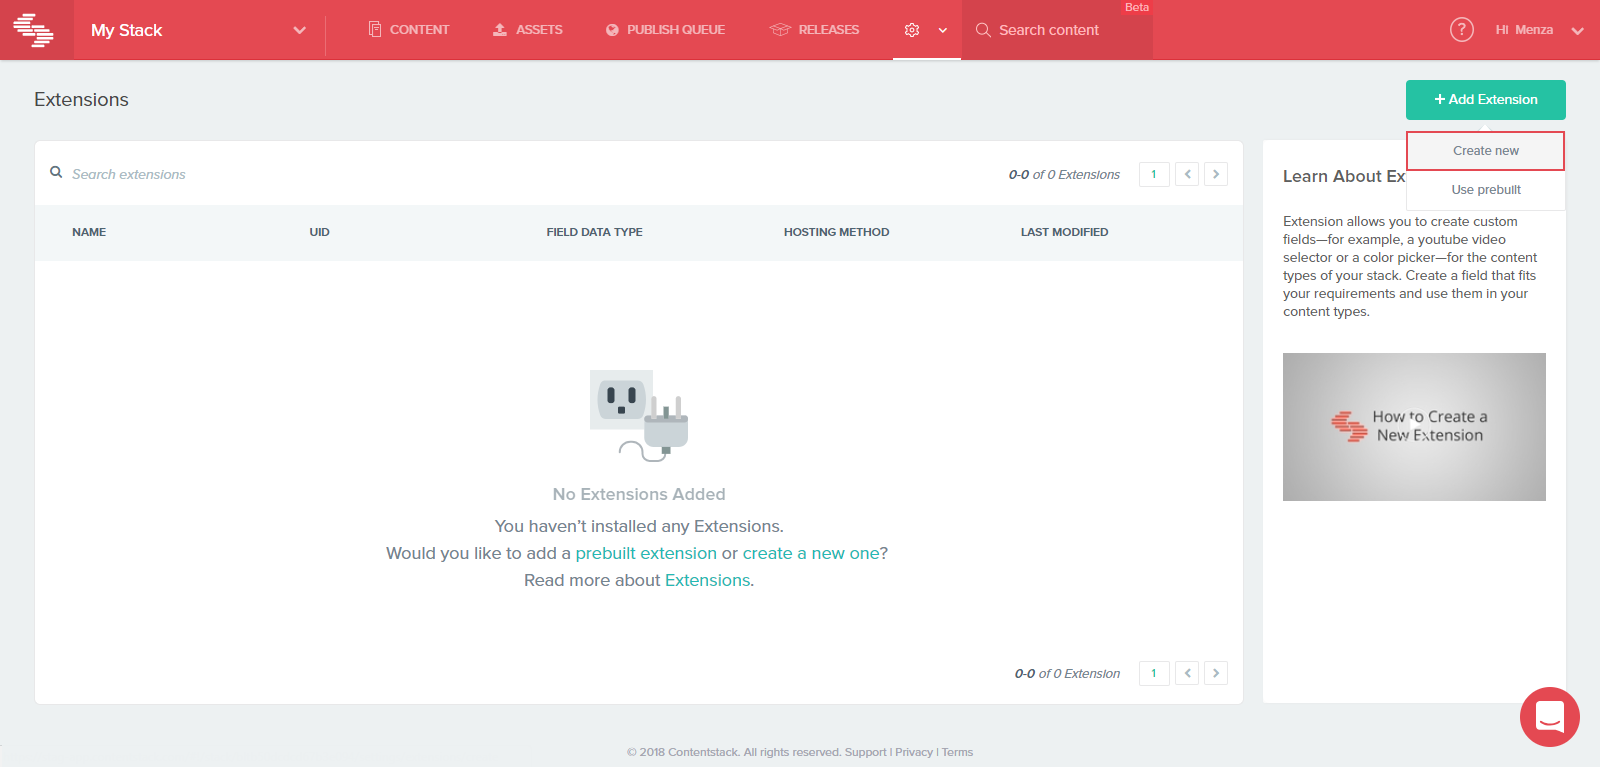
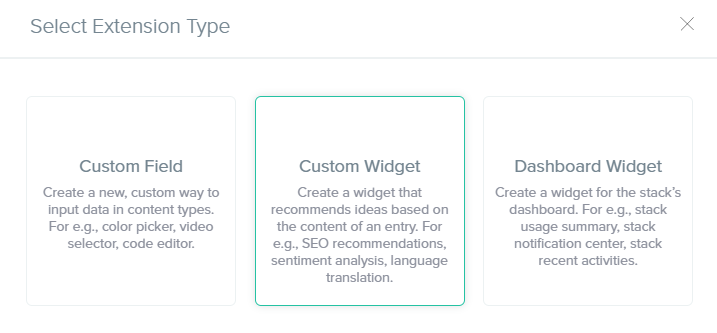
- On the Select Extension Type screen, select Custom Widget.
- On the Create New Extension page, enter the following details:
- Click on Save to save your settings.
Now that you have added the extension to your content type, let's use it in our entry and see how it works.
Use the Extension
- Click on the content type for which you have enabled this custom widget.
- Click on an entry. You will see the Widgets dropdown at the top. Click on it and select Developer Tools.
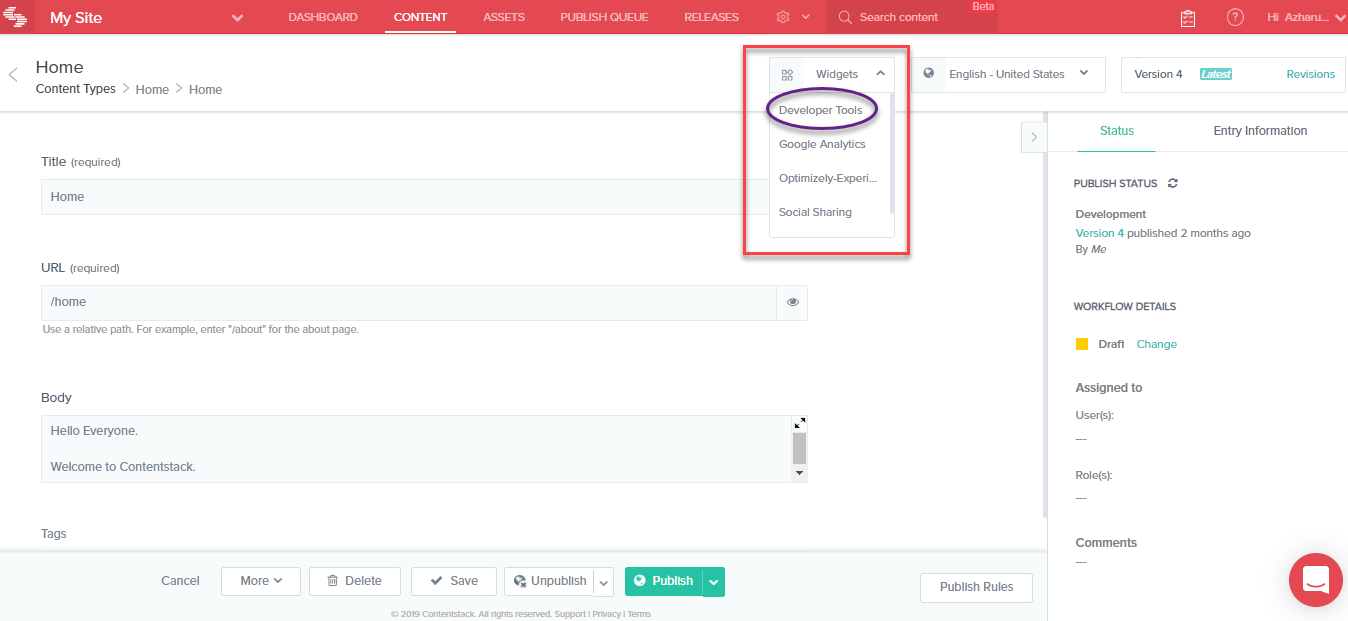
- The selected widget expands on the sidebar.
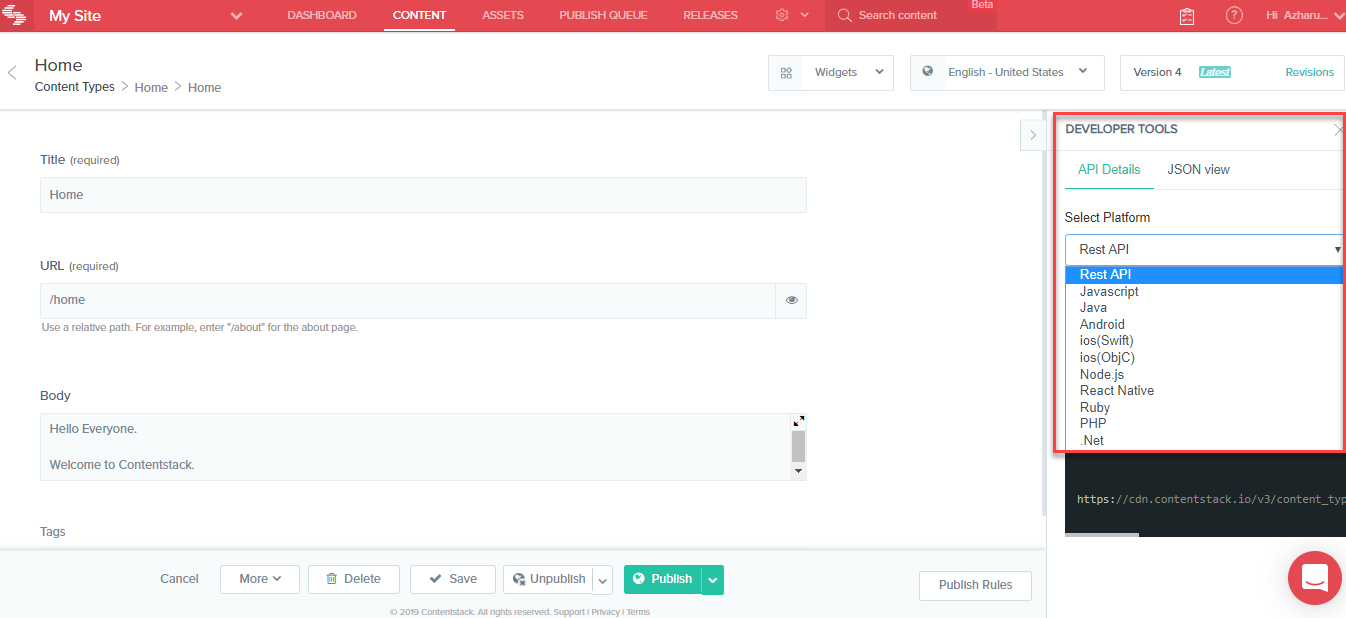
- You can then select either of the following options:
- API Details: This tab provides the REST API endpoints or queries (in any language of your choice) that you can readily use to access/fetch the current entry or all entries of the content type.
Under Platform, either select REST API or the platform (iOS, Android, Javascript, etc.) to view the REST API endpoint for fetching the entry. You can copy this endpoint/query (and enter the environment name) and use it as required.
The widget provides endpoints/queries for both Get this entry and Get all entries.
- JSON view: The JSON view tab lets you to see the JSON format of the entry you're working on, which can then be copied and exported to other content types.


