Was this article helpful?
Thanks for your feedback
Contentstack CLI can be installed in macOS, Windows and Linux environments. In this guide, you'll learn how to install and update command-line interface (CLI).
To install CLI as a global module in your machine, open your terminal (command prompt) and run this command:
npm install -g @contentstack/cli
Once the CLI is successfully installed, you can use the csdx command from your terminal.
The csdx is a top-level namespace in Contentstack that gives you access to Contentstack's extensive range of commands and functionalities.
Additional Resource: Visit our CLI GitHub page for more information. You can also read about Contentstack CLI on the npm page.
Next, let’s verify the CLI installation.
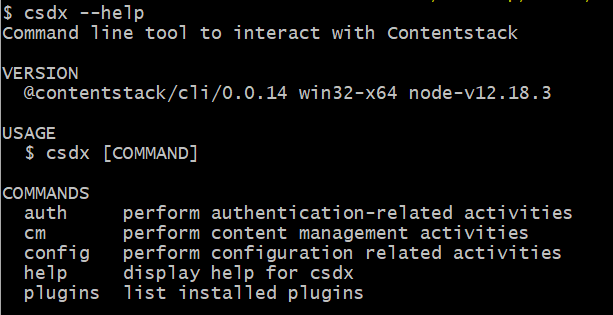
Verify your installation by running the csdx --help, in your terminal, to get a list of commands that will help you to interact with Contentstack.

As shown in the above image, the help namespace contains other namespaces within it.
Let’s understand these namespaces in detail.
Namespace is used to categorize commands as per their functionality or purpose.
The following namespaces exist within the csdx command:
Note: The guide to create your own plugin within csdx is yet to come. But, as our CLI is built using the oclif package, you can create your custom plugin by referring to oclif plugin documentation.
Here are the commands within each namespace:
Refer the section below to check the CLI version on your machine and update it to use the latest version.
To check the current version of CLI installed on your machine, run this command in the terminal:
csdx --version
Running this command will display the current version, as shown below:

As mentioned above, you can check the version of CLI installed on your machine.
To get the latest version of CLI, run the following command in your terminal:
npm install -g @contentstack/cli update
Was this article helpful?
Thanks for your feedback