Managing assets in CMS can be tedious and time-consuming, especially if you’ve saved a lot of them.
We know it’s painful, so we’ve introduced the ability to create folders in assets. This means you can group your assets based on type, project, color, size, or any other parameter of your choice.
Folders in the Assets section of Contentstack work just like any other folder system: You can create new folders, rename them, save assets (files) and more folders within them, or move them easily.
Below is a quick overview of how this feature works.
Create a New Folder
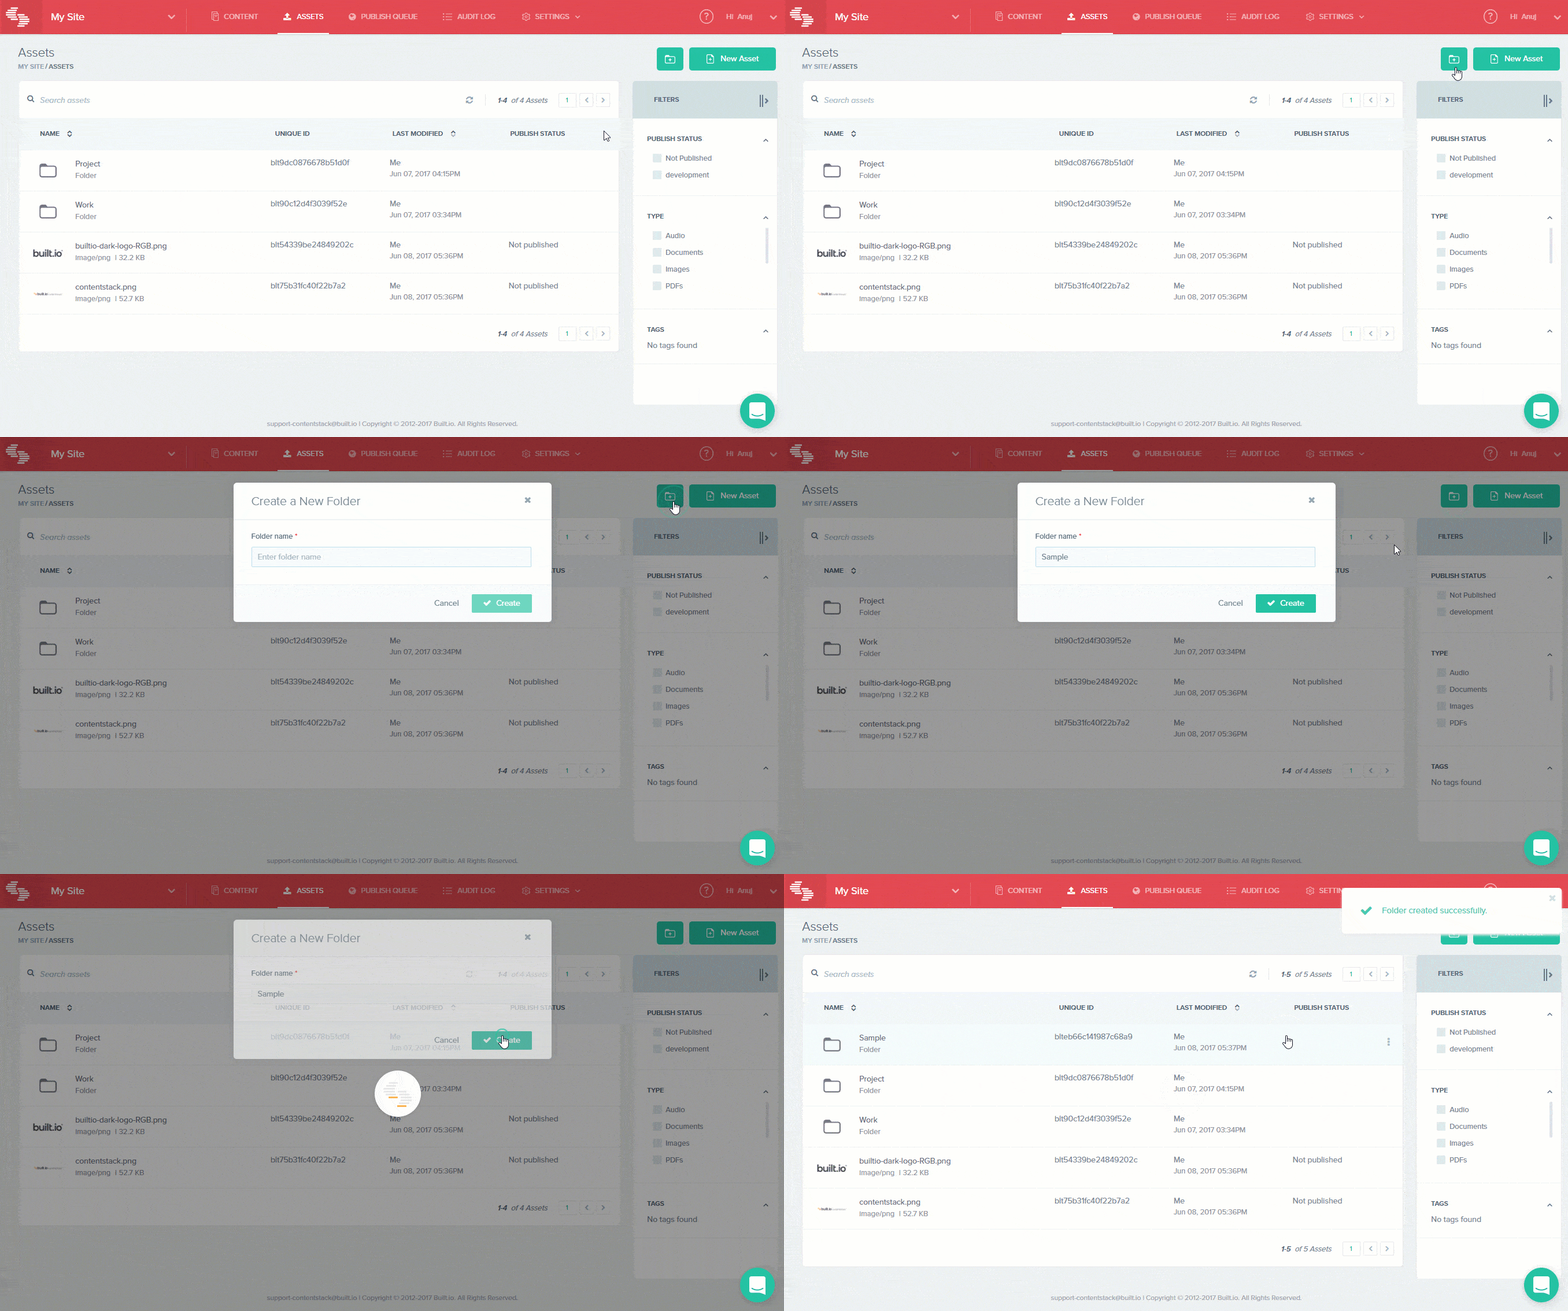
Creating new folders in "Assets" is easy. Navigate to the "Assets" section, and click the new folder icon on the top right-hand side corner of the page. Provide a name of your choice and click "Create." You will now see the new folder in the list of assets.

Move an Asset to a Folder
Next, you may want to move some existing assets to the newly created folder. To do this, hover over the asset that you want to move, and click the vertical ellipsis icon (the "more options" icon indicated by three vertical dots) located on the extreme right-hand side end of the asset. Pick the "Move to" option and select the folder in which you want to move this asset.

Likewise, you can also move folders to another folder.
Rename or Delete a Folder
Renaming a folder is simple. Hover over the folder and click the more options icon. Pick the "Rename" option and provide a new title.

If you want to get rid of the folder, select the "Delete." However, please keep in mind that deleting a folder will delete all the assets that are saved within it.
